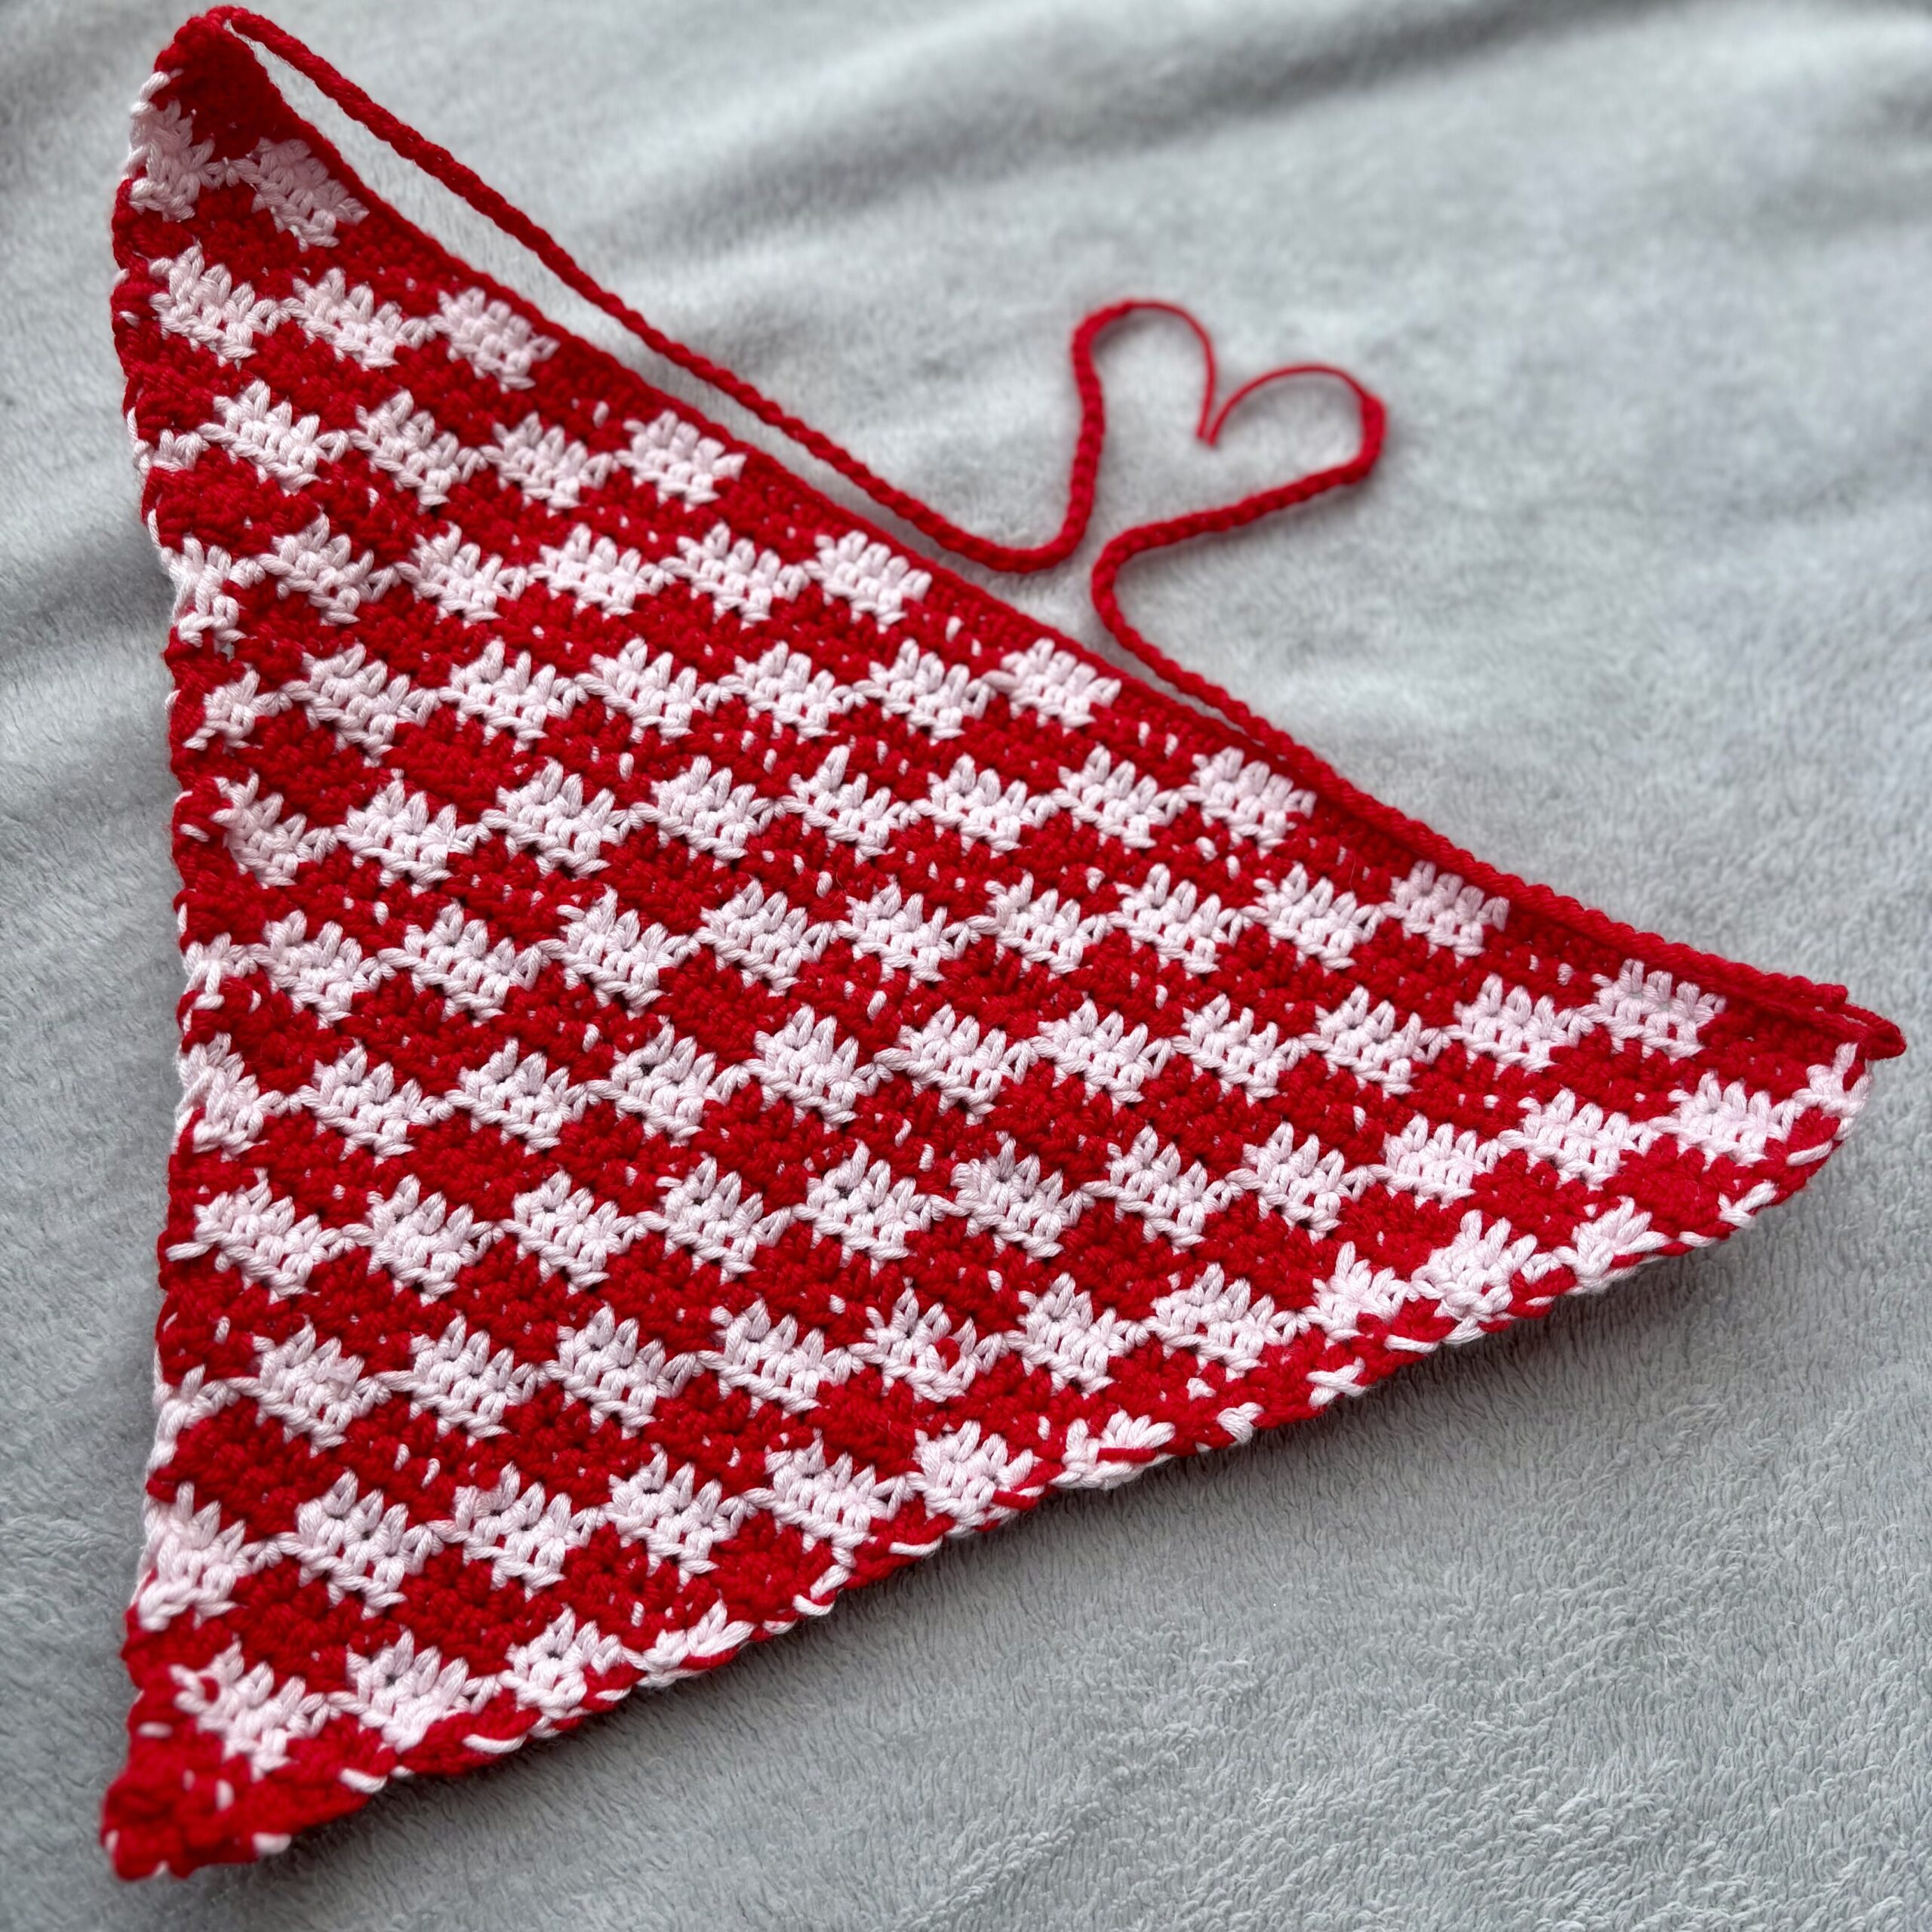
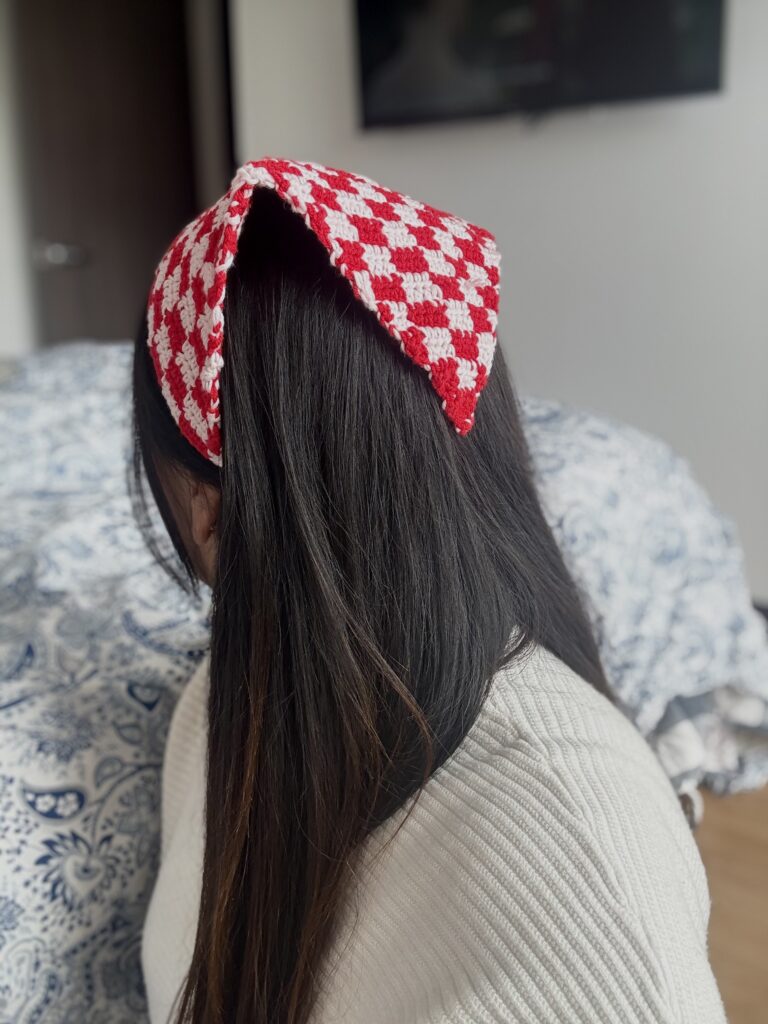
Accessories can elevate any outfit, and this Crochet Checkered Bandana is no exception. This stylish and trendy crochet accessory is designed to be a statement piece that instantly stands out and adds personality to any look.
This easy crochet bandana pattern is fun to make and perfect for winter, keeping you warm while still looking fashionable. It’s a great project for handmade accessories and seasonal crochet ideas.
I hope you enjoy making this crochet bandana pattern as much as I enjoyed designing it.
NOTE: Video tutorial available, if you are a visual lerner or get a bit stuck with the color – changing technique, do not worry. I created a detailed, step by step video tutorial on my Youtube channel where I show you exactly how to carry the yarn, change colors seamlessly, and master the checkered stitch pattern.
You can watch the full video to stitch along with me, and do not forget to subscribe!
CUSTOMIZING THE Crochet Checkered Bandana PATTERN
This pattern is easy to customize to suit your personal style.
Color changes: Feel free to experiment with different color combinations. Use high-contrast colors for a bold look, or similar tones for a more subtle, cohesive design.
Size: Adjust the size by adding or removing chains to make it larger or smaller.
Yarn choice: Different yarn fibers and weights will affect the final texture and thickness. For best results, choose 100% cotton yarn.
MATERIALS
2 skeins of cotton yarn or acrylic yarn in different colors (I used acrylic yarn, and it worked very well for this project).
Crochet hook (size recommended for your chosen yarn) I used a 3.0 mm
Scissors.
**Yarn link is provided for reference only. This pattern is not sponsored, and you may use any similar yarn you prefer.
STITCH ABBREVIATIONS (US TERMS)
sk: Slip Knot
ch : Chain
sts: Stitches
hdc : Single Crochet
dec: Decrease
Crochet Checkered Bandana
PATTERN NOTES
The turning chain 2 does not count as a stitch.
Make sure to use the same type and weight of yarn for both colors in your project. Using a thinner yarn for one color may affect the look of the color changes and result in an uneven finish.
The key to a successful colorful crochet bandana is learning how to change colors properly, as explained below.
Use the reference images and video provided for guidance
INSTRUCTIONS
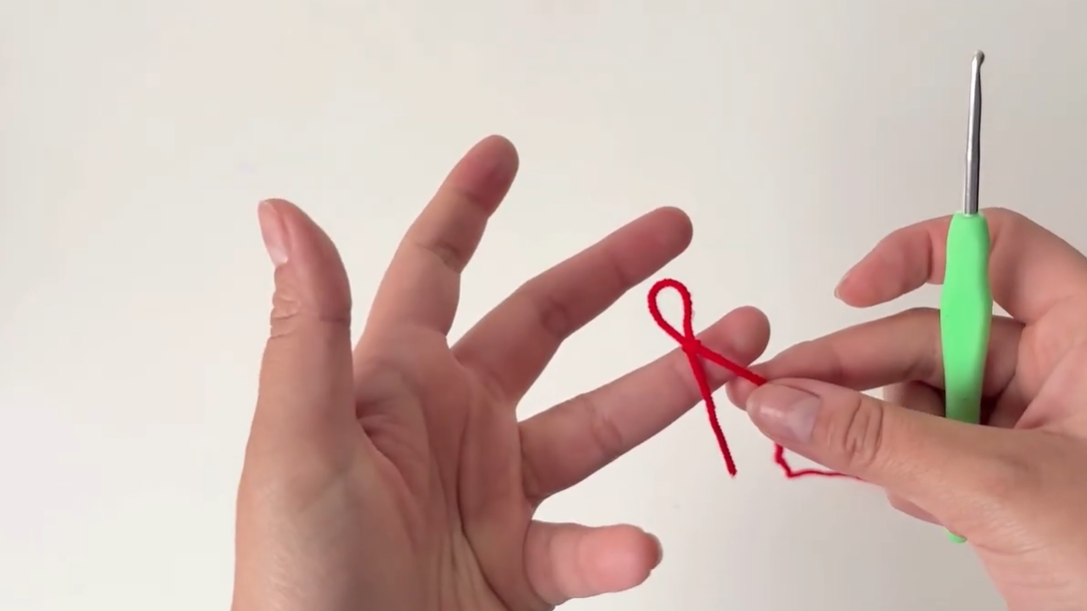
Make a slip knot using one of the two colors chosen for your project; in this case, I used red.
How to make a slip knot
Chain until the piece reaches from the right ear to the left ear when measured across the head.
ROUND 1 & ROUND 2
Starting in the third chain from the hook, make a half double crochet, then continue with one half double crochet in each of the next 4 chains (4 stitches total).
Every four half double crochets, we will change color. To do this, on the last half double crochet (the fourth one), stop before finishing the stitch, when you have three loops on the hook.
With the yarn in the other color, make a slip knot and pull it through the 3 loops you had on your hook.
Work 4 half double crochets with the new color, always stopping before finishing the last stitch to change color.
Chain 2 at the beginning of each round.
ROUND 3- ROUND 10
Chain 2 at the beginning of each round.
At the beginning of each round, make 1 hdc decrease. Work hdc across, and finish the round with 1 hdc decrease.
ROUND 11
Chain 2 at the beginning of each round.
Make 3 decreases at the beginning of the round and 3 decreases at the end of the round.
ROUND 12–ROUND 35
Chain 2 at the beginning of each round.
Make 1 decrease at the beginning and 1 decrease at the end of each round.
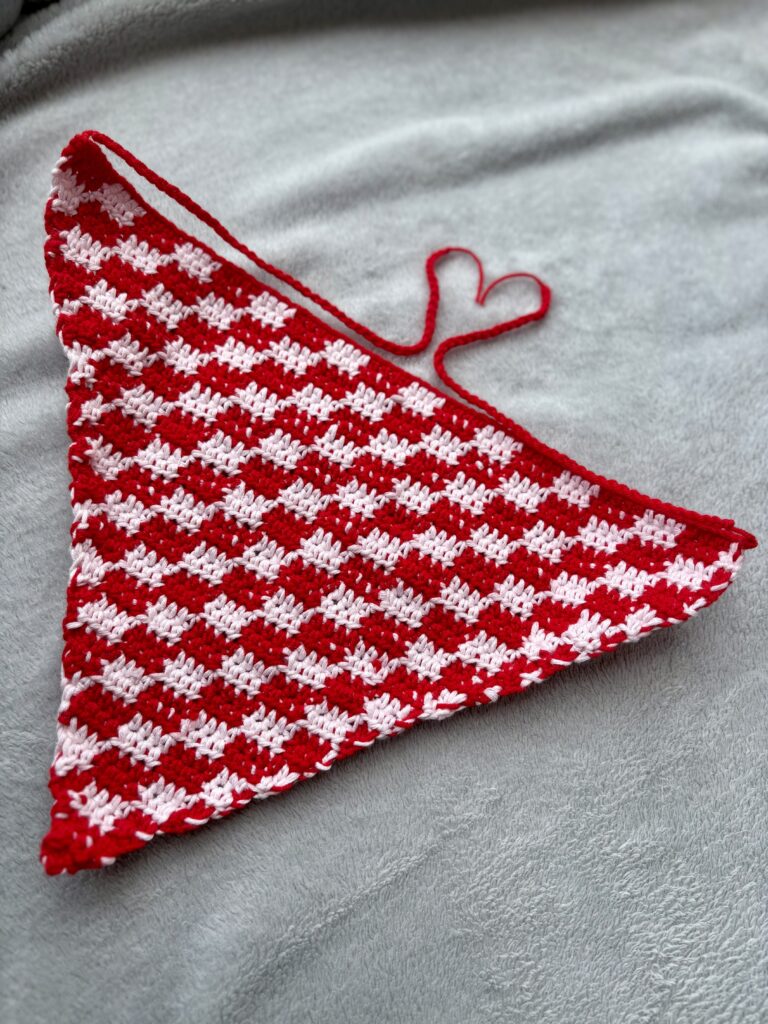
Work the last 3 rounds using only one color to mark the end.
THE STRAPS
To finish, we will crochet the tie strapS that will allow you to adjust the bandana around the neck, For this pattern, you have two great options for creating the strap.
As a reference my tie straps measure approximately 20–24 cm in length.
Option 1: The Fast & Simple Chain Strap
If you want a quick project, you can create a beautiful textured strap simply by crocheting a long chain while keeping one or two yarn colors held together. The two strands will naturally create a lovely, thick, cord-like visual effect.
How to do it: Chain normally until the strap reaches your desired length, remember you need two of them!
Option 2: The Sturdy Textured Cord
If you want a more professional, high-end finish that mimics a woven rope and offers zero stretch, this textured cord is the perfect choice.
How to make the cords, remeber you need two of them:
The Double-Tail Slip Knot: Make a slip knot keeping both yarn strands together, but leave two tails: the long working yarn (connected to your yarn) and a shorter tail of about 15 cm (6 inches).
The First Movement: Take the shorter tail and yarn over your hook from front to back.
The Lock: Take the long working yarn, yarn over, and pull it through both loops on your hook. You now have one loop left on your hook.
The Repeat Pattern: Look at the right side of your stitch. You will see a small loop (or bar) on the side. Insert your hook into that right-side loop, yarn over with your working yarn, and pull through both loops on your hook.
Repeat step 4 continuously until your cord reaches your desired lenght.
Visual Guide Since this cord technique is very visual, make sure to watch the quick video tutorial below to see the exact hand movements step-by-step!
How to attach the straps to your checkered bandana.
To finish your crochet checkered bandana, you need to attach the two tie straps to the top corners of the main triangle body. You can do this in one of two ways:
Option 1: The sewing method.
Using a tapestry needle or a yarn needle, thread your needle and securely sew one strap to each of the top corners. Make sure to weave in your ends tightly on the inside so the seam looks completely clean and professional.
Option 2: The crochet method (Join with a Slip Stitch).
If you prefer a seamless finish without sewing, simply insert your crochet hook into the top corner of the bandana, pull up a loop of your yarn, and join the strap directly using a slip stitch.
crochet bandana
Now that you’ve mastered the checkered stitch technique and color changes with this bandana, you are officially ready for the ultimate summer project!
7 thoughts on “Free Crochet Checkered Bandana – Easy Pattern.”