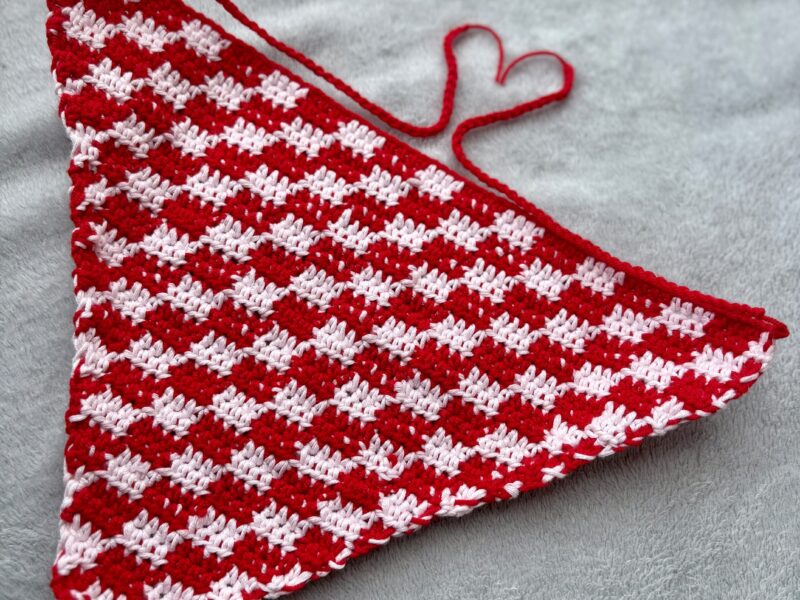
At this point, I think I’m officially obsessed with all things checkered! I just can’t get enough of those little squares, and mixing different colors has become my new favorite thing.
So far, I’ve made a checkered bandana, a matching top, and now, this bucket hat! Honestly, I’m pretty sure I’ll be wearing it every single day. I just love how all these pieces look together!
Want to make your own checkered set? You can find the patterns for my other checkered creations here, too!
You can find them all here.

This bucket hat truly gives you the best of both worlds (yes, just like Hannah Montana). You get the classic bucket hat shape, which is a total statement piece for any outfit, combined with the checkered print that just looks gorgeous.
Another reason I adore this project is its versatility. While bucket hats are often seen as a summer accessory to protect from the sun, using a thicker yarn can easily turn it into a cozy winter piece that instantly elevates any outfit.
What I love most about this project is how fun it is to play around with different color combinations and watch the checkered pattern come to life! It’s the kind of crochet project that makes you want to keep going just to see how beautiful the final result will look. It’s perfect for beginners or anyone looking for a relaxing weekend make. But I won’t lie to you—you’ll need to stay focused and keep track of your stitches. I know, I know… every crocheter’s worst nightmare! But trust me, the finished piece is 100% worth it!
CUSTOMIZING THE PATTERN
This pattern is easy to customize to suit your personal style.
- Bicolor : Feel free to experiment with different color combinations. Use high-contrast colors for a bold look, or similar tones for a more subtle, cohesive design.
- Size: Adjust the size by adding or removing rounds to make it larger or smaller.
- Yarn choice: Different yarn fibers and weights will affect the final texture and thickness. For best results, choose 100% acrylic yarn.
MATERIALS
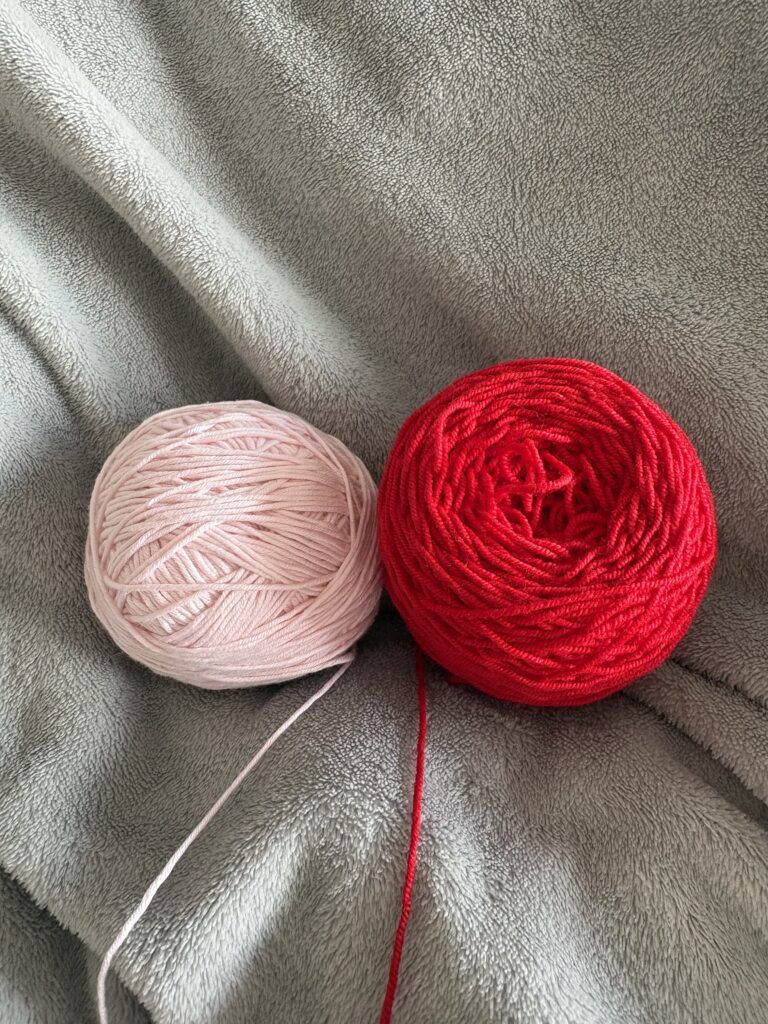
- 2 skeins of yarn in different colors (if you want), I used acrylic yarn, and it worked very well for this project.
- Crochet hook (size recommended for your chosen yarn) I used a 4.0 mm
- Scissors.
Pattern Notes
- Read Ahead: Please read through the entire pattern before you begin to familiarize yourself with the project steps.
- Turning Chains: At the beginning of every single row, you must chain 2. This turning chain does not count as a stitch throughout the pattern.
- Yarn Consistency: Make sure to use the same type and weight of yarn for both colors in your project. Using a thinner yarn for one color may affect the look of the color changes and result in an uneven finish.
- Visual Aid: Use the reference images provided throughout the post for guidance.
Stitch Abbreviations (US Terms)
- ch: chain
- dc: double crochet
- st(s): stitch(es)
- sc: single crochet
- inc (Increase)
INSTRUCTIONS
Color Change & Checkered Pattern Instructions
To create the perfect checkered effect, we will alternate between Color 1 (Red) and Color 2 (Pink) to form small blocks of color.
How to Alternating Colors (Tapestry Technique):
- After finishing your magic ring with Color 1, Ch 2.
- Work your first increase (2 dc) into the next stitch.
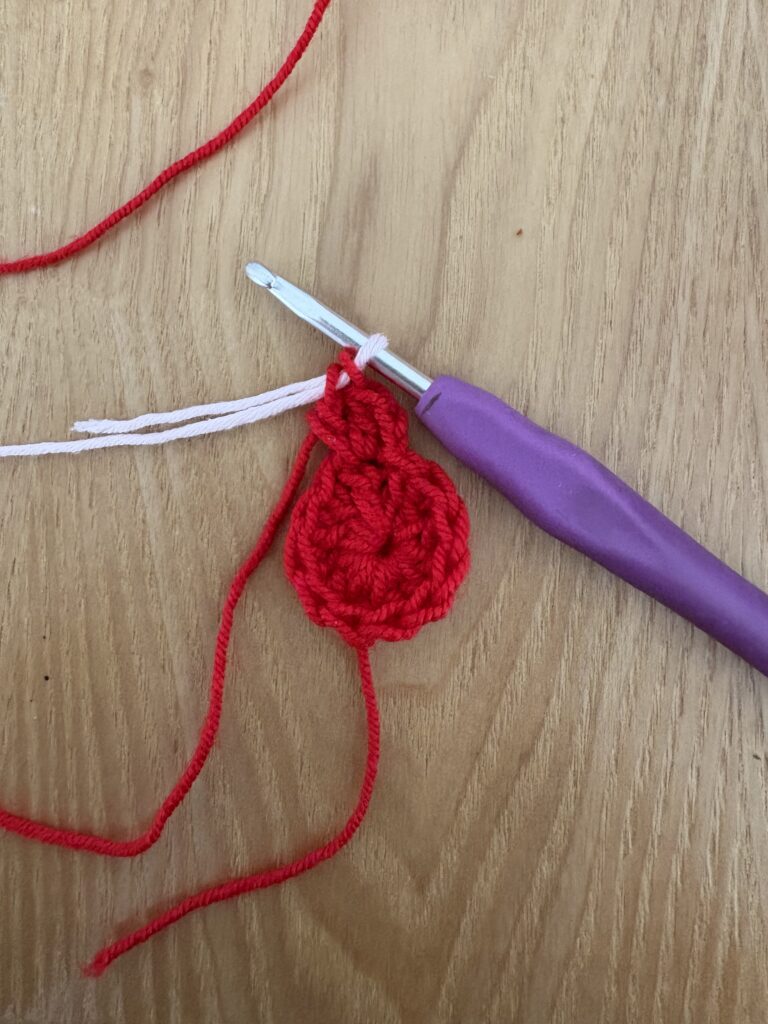
- Crucial Step: Before completing the very last pull-through of your second dc, drop Color 1 and pull through with Color 2 to finish the stitch.
- Continue alternating colors for every single increase around.
- Do not cut your yarn! You will carry both yarn strands along the top of your stitches, crocheting over the unused color so it stays hidden and ready for the next block.
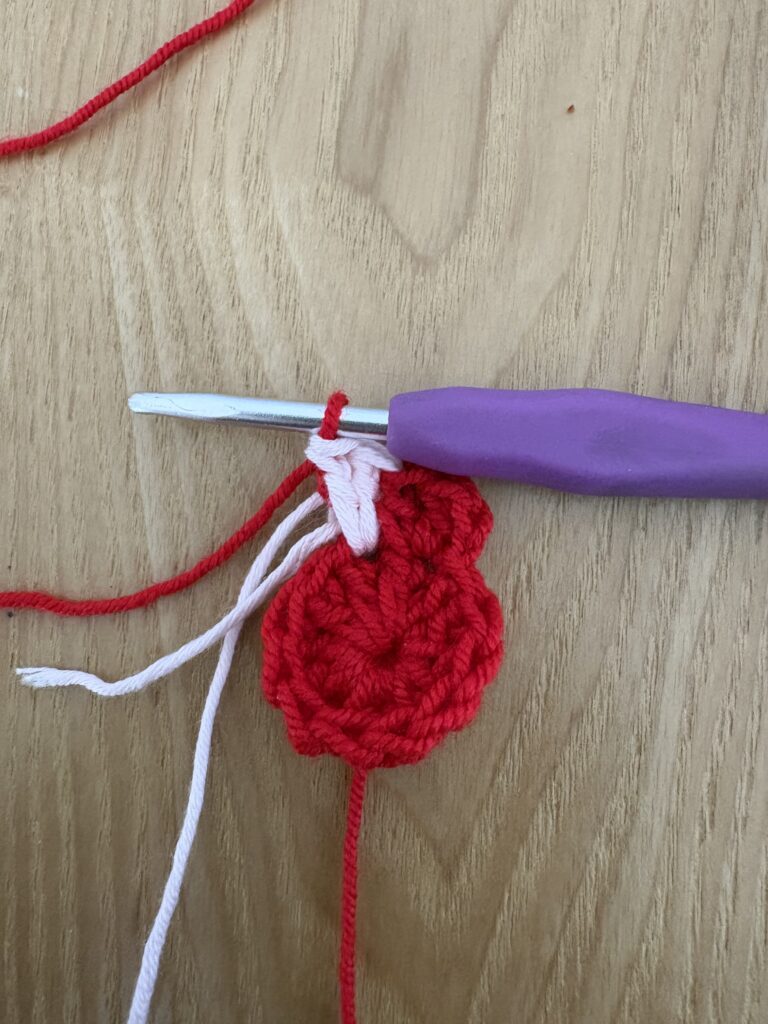
Building the Checkered Squares:
- To get those clean squares, you will repeat each color block vertically for two consecutive rounds.
- This means you will weave the exact same colors directly on top of each other from Round 2 to Round 3, from Round 4 to Round 5, and so on.
- Switching Rows: When you finish a two-round block (for example, at the end of Round 3), join with a slip stitch and switch your starting color so the next round automatically mirrors the grid and flips the colors.
- Always pause and double-check your work every couple of rounds to ensure your colorful blocks are lining up perfectly like a proper chessboard!
Round 1 ( Color 1)
- Create a magic ring.
- Work 12 dc into the magic ring.
- Pull the ring tight and join with a slip stitch.
- Ch 2 (does not count as a stitch).
Round 2 (Color 1 and 2)
- Ch 2 (does not count as a stitch).
2 dc in each st around.- Join with a slip stitch. (24 sts)
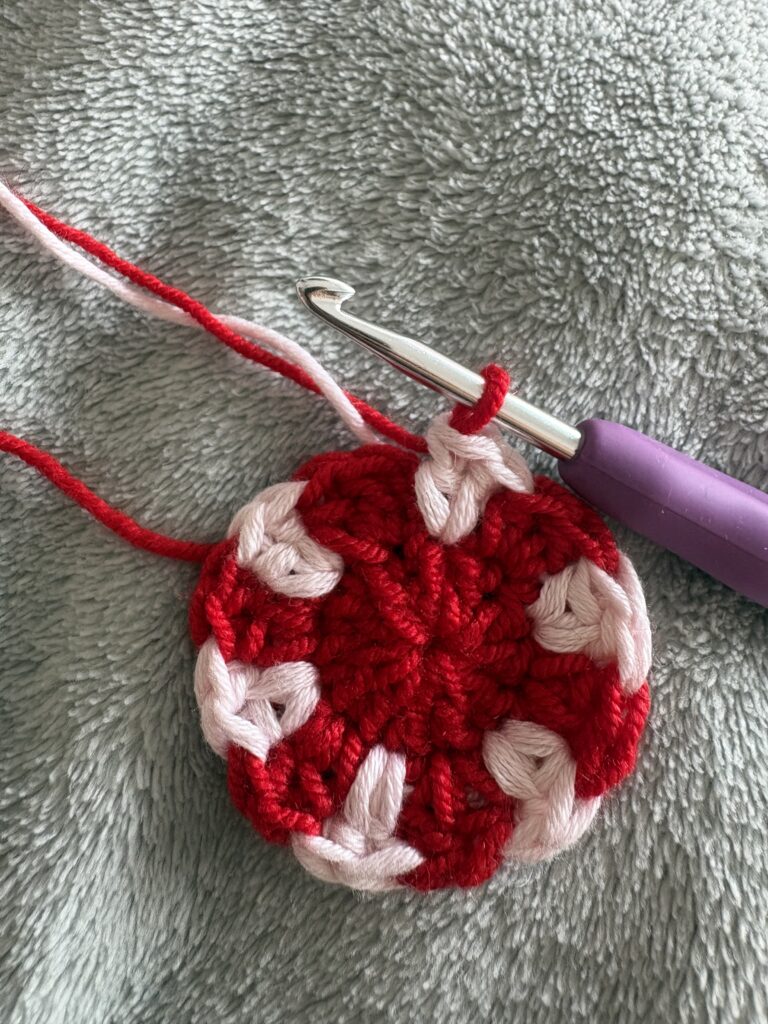
Round 3 (Color 1 and 2)
- Ch 2 (does not count as a stitch).
- [1 inc, 2 dc] repeat around.
- Join with a slip stitch. (36 sts)
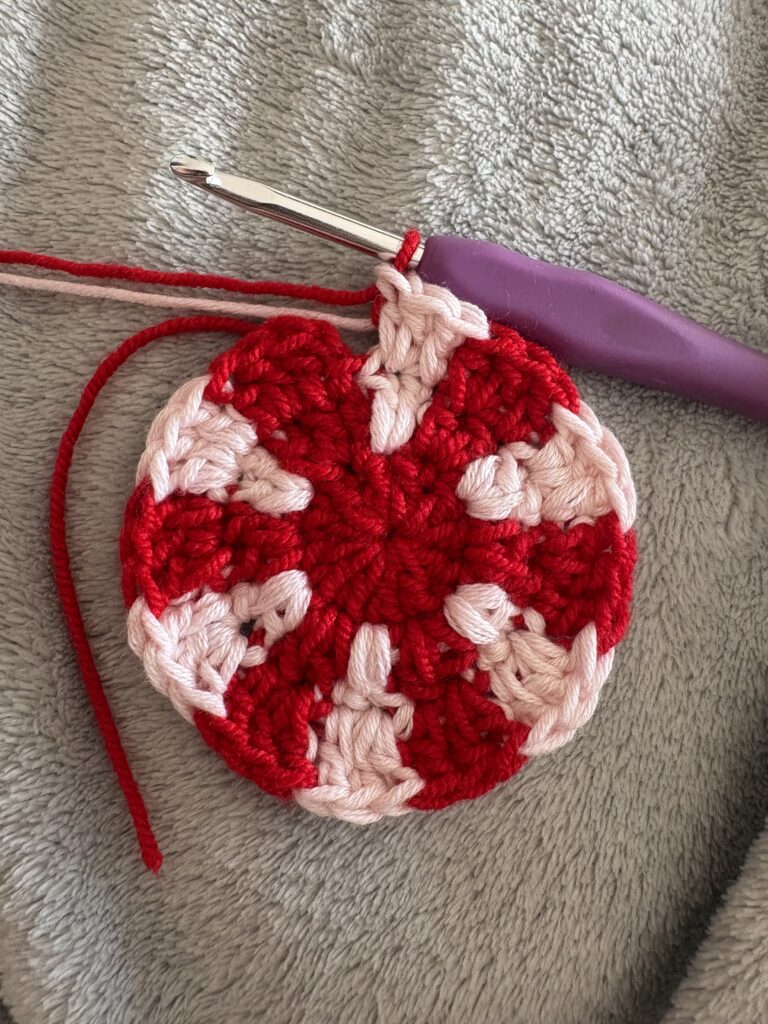
Round 4 (Color 1 and 2)
- Ch 2 (does not count as a stitch).
- [1 inc, 3 dc] repeat around.
- Join with a slip stitch. (48 sts)
Round 5 (Color 1 and 2)
- Ch 2 (does not count as a stitch).
- [1 inc, 4 dc] repeat around.
- Join with a slip stitch. (60 sts)
Round 6 (Color 1 and 2)
- Ch 2 (does not count as a stitch).
- [1 inc, 5 dc] repeat around.
- Join with a slip stitch. (72 sts)
Round 7 (Color 1 and 2)
- Ch 2 (does not count as a stitch).
- [1 inc, 6 dc] repeat around.
- Join with a slip stitch. (84 sts)
Round 8 (Color 1 and 2)
- Ch 2 (does not count as a stitch).
- [1 inc, 7 dc] repeat around.
- Join with a slip stitch. (96 sts)
Round 9 (Color 1 and 2)
- Ch 2 (does not count as a stitch).
- [1 inc, 8 dc] repeat around.
- Join with a slip stitch. (108 sts)
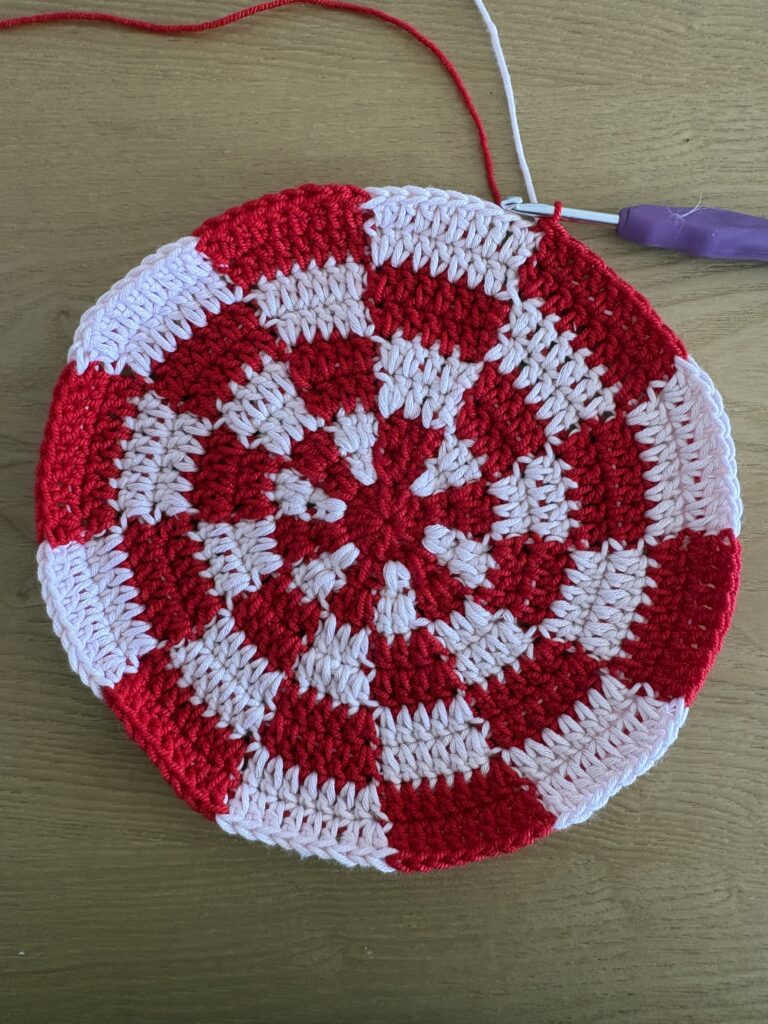
Rounds 10–15 (The Body of the Hat)
For these rounds, we will stop increasing! Working straight rounds without any increases is what gives the beanie its height. I did 8 rounds for mine, but if you prefer a deeper or slouchier fit, feel free to add a few more rounds. You can add extra rounds if you want a folded brim, or fewer if you don’t. Keep trying it on until it reaches your desired length!
- Rounds 10–15: Ch 2 (does not count as a stitch). 1 dc in each stitch around while maintaining the checkered color-changing sequence. Join with a slip stitch. (108 sts)
Round 16
- Ch 2 (does not count as a stitch).
- [4 dc, 1 inc] repeat around.
- Join with a slip stitch. (129 sts)
Round 17
- Ch 2 (does not count as a stitch).
- [4 dc, 1 inc] repeat around.
- Join with a slip stitch. (154 sts)
Round 18
- Ch 2 (does not count as a stitch).
- [4 dc, 1 inc] repeat around.
- Join with a slip stitch. (184 sts)
Optional Finishing Border
If you want to give your bucket hat a clean, contrasting finish, you can add an optional border using a different solid color.
Round 19 (Optional Border)
- Ch 1 (does not count as a stitch).
- Place 1 sc (single crochet) in each stitch all the way around the edge of the hat.
- Join with a slip stitch, fasten off, and weave in your ends!
I really hope you enjoyed making this bucket hat as much as I did! Yes, counting those stitches might have been a bit of a nightmare at first, but seeing those crisp squares come together makes it 100% worth it, right?
Thank you for supporting my blog and making my patterns a part of your crochet journey. Drop a comment below if you have any questions, and until next time. Happy making!