A couple of months ago, my partner and I moved into our new place, and all I’ve wanted since then is to truly turn this house into a home. I don’t want it to look like a sterile magazine cover or a cold, minimalist apartment. I want color everywhere! To prove it, I recently crocheted a cushion for our living room in a bright, neon orange that might actually hurt some people’s eyes—and I absolutely love it.
I honestly can’t remember how long ago I bought the yarn for this project, but I knew my coffee table would thank me for it.
As I started stitching these colorful placemats, memories came flooding back of when I first learned to crochet and how hard it was to master color changes back then. It was such a struggle! But I want your experience to be completely different. I don’t want it to be a headache for you, which is why I designed this pattern to be as simple as possible.
In this guide, I’m going to show you step-by-step how to make this beautiful, vibrant placemat. It will easily become the center of attention in your dining or living room. Trust me, everyone who walks in will ask you where you bought them, and the absolute best part? No one else will have anything like them. They are just too wow to miss.
Abbreviations US Terms
- mg: Magic Ring
- ch : Chain
- st: Slip Stitch
- sts: Stitches
- sc : Single Crochet
- dc : Double Crochet
Pattern Notes
Please read through the entire pattern before you begin to ensure a smooth and frustration-free crafting experience!
- Yarn Matching is Key: Make sure to use the exact same type and weight of yarn for all 3 colors in your project. Using a thinner or thicker yarn for one of the colors will affect the tension of your color changes, resulting in an uneven, warped finish.
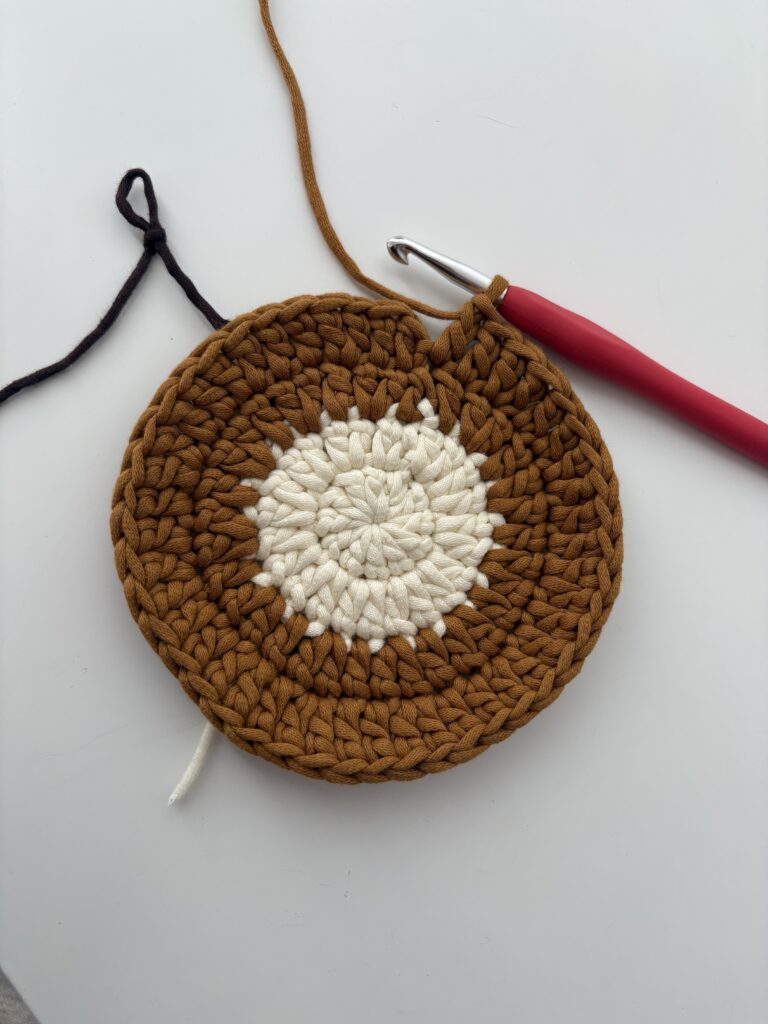
- Master the Color Change: The absolute key to a successful, crisp, and colorful crochet placemat is learning how to change colors properly, as explained in the guide below.
- Each round is joined with a slip stitch to the first stitch.
- Visual Aid: Please use the reference images provided throughout the post for row-by-row guidance.
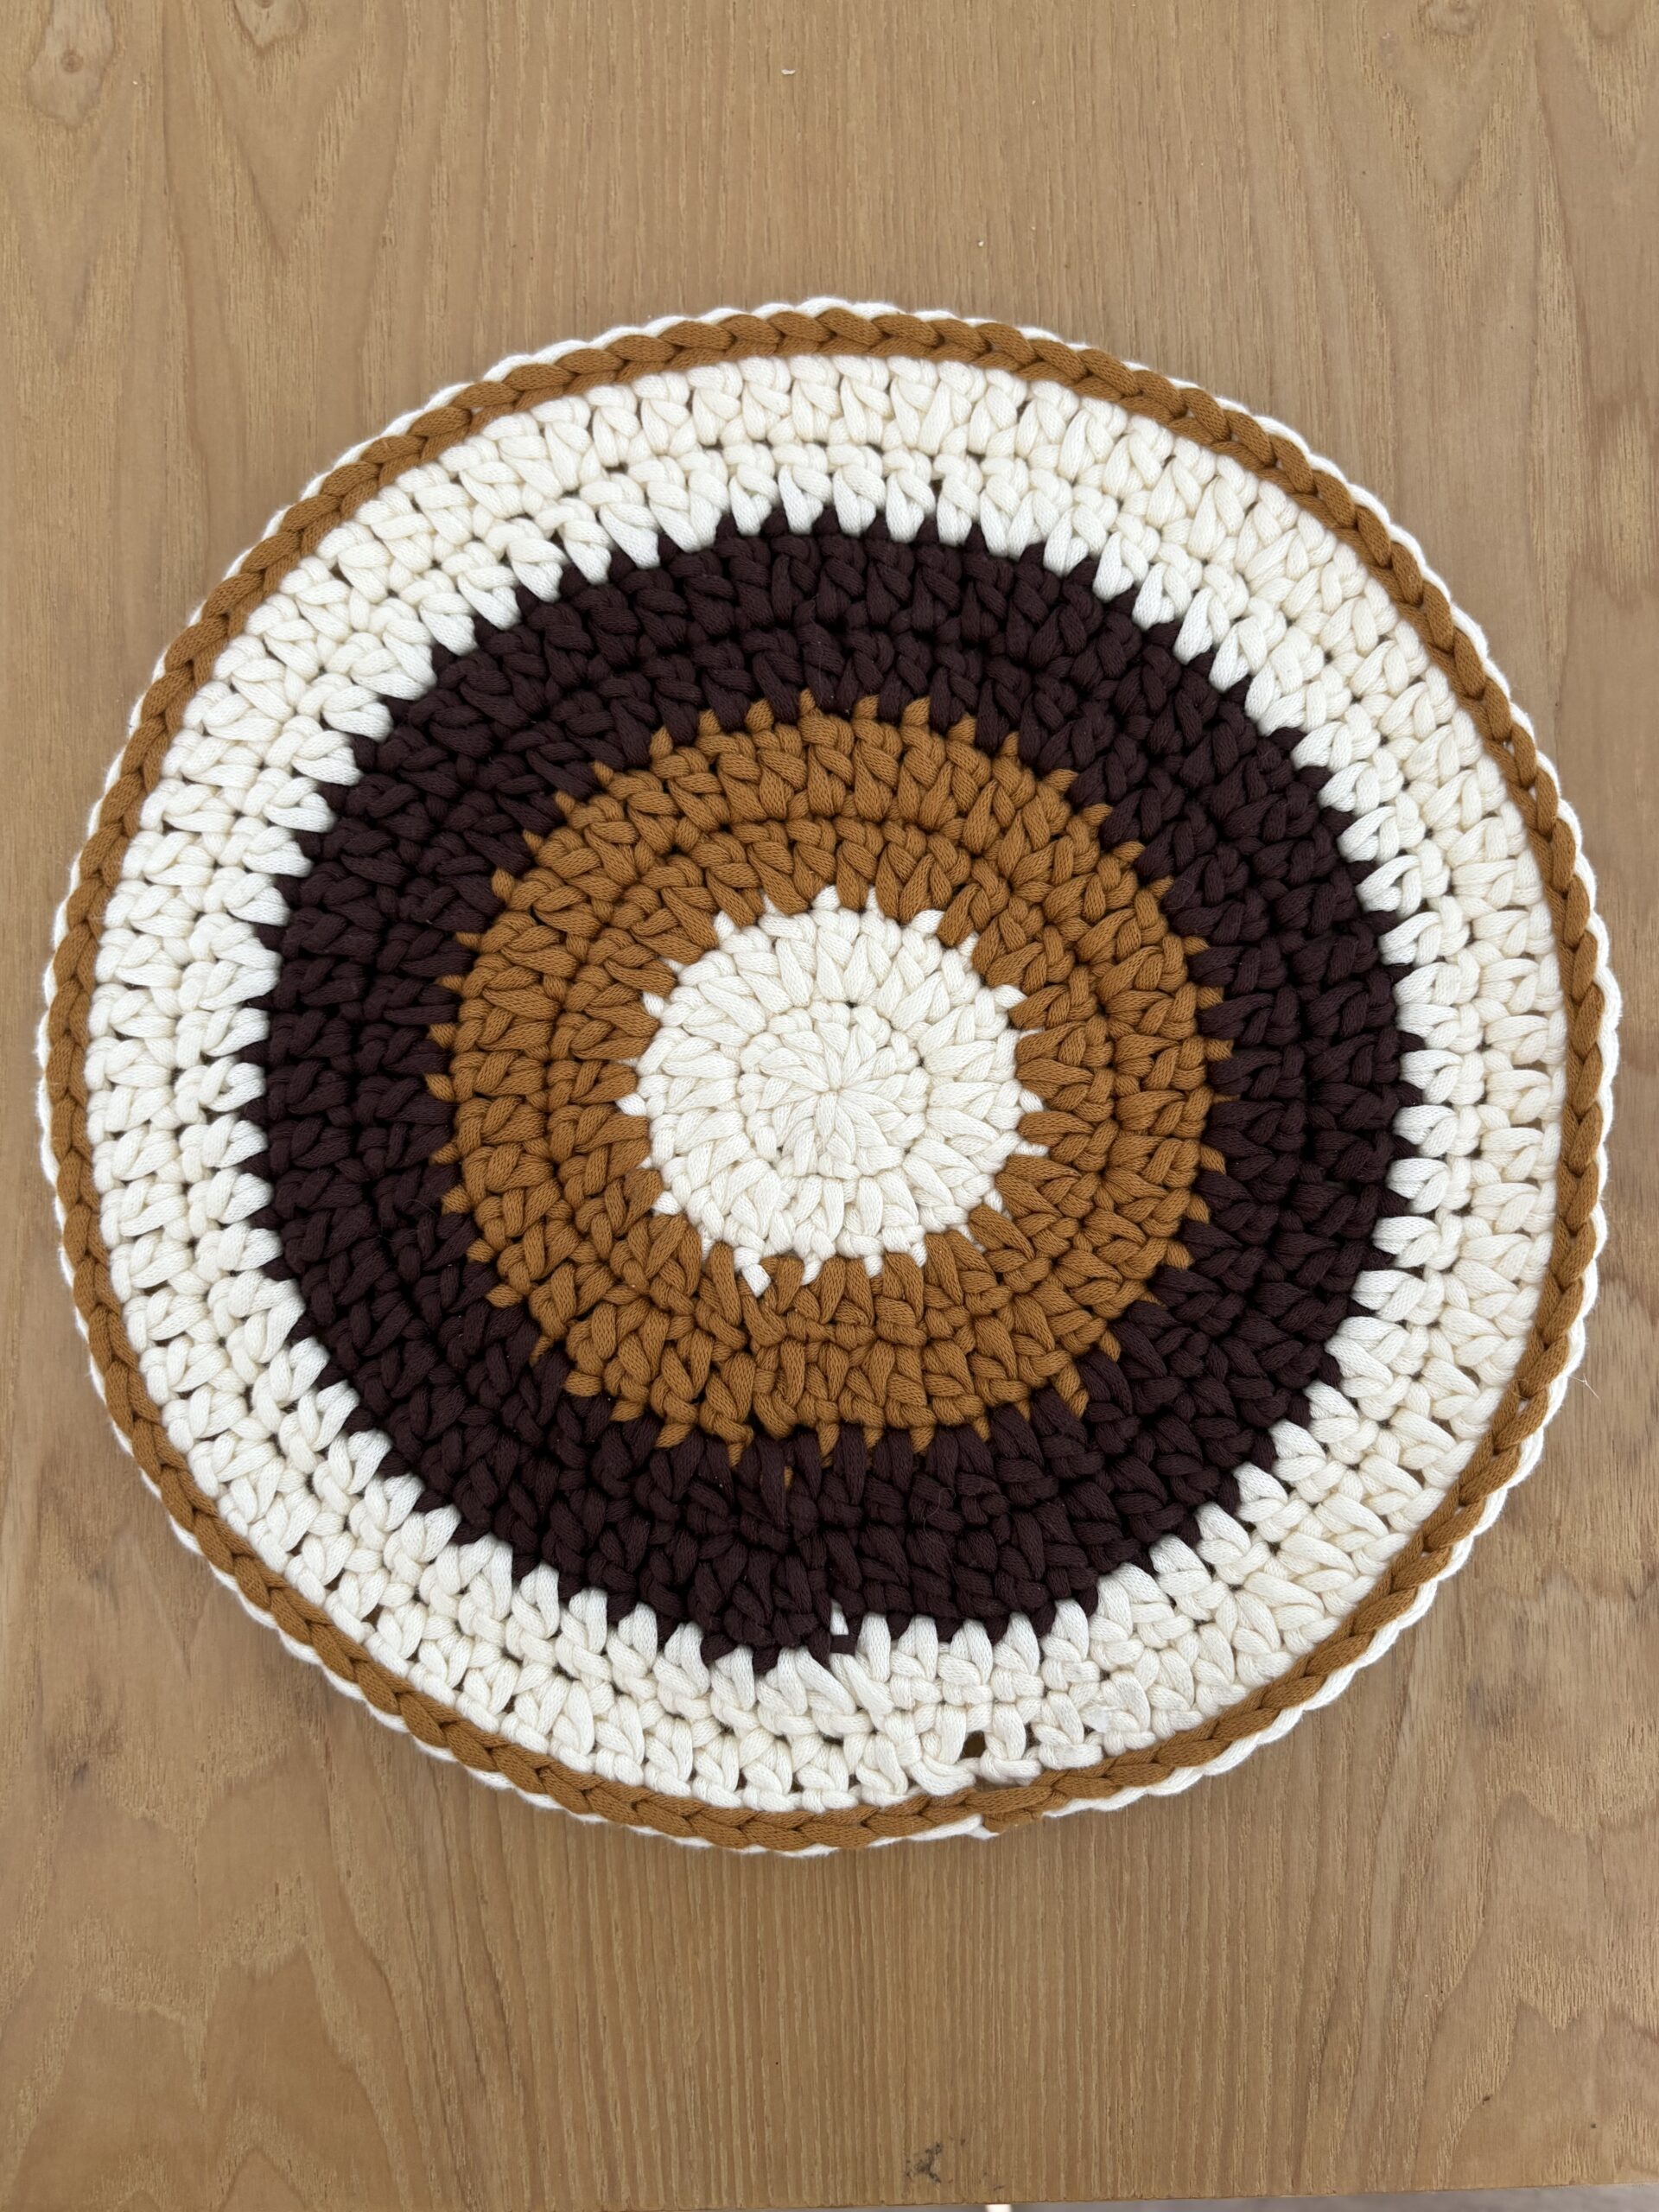
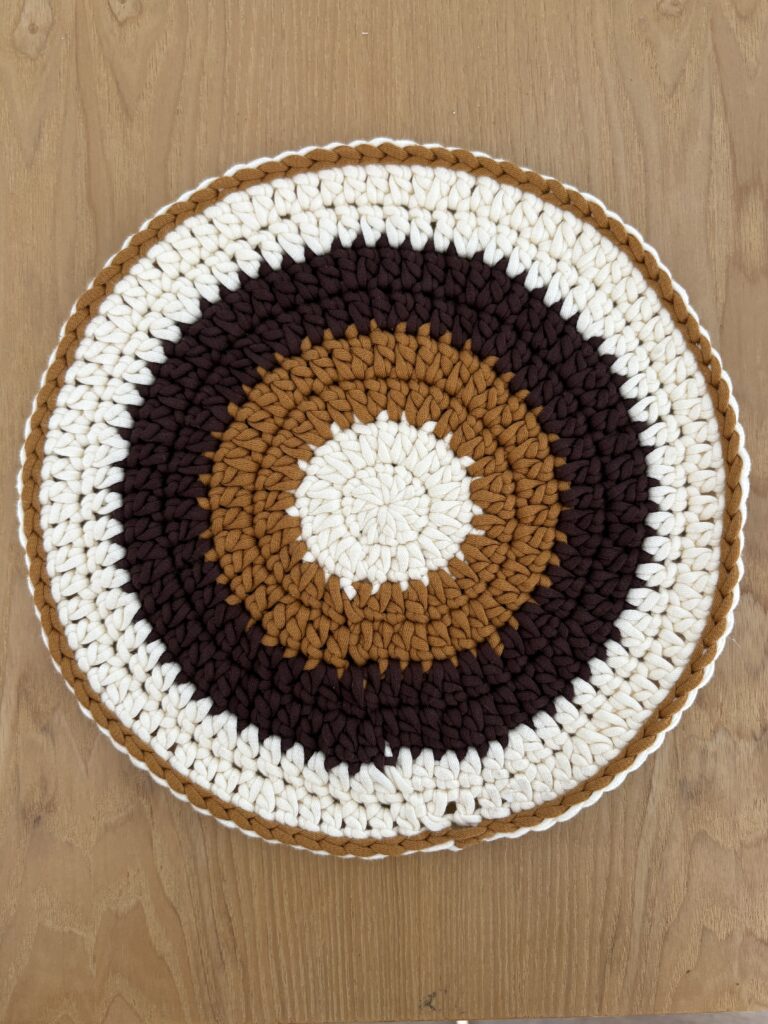
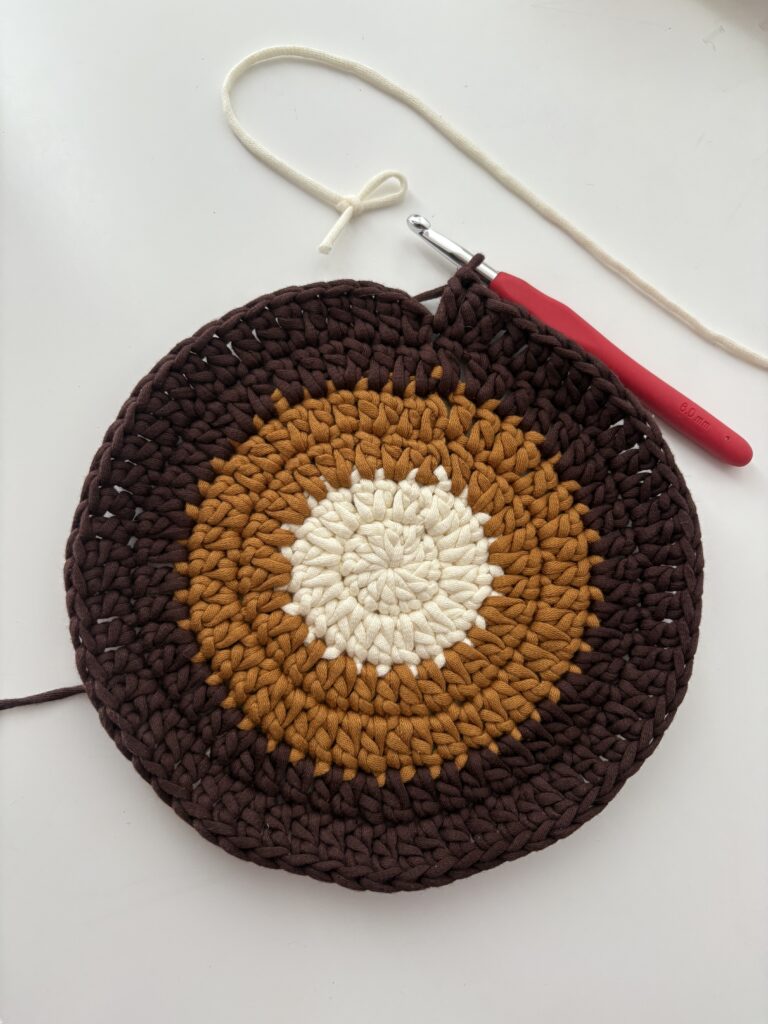
- Stitch Simplicity: The entire body of this pattern is worked using only Double Crochet (dc), with the sole exception of the final border round, which is worked entirely in slip stitch (sl st) to give it that clean, tailored edge.
How to Seamlessly Change Colors Mid-Round
To keep your color blocking crisp and sharp, work your double crochet until you have two loops remaining on your hook. Drop the current yarn, yarn over with your new color, and pull it through the remaining two loops to complete the stitch.
Yarn Weight & Tension Check
Two placemats can have the exact same number of stitches but turn out slightly different in size, even if you use the same hook. This happens because yarn thickness varies across brands and colors. To ensure your set of placemats matches perfectly:
- Use yarns of the exact same weight (preferably from the same brand).
- Maintain a steady, relaxed tension throughout the 8 rounds.
Materials
To make this colorful, vibrant placemat, you will need the following supplies:
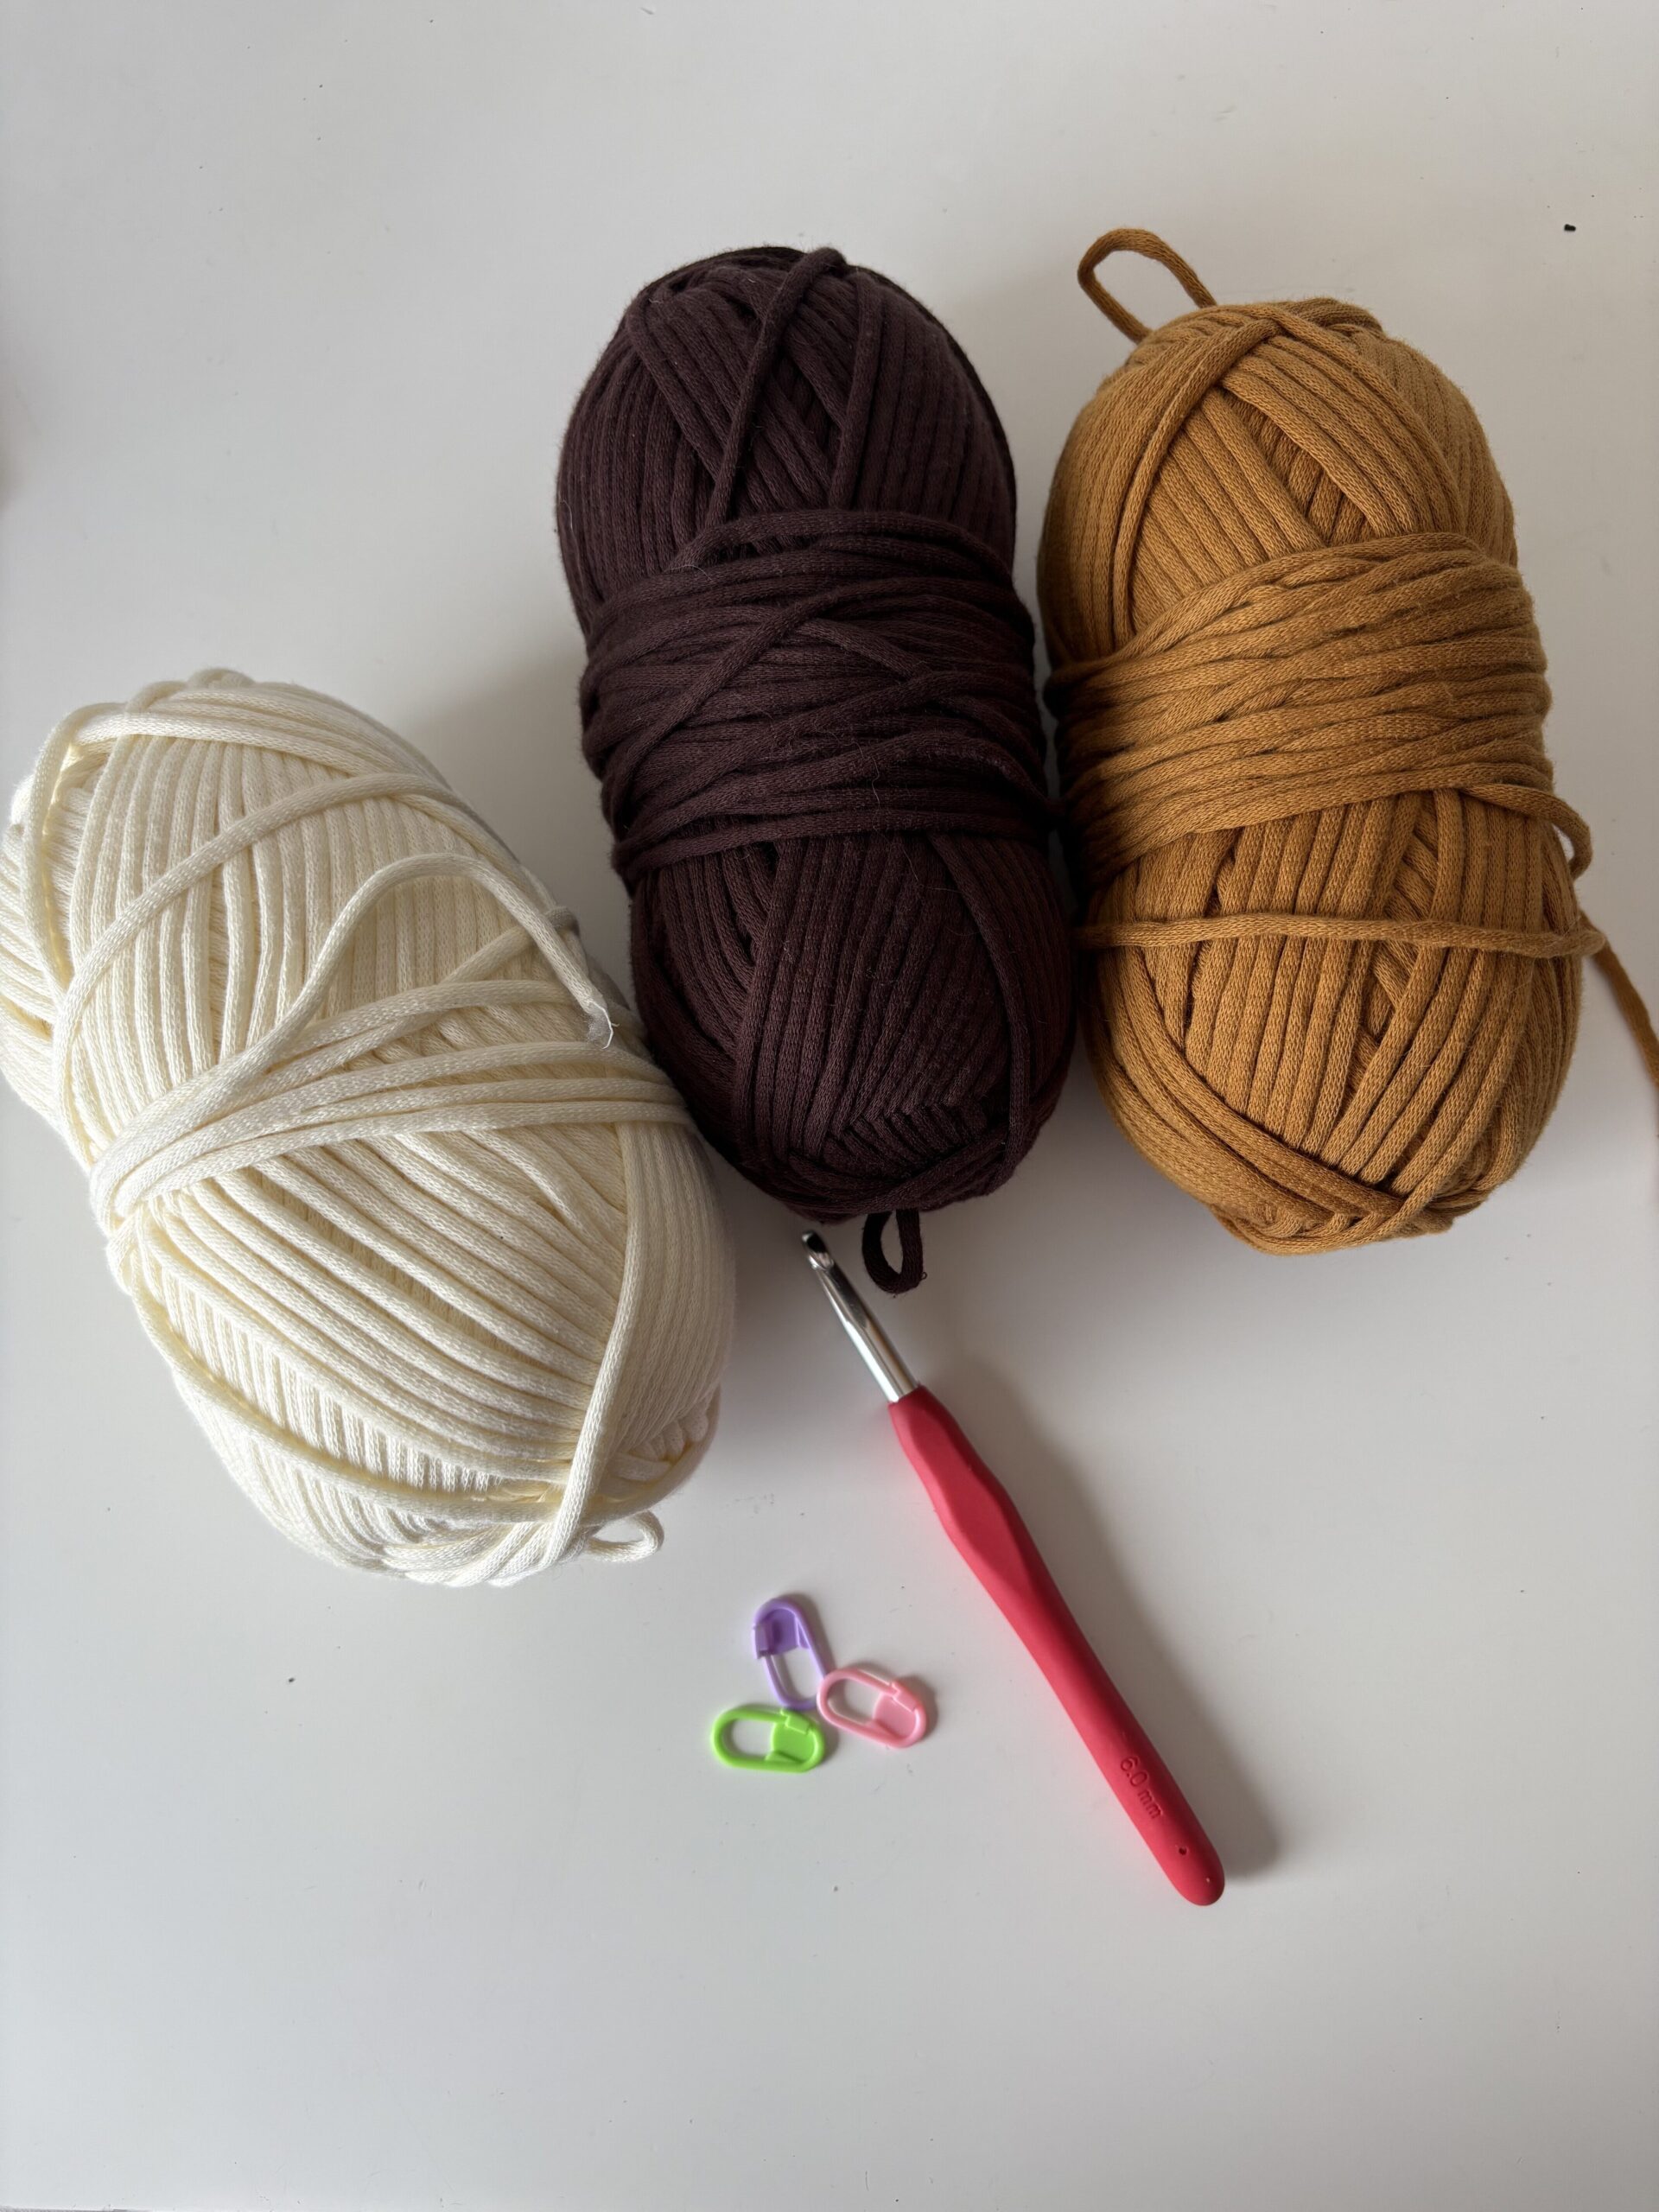
- Crochet Hooks: A 6mm hook for the main body of the placemat and a 2mm hook (this is my favorite hack to weave in those pesky yarn tails smoothly and effortlessly!).
- Yarn: A braided cotton blend yarn (70% Cotton / 30% Polyester). You will need 3 different colors of your choice to create that beautiful, eye-catching contrast! Why I love this yarn: Braided structure yarn is an absolute dream for beginners because it doesn’t split or fray while you work. It gives the perfect structure, weight, and stitch definition for home decor items.
- Scissors.
- Optional: Stitch marker (highly recommended to help you keep track of the first stitch of each round!).
Estimated Gauge & Tension Check
Crochet Gauge (with 6mm hook): Approximately 2.5 to 3 stitches = 1 inch (or about 10-11 dc stitches = 10 cm).
Step-by-Step Written Pattern
Pro-Crafter Note: In this pattern, we do not start the rounds with a chain-2. Starting directly with a double crochet ensures your placemat has a perfectly seamless, invisible join without that annoying gap!
Pattern Instructions
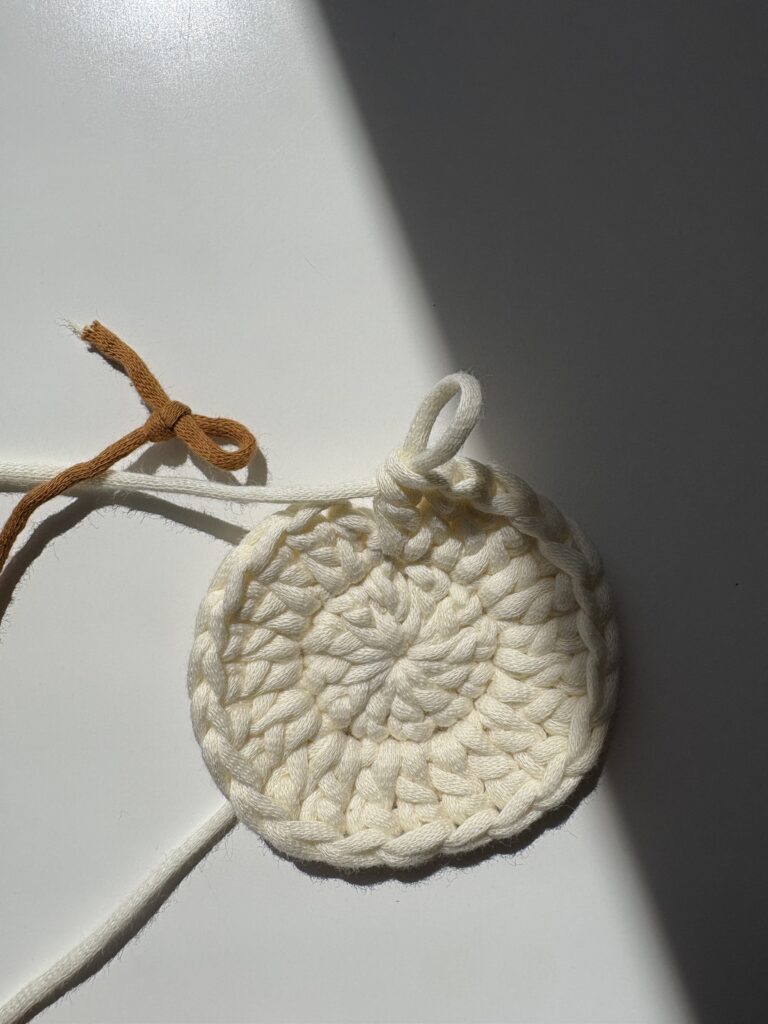
Setup: Begin with a Magic Ring.
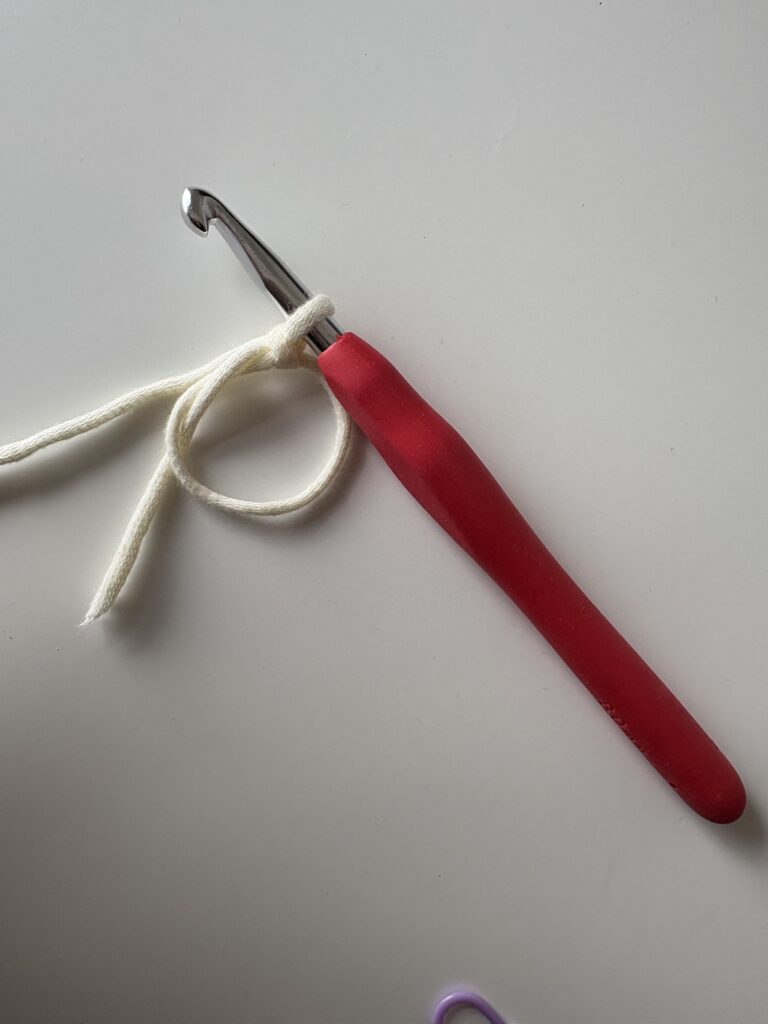
Round 1: Work 12 double crochet (dc) into the magic ring. Slip stitch to join the round. (12 sts)
Round 2: Work 2 dc in each stitch around. Slip stitch to join. (24 sts)
Round 3: Repeat [1 dc in the next stitch, 2 dc in the following stitch] around the circle. Slip stitch to join. (36 sts)
Color Change Tip: Before completing the final slip stitch, pull your new color through to start the next round.
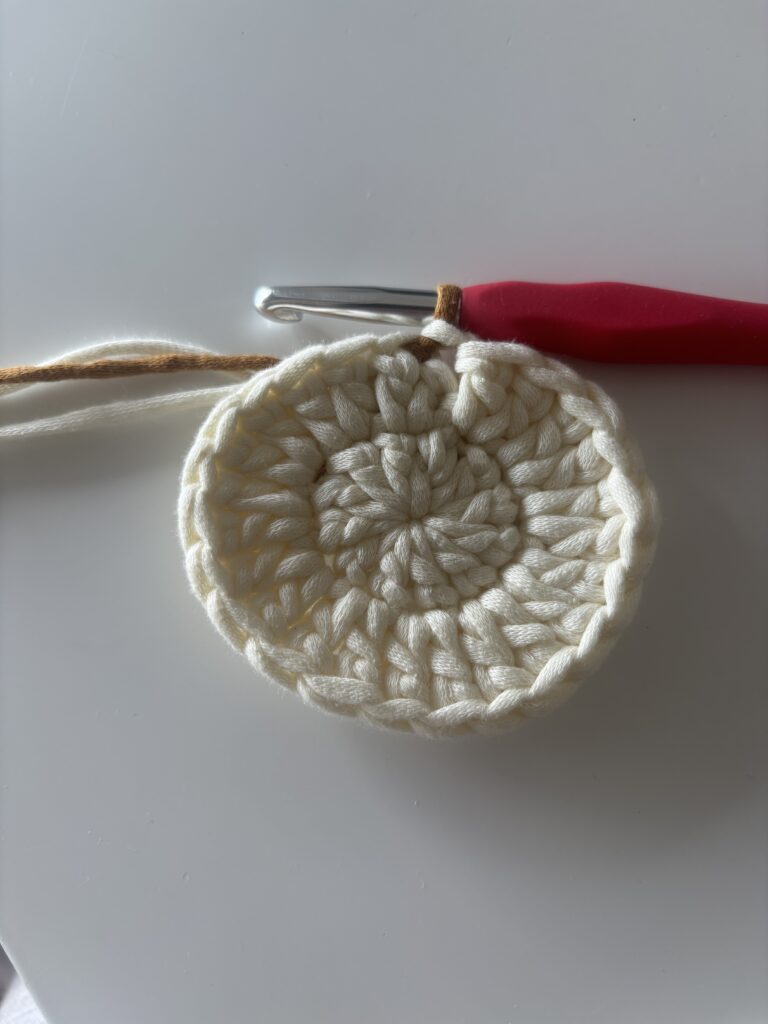
Round 4: Repeat [1 dc in each of the next 2 stitches, 2 dc in the next stitch] around the circle. Slip stitch to join. (48 sts)
Round 5: Repeat [1 dc in each of the next 3 stitches, 2 dc in the next stitch] around the circle. Slip stitch to join. (60 sts)
Round 6: Repeat [1 dc in each of the next 4 stitches, 2 dc in the next stitch] around the circle. Slip stitch to join. (72 sts)
Round 7: Repeat [1 dc in each of the next 5 stitches, 2 dc in the next stitch] around the circle. Slip stitch to join. (84 sts)
Round 8: Repeat [1 dc in each of the next 6 stitches, 2 dc in the next stitch] around the circle. Slip stitch to join. (96 sts)
Final Border Round: Work 1 slip stitch (sl st) in each stitch around to create a clean, firm, and beautiful edge. Fasten off and weave in all your ends using 2.0 mm yarn o yarn needle.

Finished Size: Approximately 13 inches (33 cm) in diameter. (Note: Your final size may vary slightly depending on your unique tension!)
Want to Start Smaller? Match Your New Placemats!
If you are a complete beginner or feel a little intimidated by jumping straight into an 8-round project, don’t worry at all! I’ve got you covered. This placemat is actually the big-sister version of one of my favorite quick projects. If you want to warm up your hands or create a matching set for your table, check out my Easy Crochet Coaster Tutorial here. It uses the exact same technique but on a smaller scale, making it the perfect practice run before diving into this vibrant placemat!

One thought on “How to Crochet a Placemat – Free Beginner Pattern”