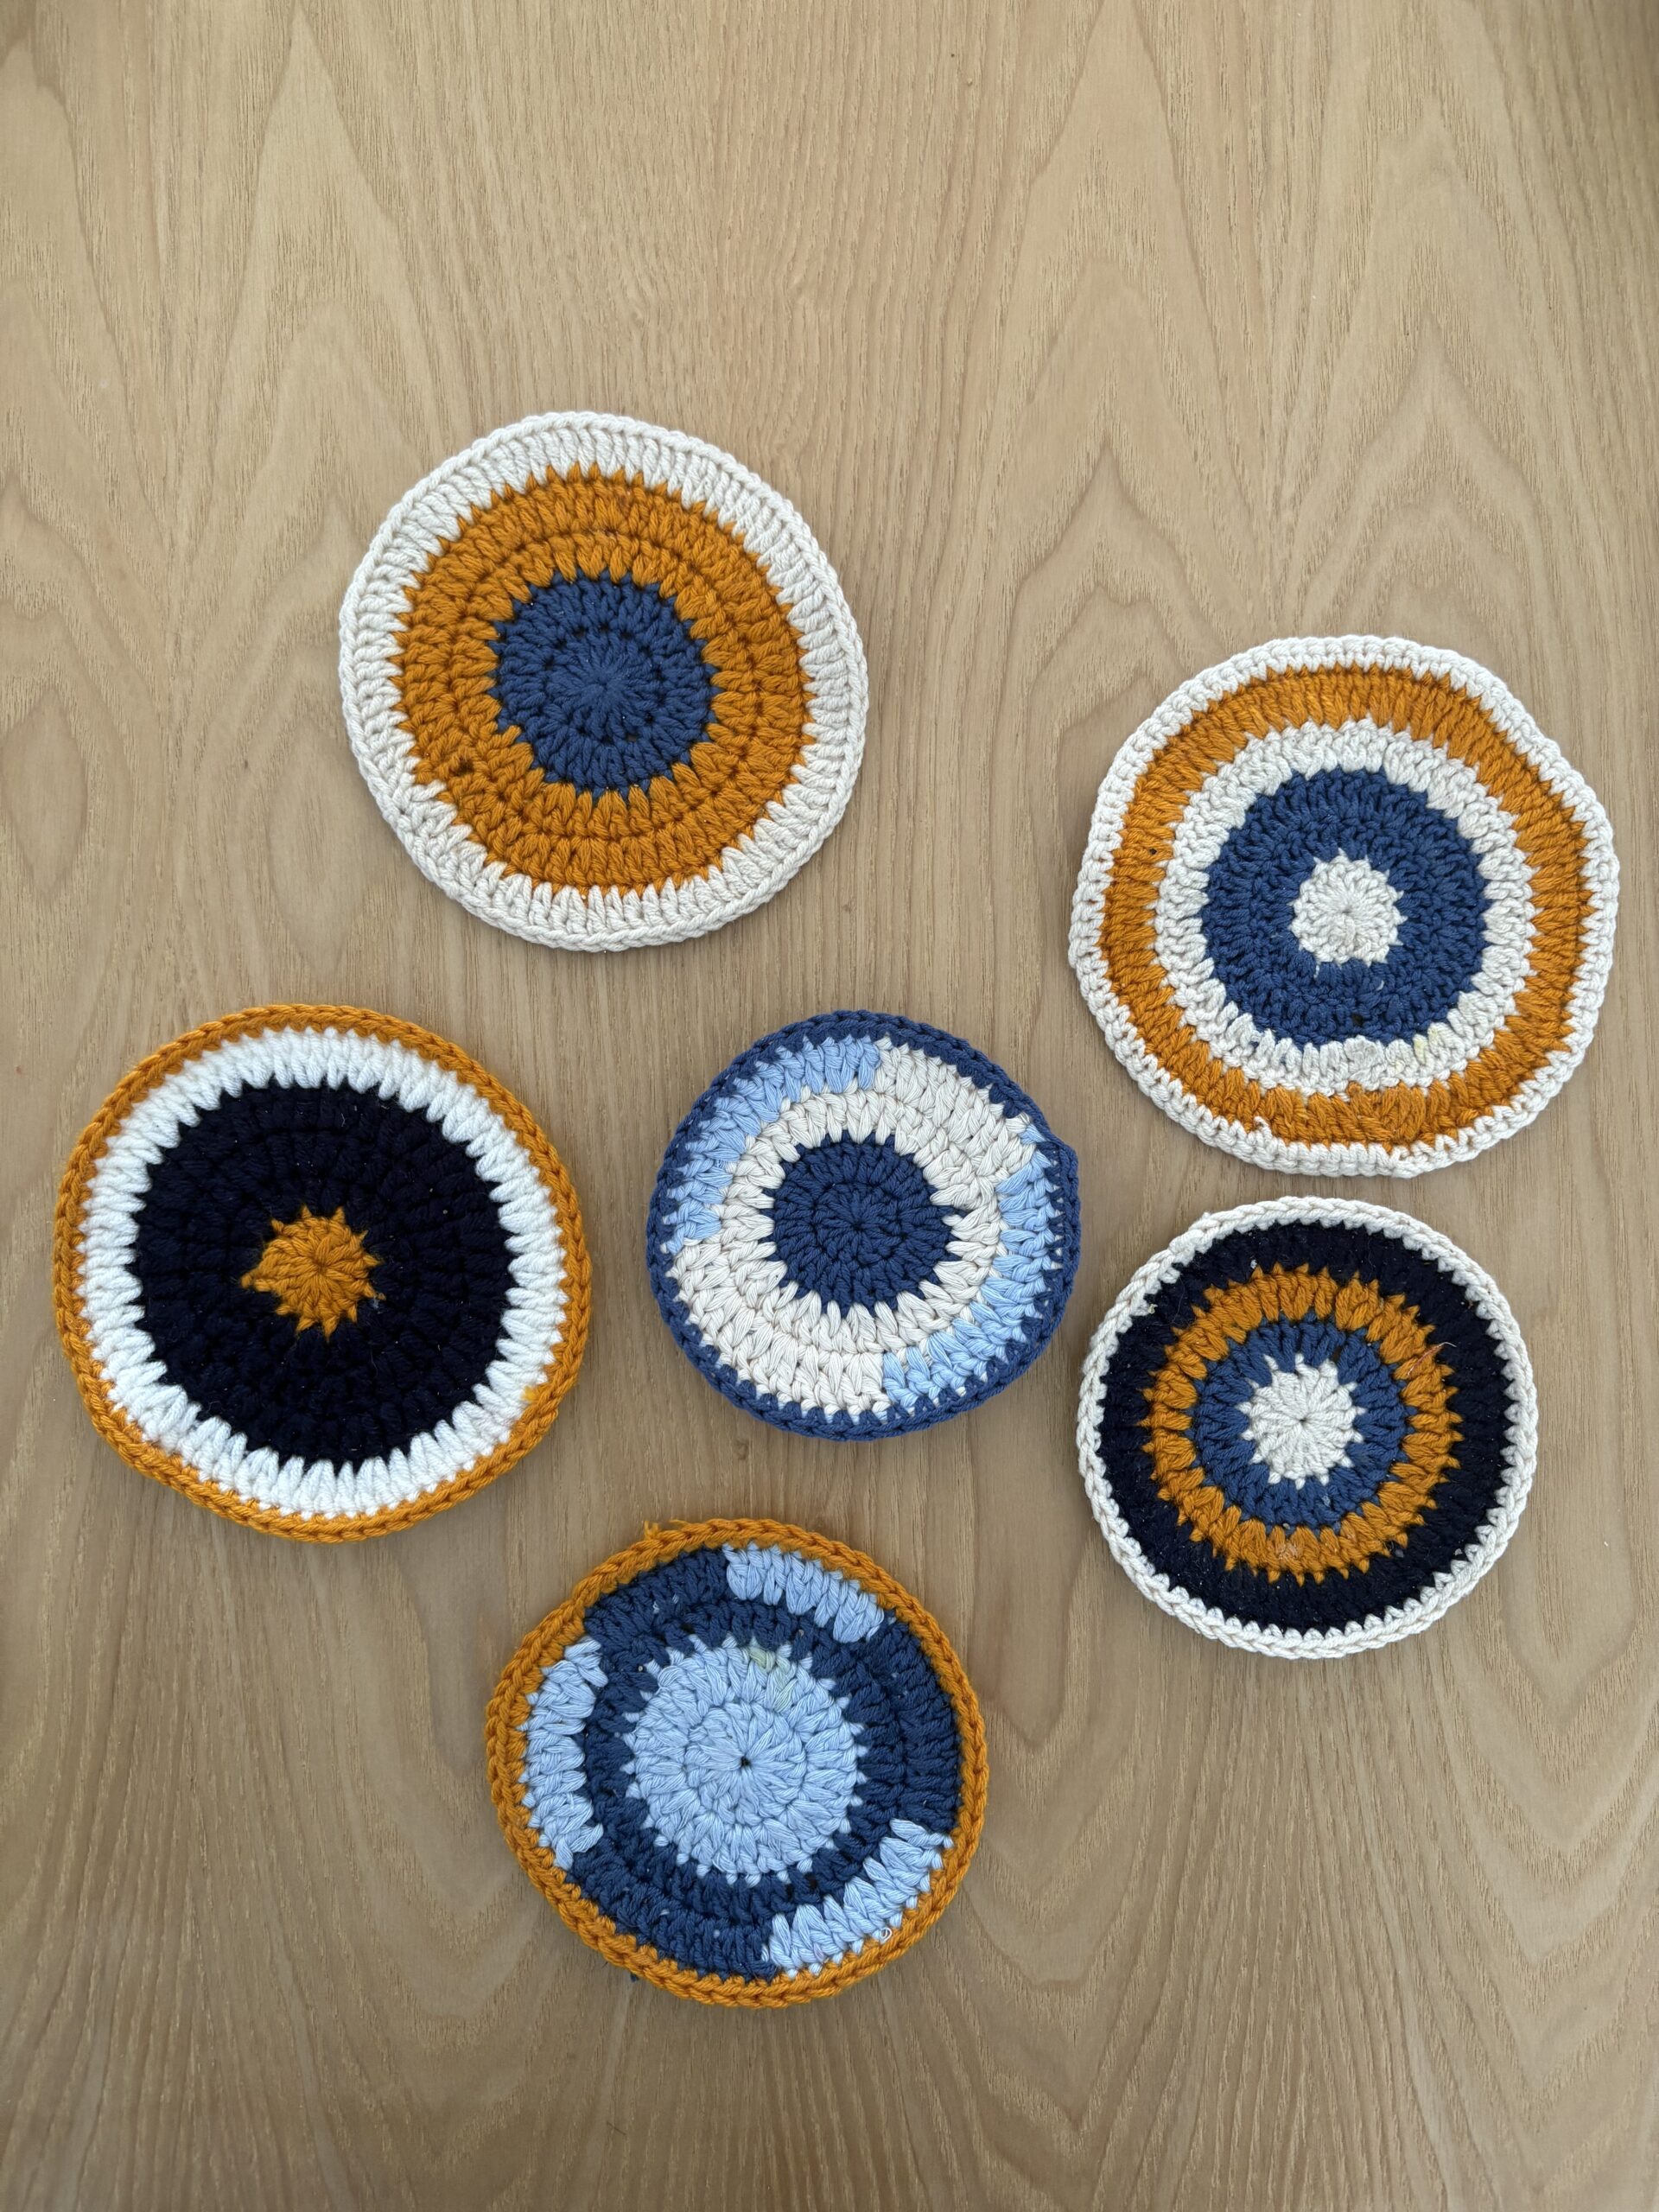
Orbit coaster Crochet Pattern
Orbit is a easy crochet coaster pattern inspired by my first home — a place where I
wanted my personal style to be present, along with pieces made by my own hands. This
design combines simple stitches and circular construction to create a timeless, functional
accessory for everyday living.
Designed to be beginner-friendly and easy to customize, this pattern allows you to play with color combinations while creating a cohesive, minimalist look. Whether made as a single piece or a full set, Orbit is intended to bring warmth, intention, and handmade character into your space.
Quick note: This post contains affiliate links, which means I get a tiny commission if you buy your yarn through them—at zero extra cost to you! It just helps me keep the lights on here at The Crochet Lab so I can keep making free patterns for you. Thank you for your support! 💖
Materials Needed:
- Acrylic yarn, cotton yarn or cotton blends.
- Crochet hook (size recommended for your chosen yarn)
- Scissors
What is the Best Yarn for Crochet Coasters?
Choosing the right yarn is the secret to making functional, long-lasting crochet coasters. Since their main job is to absorb moisture and protect your wooden tables, material choice matters:
- 100% Cotton Yarn (Highly Recommended): Cotton is the absolute king for kitchen decor. It is incredibly absorbent, durable, heat-resistant (perfect for hot coffee mugs!), and super easy to wash. It will hold its shape perfectly over time.
- Acrylic Yarn (Use with Caution): While acrylic yarn comes in gorgeous colors and is very budget-friendly, it doesn’t absorb liquid well. Water from cold drinks will easily slide off, and high heat from hot mugs can slightly melt the synthetic fibers over time.
- Cotton Blends: A cotton-acrylic blend (like a 50/50 mix) is a great middle ground if you want a softer texture and unique vibrant color palettes while maintaining good absorbency.
So, even though there are plenty of great yarn options out there and you can definitely experiment with the ones I mentioned above, 100% cotton is still my ultimate holy grail for table decor. It’s just unmatched when it comes to absorbing moisture and surviving the wash. If you want to skip the guesswork and use the exact same one I trust for my kitchen projects, you can grab this specific cotton yarn on Amazon and start crocheting worry-free.
Abbreviations US Terms:
- mg: Magic Ring
- ch : Chain
- st: Slip Stitch
- sts: Stitches
- sc : Single Crochet
- dc : Double Crochet
Instructions:
Magic Ring
Chain 2
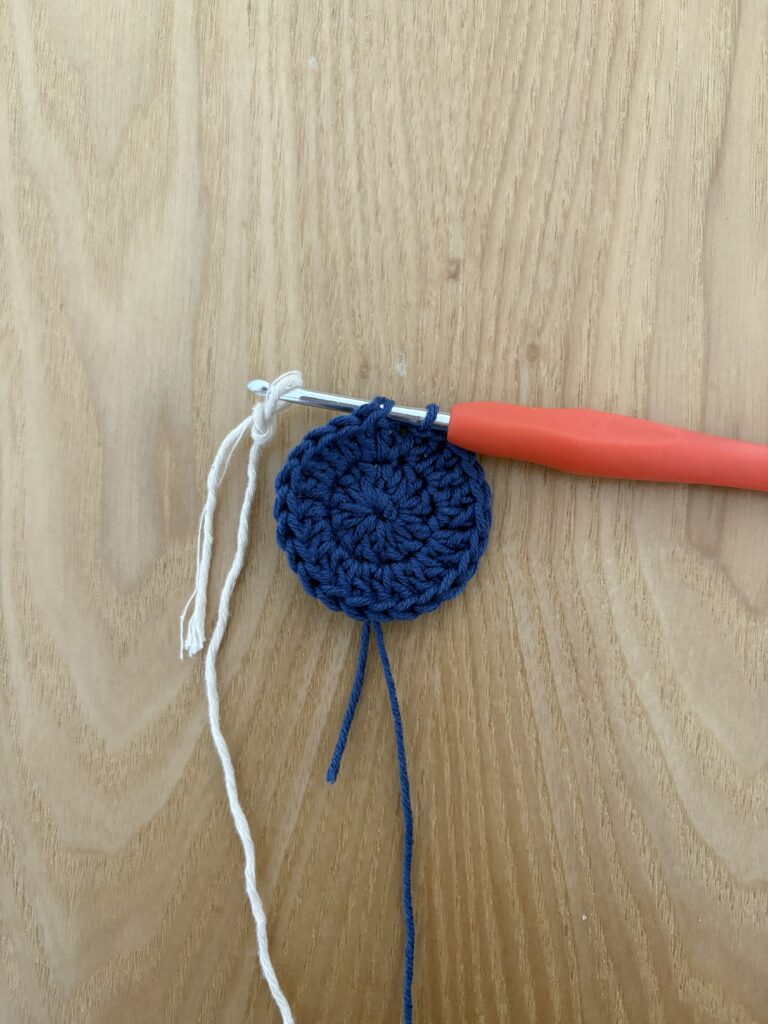
Round 1:
- 12 double crochet (dc) into the magic ring.
- Slip stitch to join.
Round 2:
- Chain 2.
- Work 2 dc in each stitch around.
- At the end of the round, you will have 24 dc.
- Slip stitch to join.
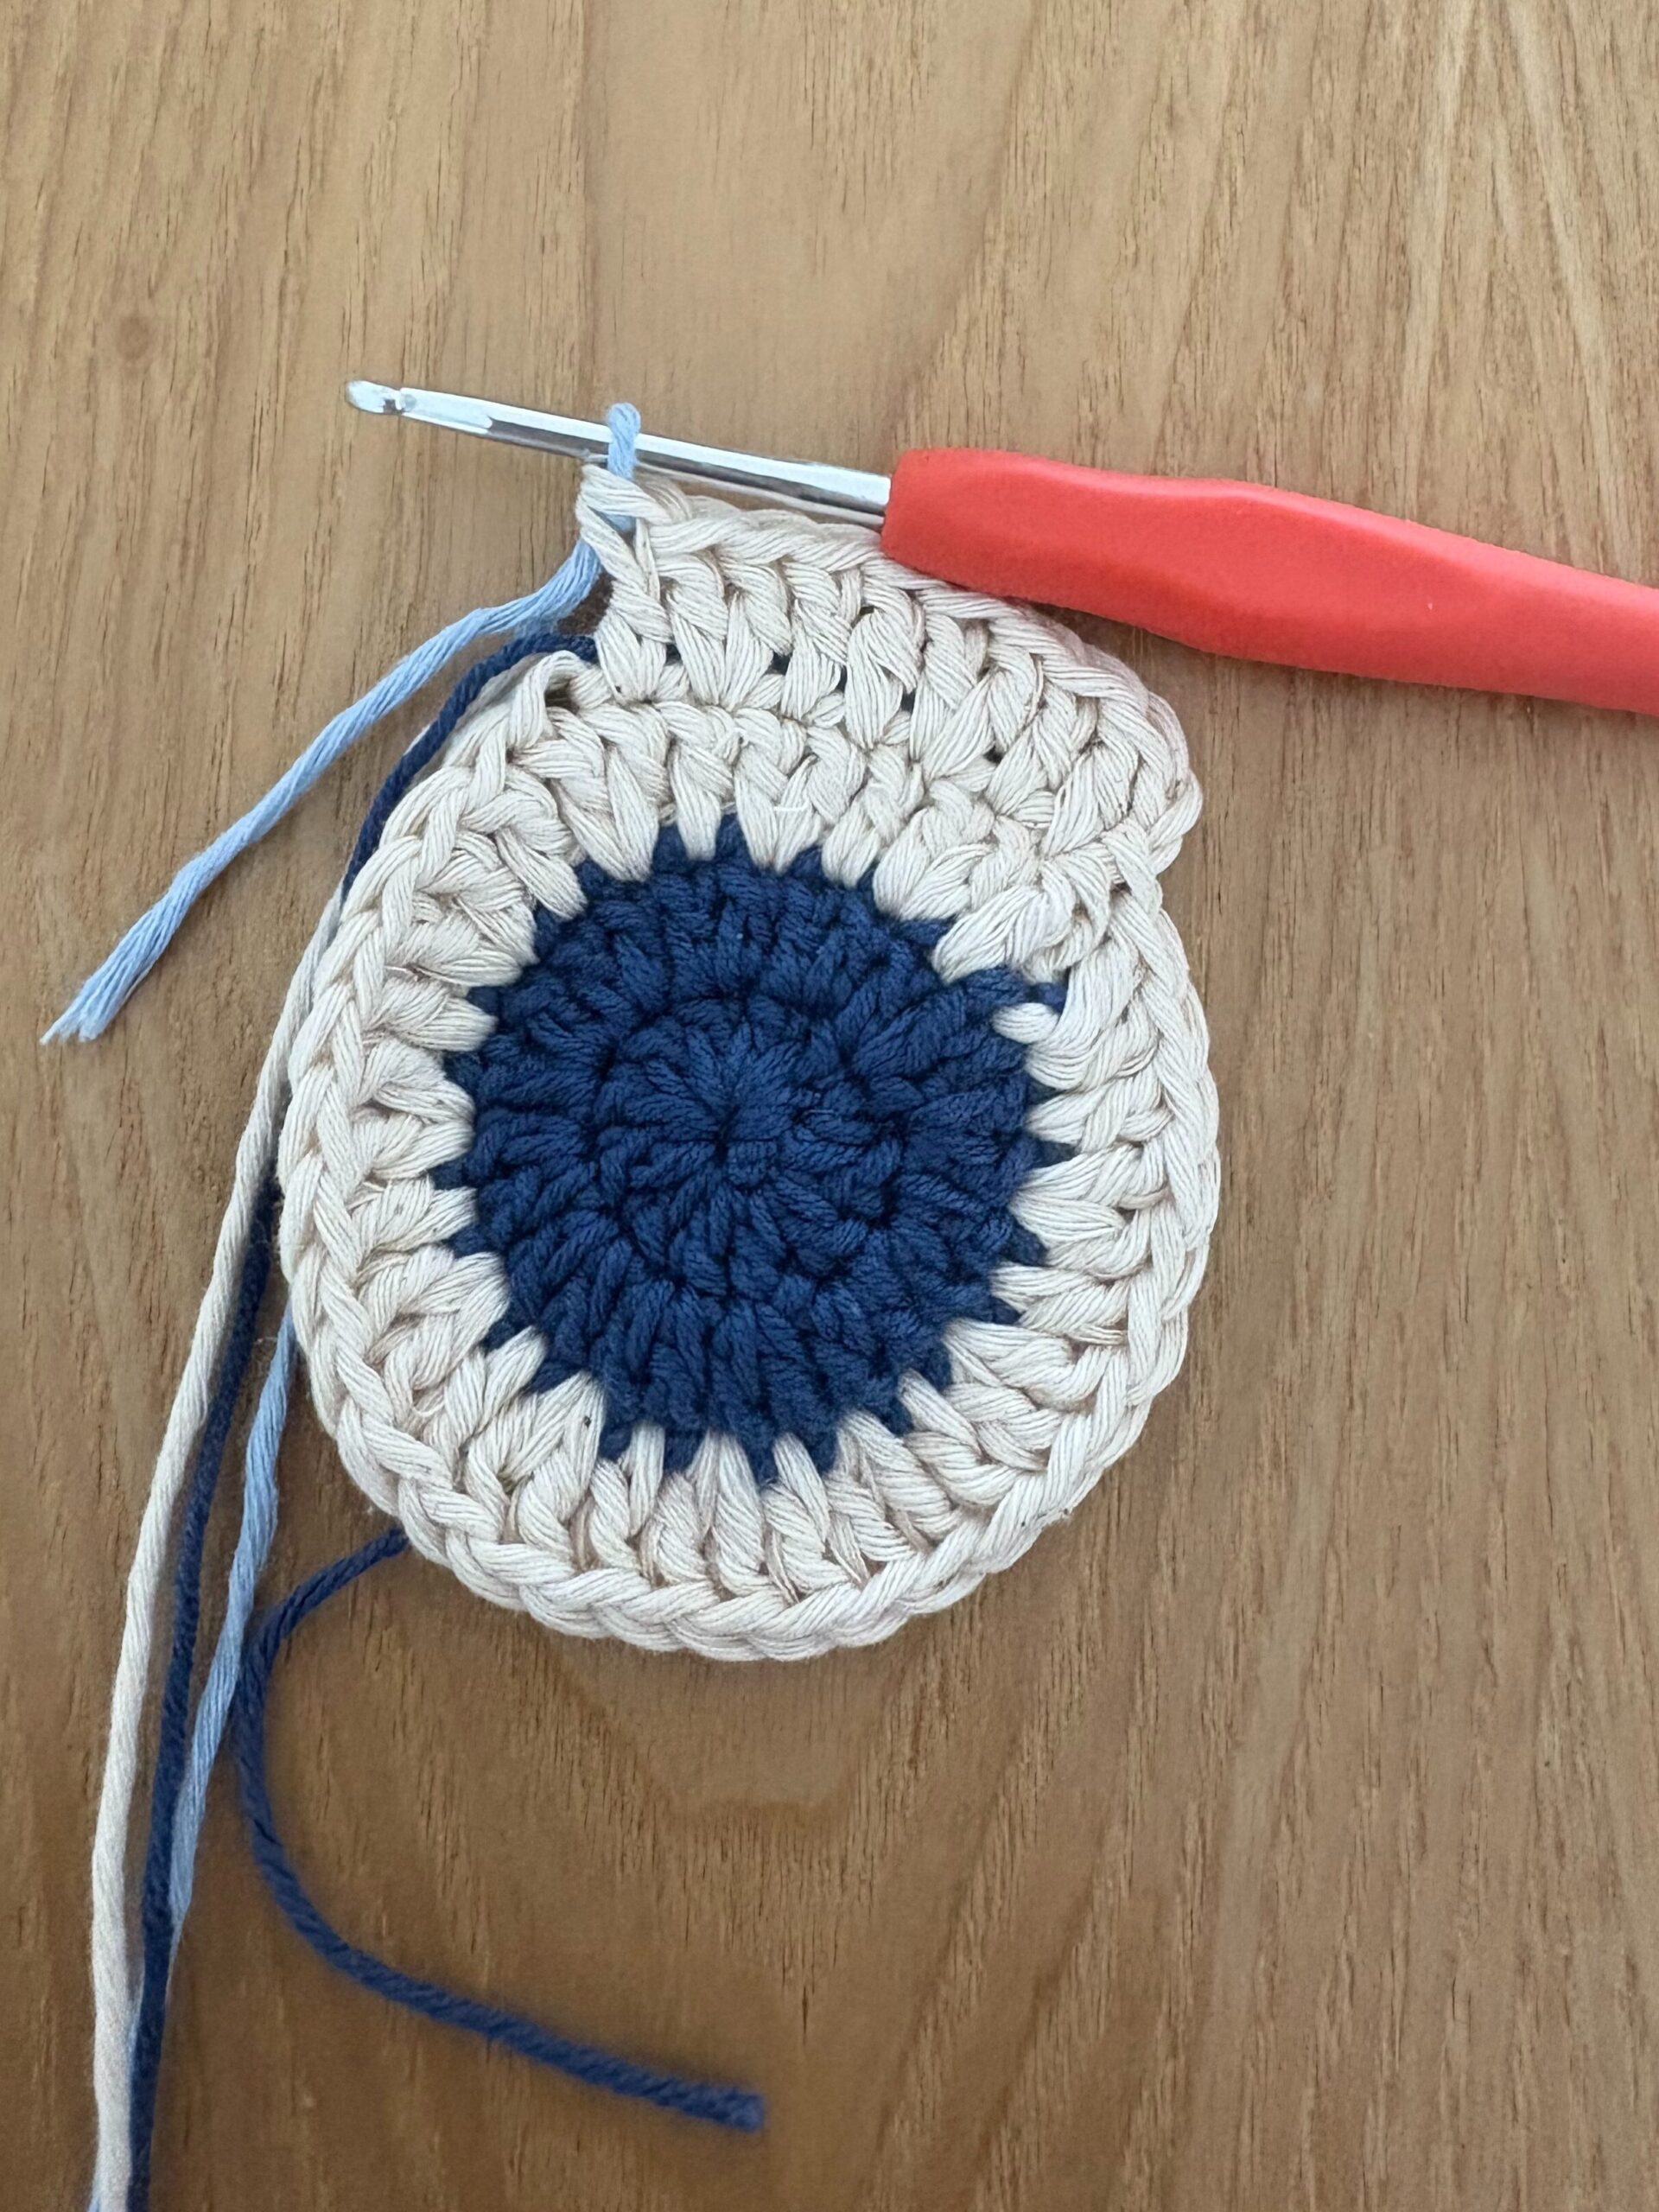
Color change: Before joining the round with a slip stitch, attach the new color and pull it through the first stitch.
Note: If you plan to reuse the center color in later rounds, carry the unused yarn along the back of the work and crochet over it to conceal it within the stitches.
Round 3:
- Chain 2
- Work 1 double crochet in the next stitch, then work 2 double crochet in the following stitch. Repeat this sequence around the circle
- At the end of the round, you will have 36 dc.
- Slip stitch to join.
Round 4:
- Chain 2
- Work 1 double crochet in each of the next 2 stitches, then work 2 double crochet in the next stitch. Repeat this sequence around the circle.
- At the end of the round, you will have 48 dc.
- Slip stitch to join.
Color Change During the Round: Work a double crochet (dc) and stop before completing the stitch, with two loops remaining on the hook. At this point, you may continue working with the first color or change to a new color.
- To continue with the first color: yarn over and complete the stitch as usual.
- To change colors: make a slip knot with the new color, insert the hook into the stitch, then pull the new color through the remaining loops on the hook to complete the stitch.
Note: Use yarns of similar weight to ensure the fabric looks even and uniform throughout the piece.
Round 5 final border:
- Chain 1.
- Work 1 single crochet (sc) in each stitch around.
- Slip stitch to join.
- Fasten off and weave in ends using a yarn needle.
Optional size adjustment:
- To make the coaster larger, continue adding increase rounds following the established pattern before working this final single crochet border.
- Optional Round A (60 dc) Work 1 dc in each of the next 3 stitches, then 2 dc in the next stitch. Repeat around.
- Optional Round B (72 dc) Work 1 dc in each of the next 4 stitches, then 2 dc in the next stitch. Repeat around.
- Final Border Round (sc)
FINAL NOTES:
- Turning chain-2 does not count as a stitch.
- Two coasters may have the same number of stitches but still turn out different in size, even when using the same hook. This happens because the yarn thickness varies. If you want all your coasters to be the same size, make sure to use the same type of yarn for each one.
- The key to successful colorful coasters is learning how to change colors properly, as explained below.
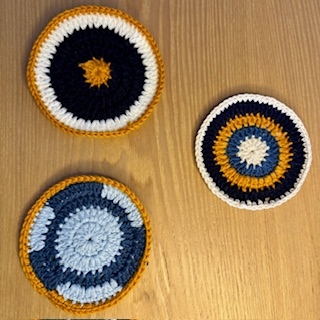
- Use the reference images provided.

How to Clean and Care for Your Handmade Coasters
Handmade home decor deserves a little love to stay beautiful! If your coasters get stained with coffee, tea, or juice, here is how to wash them safely:
- Hand Wash is Best: Soak your coasters in warm water with a drop of mild detergent or dish soap. Gently squeeze the suds through the stitches without wringing or twisting the fabric.
- Machine Wash (If using Cotton): If you made them with 100% cotton, you can pop them into a mesh laundry bag and wash them on a gentle cycle with cold water. Good news: I have personally tested washing these coasters in the washing machine, and they hold up perfectly without losing their shape or falling apart! To keep them looking brand new for years, I highly recommend popping them into a mesh laundry bag and running them on a gentle cycle with cold water.
- Reshape and Dry Flat: This is the most important step! Never put your crochet coasters in the dryer. Instead, lay them flat on a clean towel, reshape them into perfect circles or squares with your hands, and let them air dry completely.
IMPORTANT: To make sure your hard work doesn’t get ruined in the wash, I highly recommend protecting your stitches. I always pop my coasters into a small mesh laundry bag before throwing them in the machine.
Complete Your Table Setting: Easy Crochet Placemats
Want to take your dining table decor to the next level? You need a matching set! Check out the simple pattern I designed for these gorgeous coasters.
They feature beautiful, rich texture that pairs perfectly wit any aesthetic, they whip up incredibly fast, and they are completely beginner friendly.

3 thoughts on “Easy Crochet Coaster Pattern | Free Tutorial”