Start Building Your Handmade Winter Wardrobe Early!
Even if we are not in the middle of autumn or winter yet, if I were you, I would start crocheting my cold-weather wardrobe right now! There is nothing better than being fully prepared with cozy, stylish accessories before the chilly season officially hits.
To be completely honest, this specific project is not difficult at all. However, since it is a wearable garment, it might take you a little extra time to complete if this is your very first time making one. But don’t worry—that is exactly why we are starting today! Hands to work!
The Ultimate Beginner-Friendly Winter Project
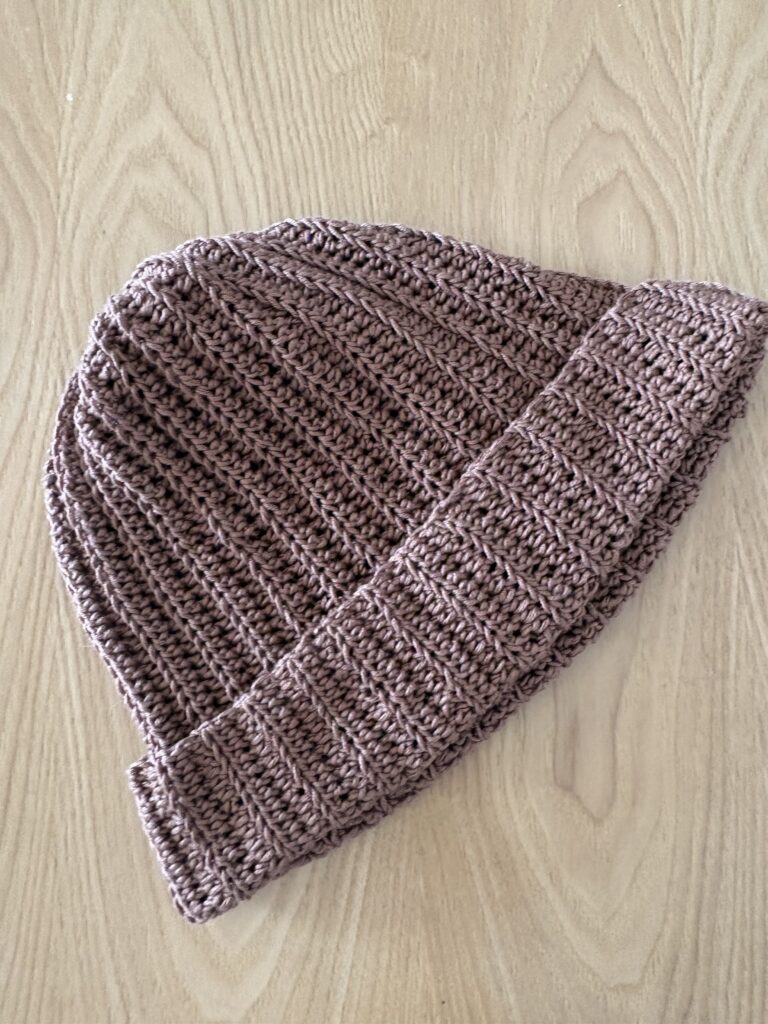
What makes this easy crochet beanie the ultimate game-changer? It uses just two basic stitches! With a simple row construction and lots of rhythmic repetitions, this pattern is the perfect way to practice your tension and build confidence for your future crochet projects.
I have personally made several of these beanies—some for myself and many others to give away as cozy gifts—and they are always an absolute hit. The finish on this design is so clean and professional that it truly doesn’t look handmade. Everyone will be completely shocked when you tell them, “Thanks, I crocheted it myself!” ✨
How to Easily Customize Your Beanie
- Size: Adjust the size by adding or removing chains to make it larger or smaller.
- Yarn choice: Different yarn fibers and weights will affect the final texture, size and thickness.
Materials Needed
- Yarn: 2 skeins of high-quality cotton yarn. Each skein is 50 grams (approx. 1.75 oz per skein), making a total of 100 grams (approx. 3.5 oz) for the entire project.
- Yarn Weight: Lightweight / Medium. Cotton is amazing for this beanie because it gives the stitches a beautiful, crisp definition and a professional, store-bought finish!
- Crochet Hook:3.0 mm
- Notions: A tapestry needle to weave in your ends, a pair of scissors, and a measuring tape.

Stitch Abbreviations (US Terms)
- ch: chain
- hdc: half double crochet
- pc: popcorn stitch
- st(s): stitch(es)
- mr: magic ring
PATTERN NOTES
To make sure your beanie turns out absolutely perfect and has that gorgeous, professional stretch, please keep these quick guidelines in mind before you pick up your hook:
- Read Ahead: Please read through the entire pattern before you begin to familiarize yourself with the project steps and construction.
- Stitch Placement (BLO): The entire pattern is worked in the Back Loop Only (BLO) to create that beautiful ribbed texture, with the exception of the very first row (Row 1), which is worked into the regular foundation stitches.
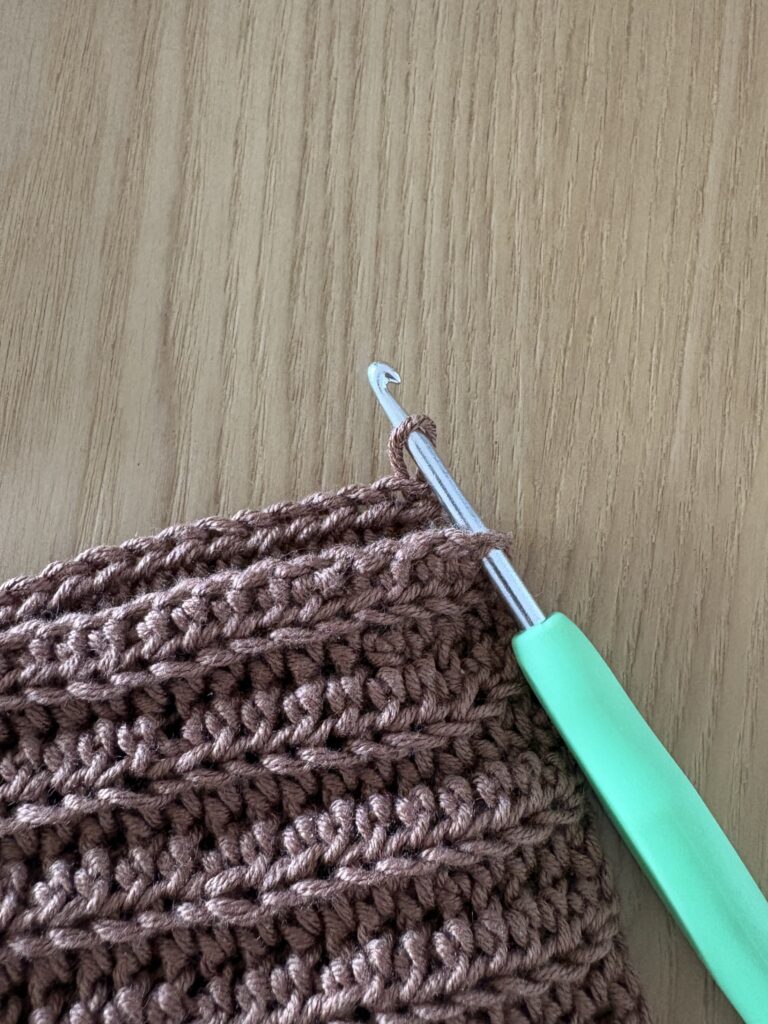
- Turning Chains: At the beginning of every single row, you must chain 1. This turning chain does not count as a stitch throughout the pattern.
- Visual Aid: Use the reference images and step-by-step photos provided throughout this post for extra guidance if you get stuck! Prefer watching the step-by-step process? If you are a visual learner or just want to stitch along with me in a relaxing, cozy environment, head over to my YouTube Channel! Don’t forget to subscribe and catch my live crochet sessions, where you can watch exactly how these professional stitches come to life in real-time.
Step-by-Step Crochet Beanie Pattern Instructions
The Foundation Chain
- Chain: Chain until you reach the desired length (height) of your beanie.
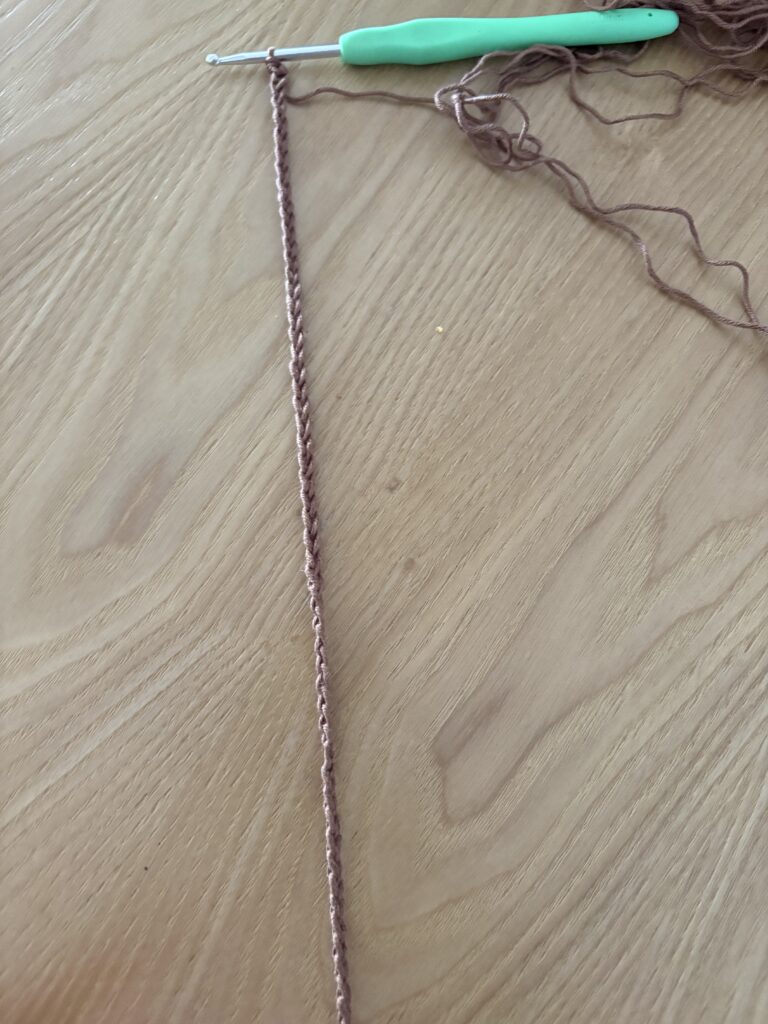
- Pro Tip for Fit: If you want a classic beanie with a folded brim, your chain needs to be significantly longer. Ideally, the chain should measure from the crown of your head down to about the tip of your nose. If you prefer a shorter, closer fit, adjust accordingly!
The Main Body of the Beanie
- Row 1: Work 1 half double crochet (hdc) in the second chain from your hook and in each chain across until you have exactly 8 chains left at the end of the row. Work 1 single crochet (sc) in each of those last 8 chains. (This tapered sc section will form the top/crown of your beanie!). Chain 1, turn.
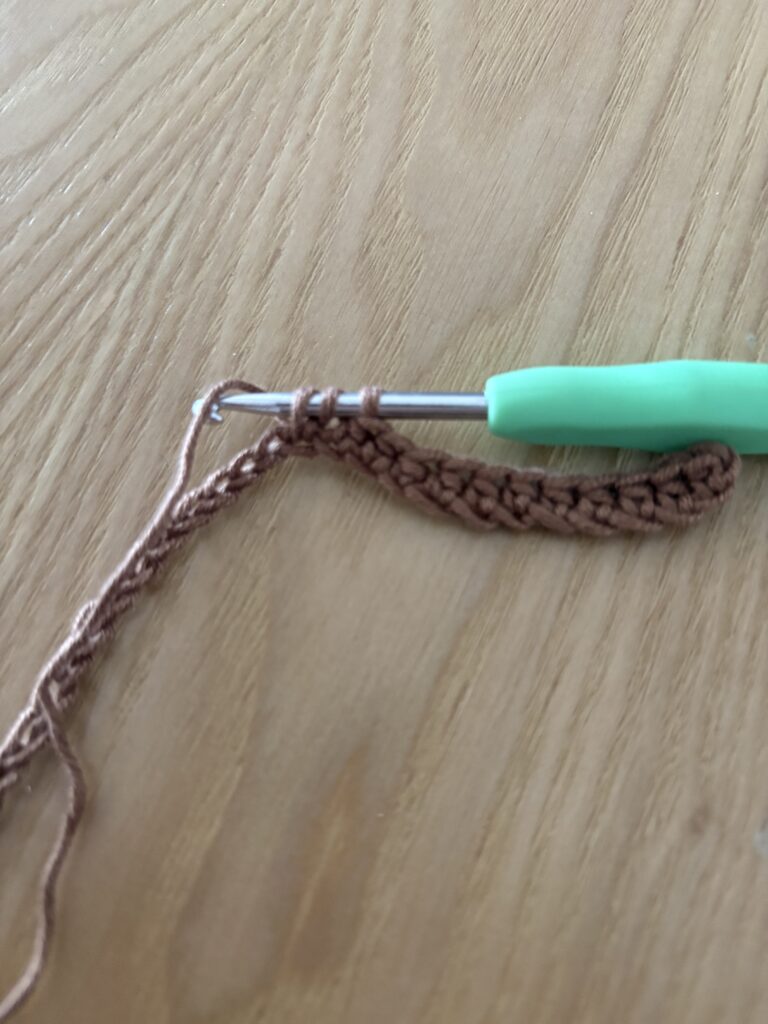
- Row 2: Starting in the very first stitch, work 1 sc BLO in each of the first 8 stitches. Then, work 1 hdc BLO in each remaining stitch across to the end of the row. Chain 1, turn.

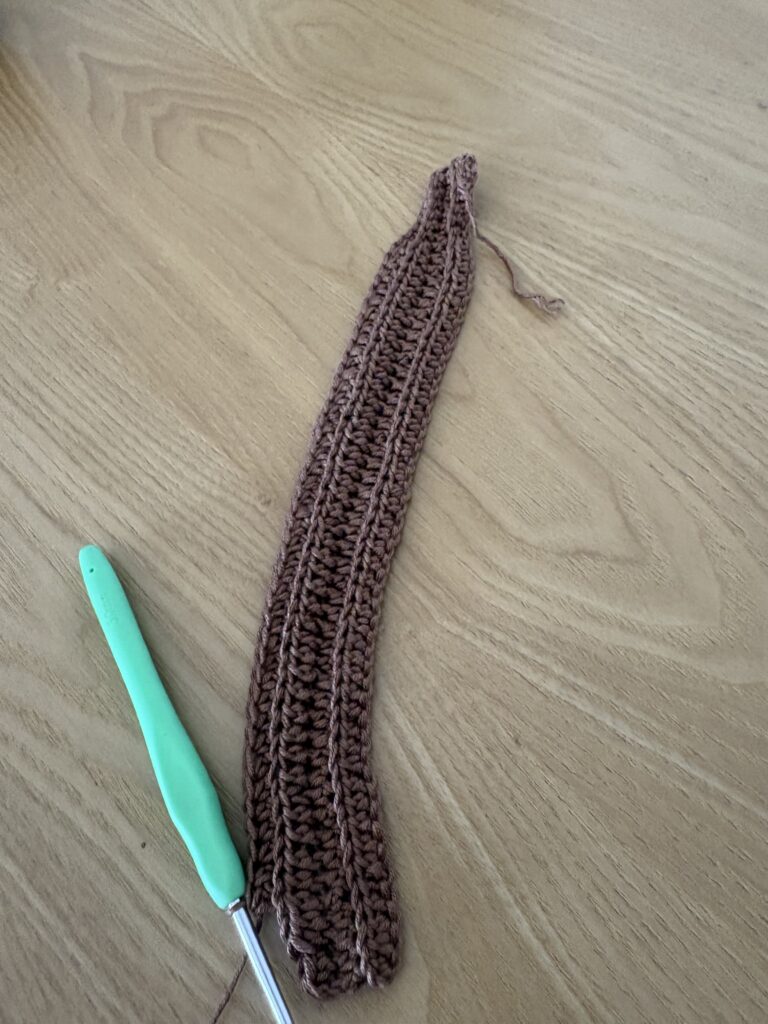
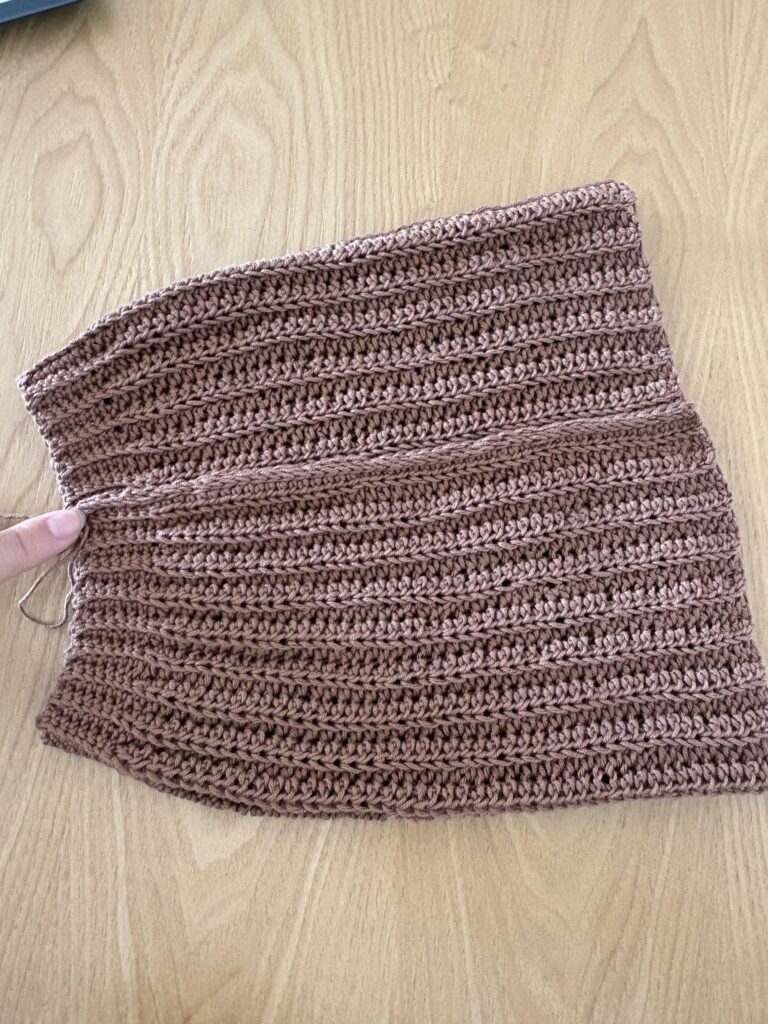
- Row 3 and beyond: Repeat Row 2, making sure to work hdc BLO over the hdc stitches and sc BLO over the 8 sc stitches at the top. This simple, rhythmic repetition forms the beautiful ribbed texture of your beanie and ensures the fabric stays incredibly soft and stretchy instead of stiff!
Determining Your Size
- Keep repeating the rows until the piece easily wraps around your head circumference.
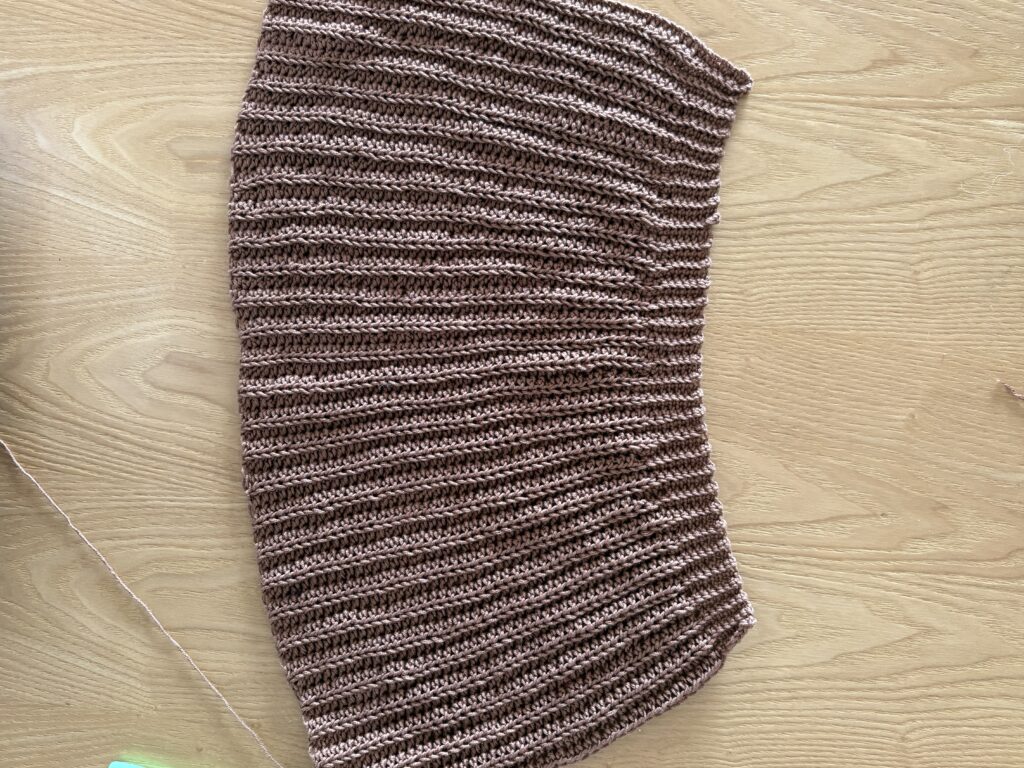
- Crucial Step: Once you reach your perfect fit, your last row must end at the bottom of the beanie (the wide edge, directly opposite the 8 single crochet stitches of the crown).
- My exact count: I crocheted a total of 62 rows for my beanie!
🪡 Assembly, Seaming, and Finishing Touches
Once your ribbed fabric is wide enough to fit comfortably around your head, it’s time to transform it into a gorgeous winter hat!
Step 1: Joining the Sides (Slip Stitch Seam)
- Do not cut your yarn yet! Fold your beanie in half so the first row meets your last row.
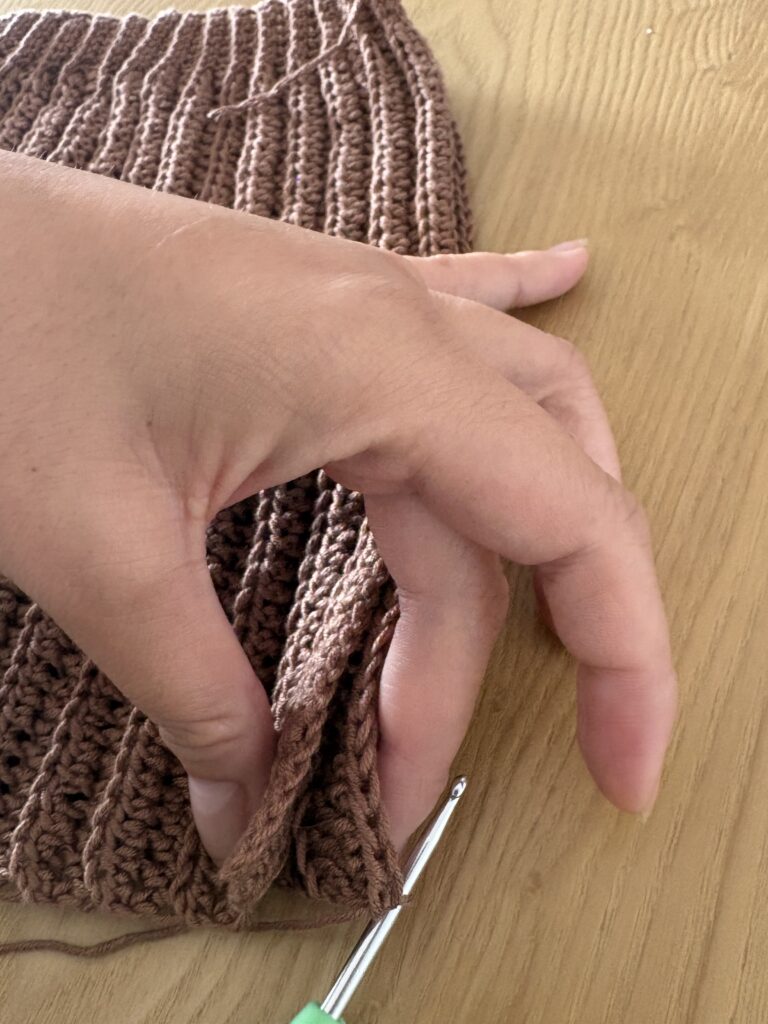
2. Insert your hook through the first stitch of Row 1, and then catch the loop left from your very last row.
3. Work a slip stitch (sl st) through both layers to join them.
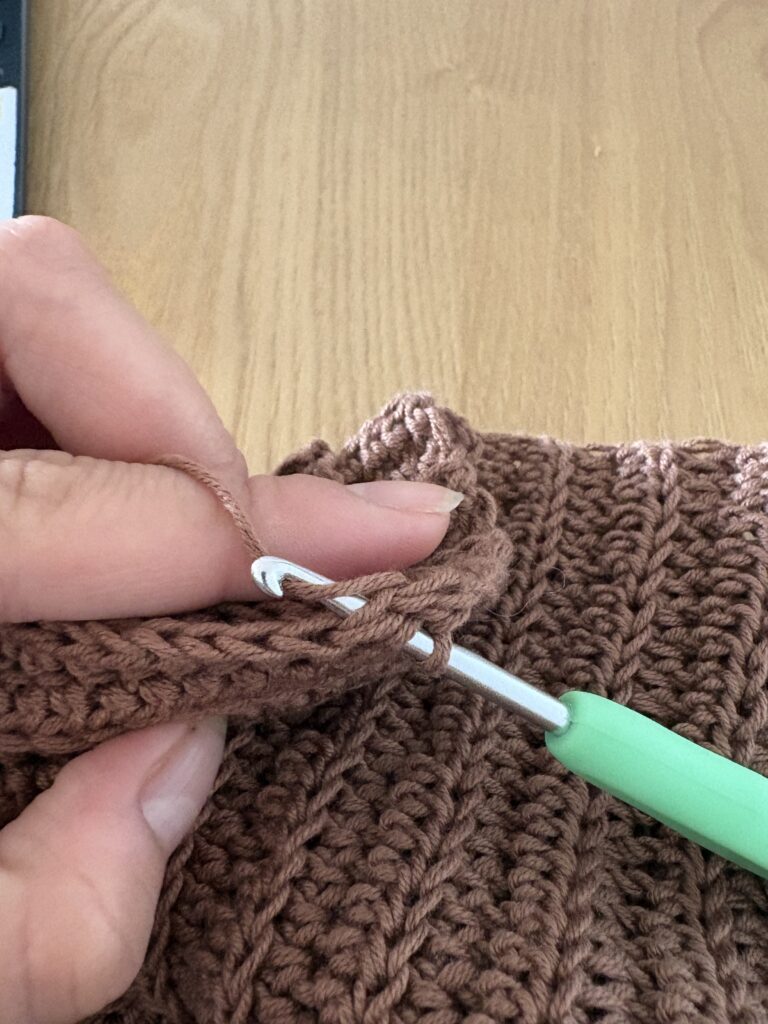
4. Continue making slip stitches all the way up the side of the beanie, starting from the bottom edge and working your way up to the top (where the 8 single crochets are).
Step 2: Securing and Closing the Crown
- Once you reach the top edge, fasten off your yarn, leaving a very long tail (about twice the total height of your beanie). It is always better to have too much yarn left over than too little!

- Thread your long yarn tail onto a tapestry needle.
- Weave the needle in and out through the edge of the stitches around the very top opening of the crown.
- Gently but firmly pull the yarn tail—just like a drawstring bag—until the top hole closes up tightly and completely.
Step 3: The Final Flourish
Secure the yarn with a strong knot on the inside of the hat, weave in any remaining loose ends, cut the excess yarn, and you are done!
Put on your brand-new, professional-looking beanie, and celebrate your beautiful handmade creation! 🥳✨
Planning ahead for warmer days? While this beanie is perfect for keeping you cozy during the chilly months, you can also start prepping your ultimate summer style right now! If you love trendy, eye-catching designs, check out my How to Crochet a Checkered Bikini Top Step-by-Step tutorial. It’s the perfect companion project to practice your colorwork and build a gorgeous, year-round handmade wardrobe!