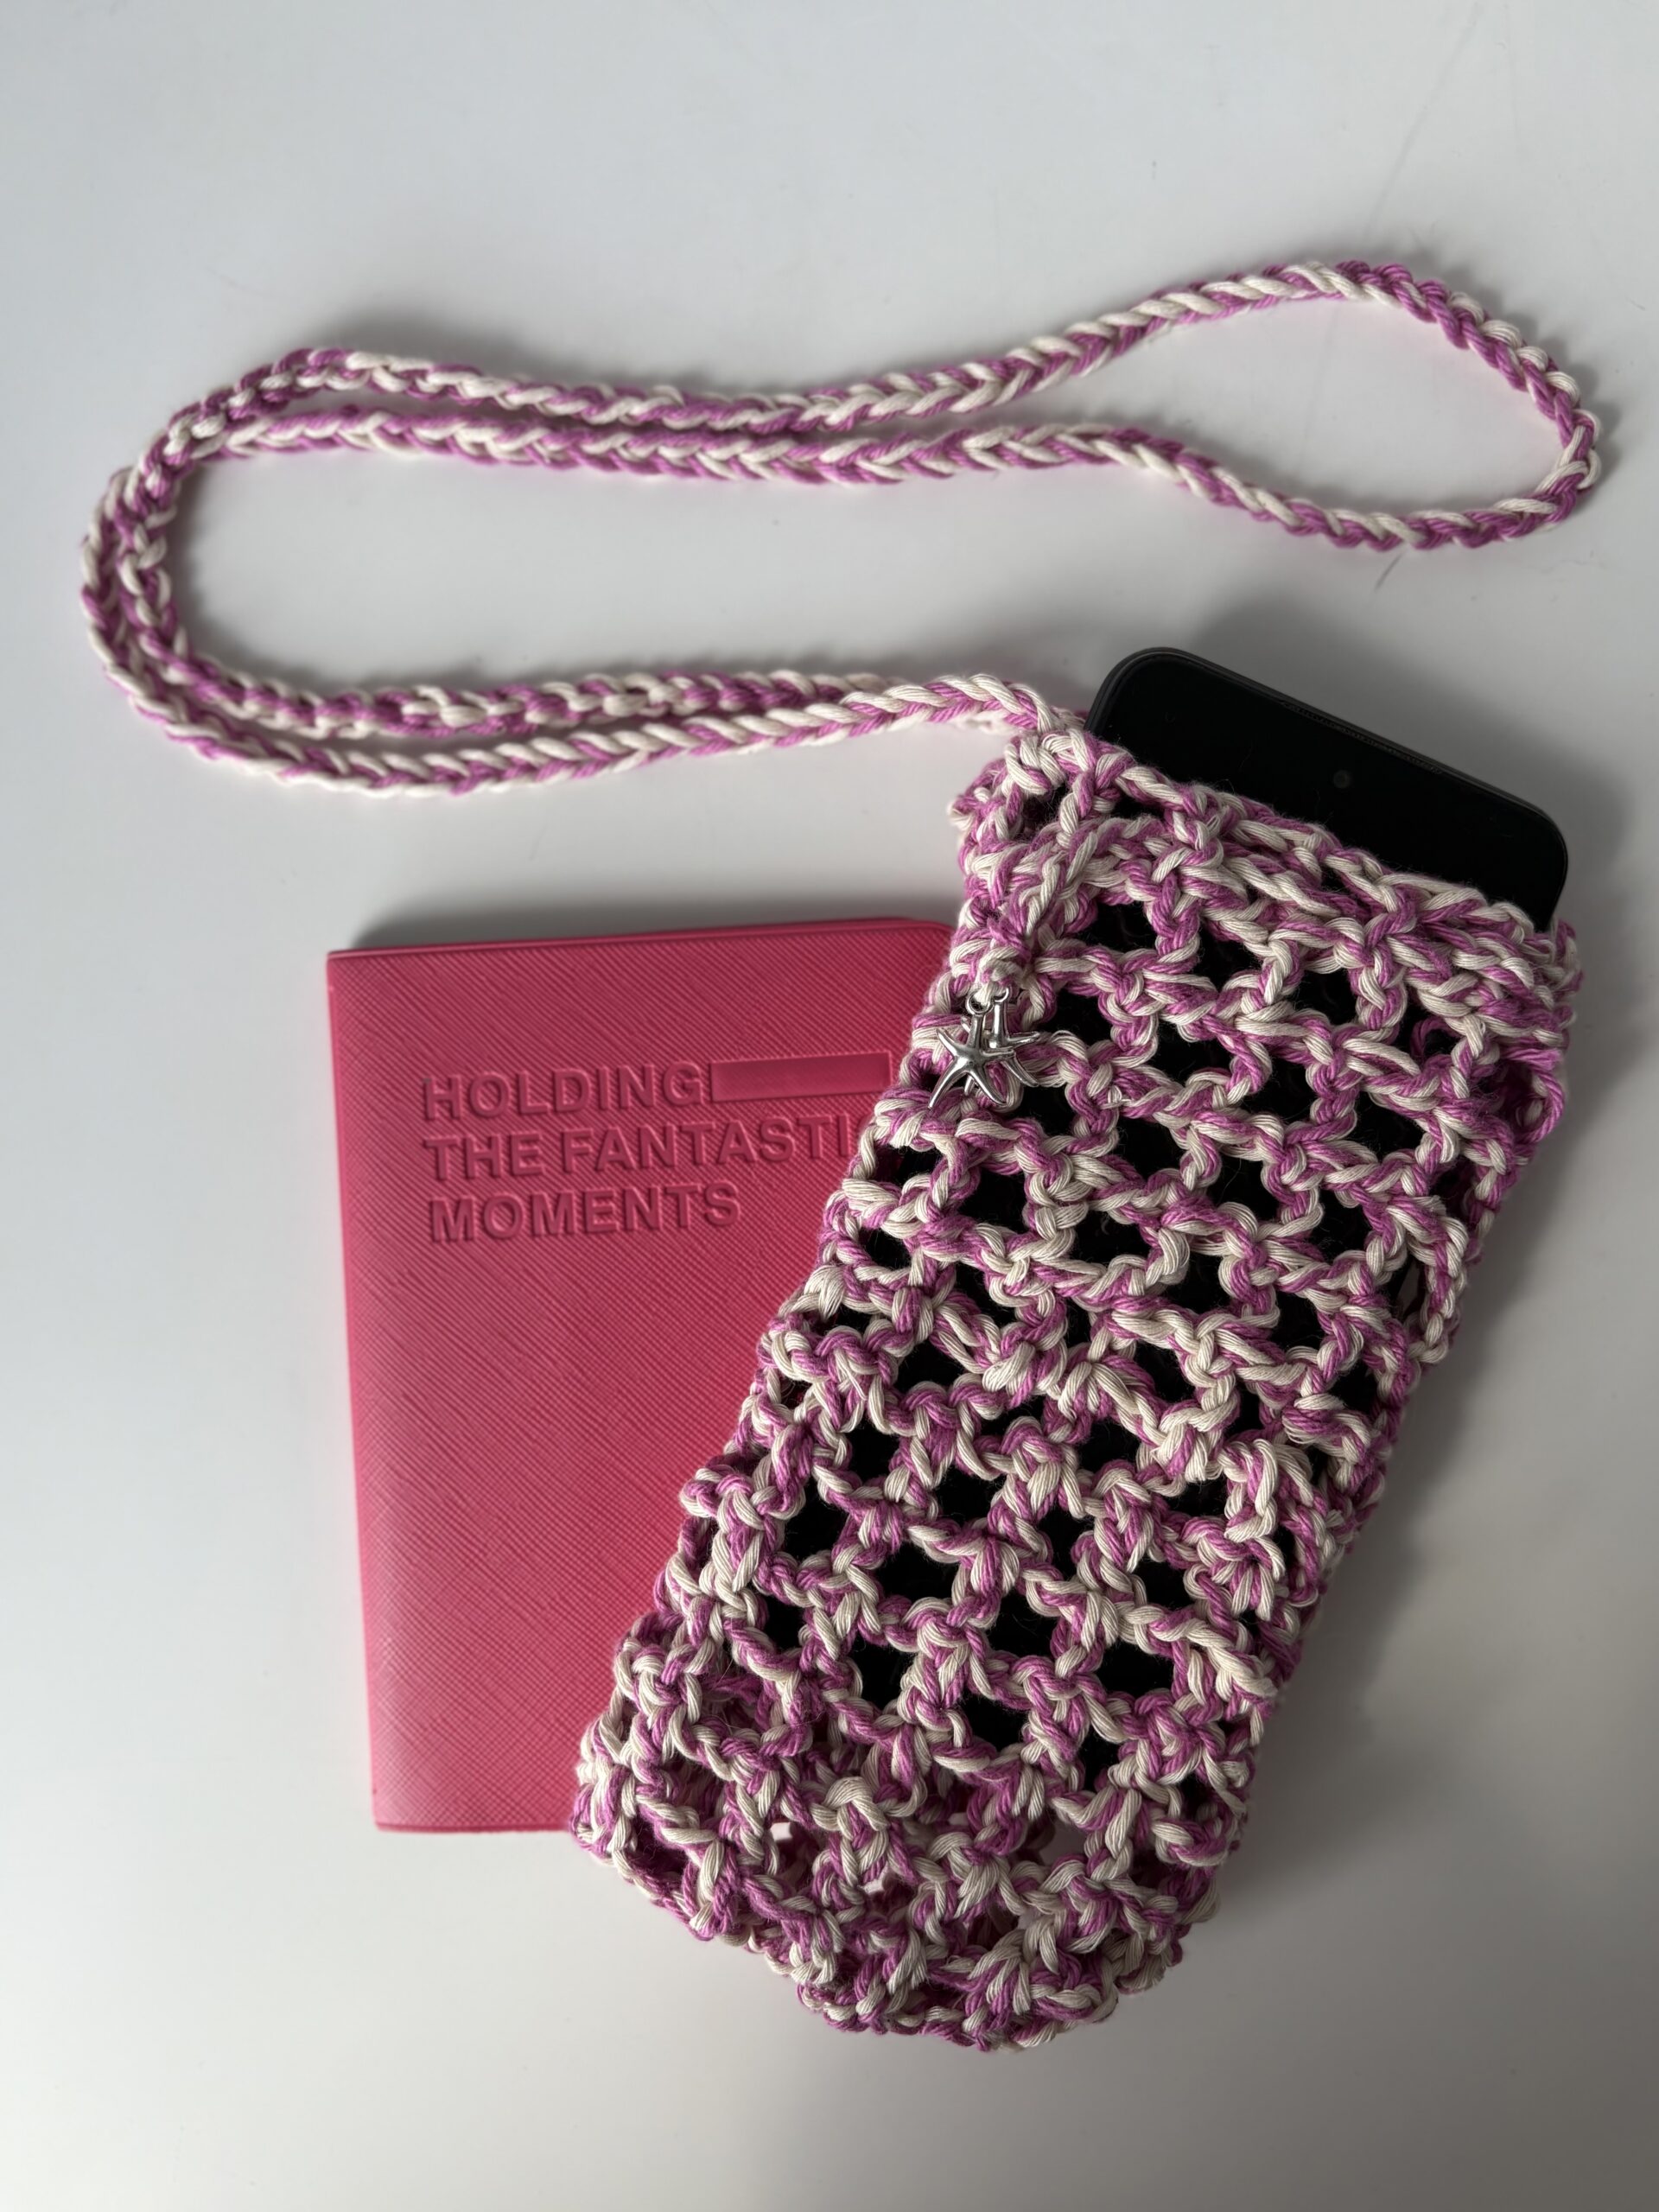
Summer vacations don’t have to turn into a headache! We all know the feeling of exploring a bustling new city, walking down a crowded beach boardwalk, or dancing at a summer music festival, only to constantly check our pockets to make sure our phone is still there. Keeping your phone safe from pickpockets without sacrificing your personal style is easier than you think. With this Summer Mesh Phone Bag, you can travel completely hands-free and enjoy every single moment of your trip with total peace of mind, knowing your most valuable item is secure right against your body.
Mesh Phone Bag
But practicality doesn’t mean boring. This mini pouch features a gorgeous, bohemian two-tone mesh texture that screams sunny days and coastal getaways. It’s the ultimate fusion of utility and fashion. Plus, it is incredibly easy and quick to make, trendy, cute, and absolutely perfect for the summer season! Whether you are an experienced crocheter looking for a fast afternoon project or a beginner ready to create your own ultimate travel accessory, this free pattern is exactly what your summer wardrobe needs
How to Easily Customize Your Crochet Mesh Phone Bag
Color changes: Feel free to experiment with different color combinations. Use high-contrast colors for a bold look, or similar tones for a more subtle, cohesive design.
Size: Adjust the size by adding or removing chains to make it larger or smaller.
Yarn choice: Different yarn fibers and weights will affect the final texture and thickness.
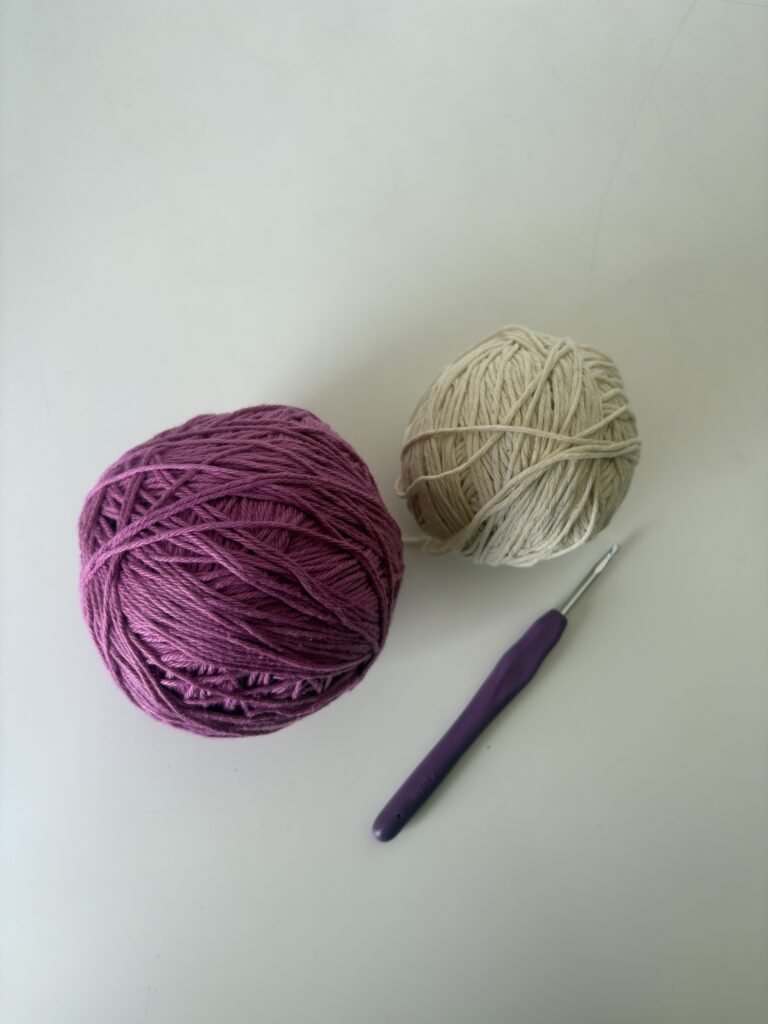
Materials Needed
Yarn: 2 skeins of cotton or acrylic yarn in contrasting colors. For this project, I used Cotton Yarn.
Crochet Hooks: A crochet hook matching your yarn size. Specifically, I used two hooks for this project: a 4.0 mm hook for the main body and a 2.5 mm hook for the small details and neat finishes.
Scissors.
Yarn needle (tapestry needle) for assembly.
STITCH ABBREVIATIONS (US TERMS)
sk: Slip Knot
ch : Chain
sts: Stitches
hdc : Half Double Crochet
dec: Decrease
PATTERN NOTES
Please read through the entire pattern before you begin
At the beginning of every single row, you must chain 3.
Make sure to use the same type and weight of yarn for both colors in your project. Using a thinner yarn for one color may affect the look of the color changes and result in an uneven finish.
Use the reference images provided for guidance.
The entire pattern is worked using only the Half Double Crochet (hdc).
INSTRUCTIONS
Base Chain
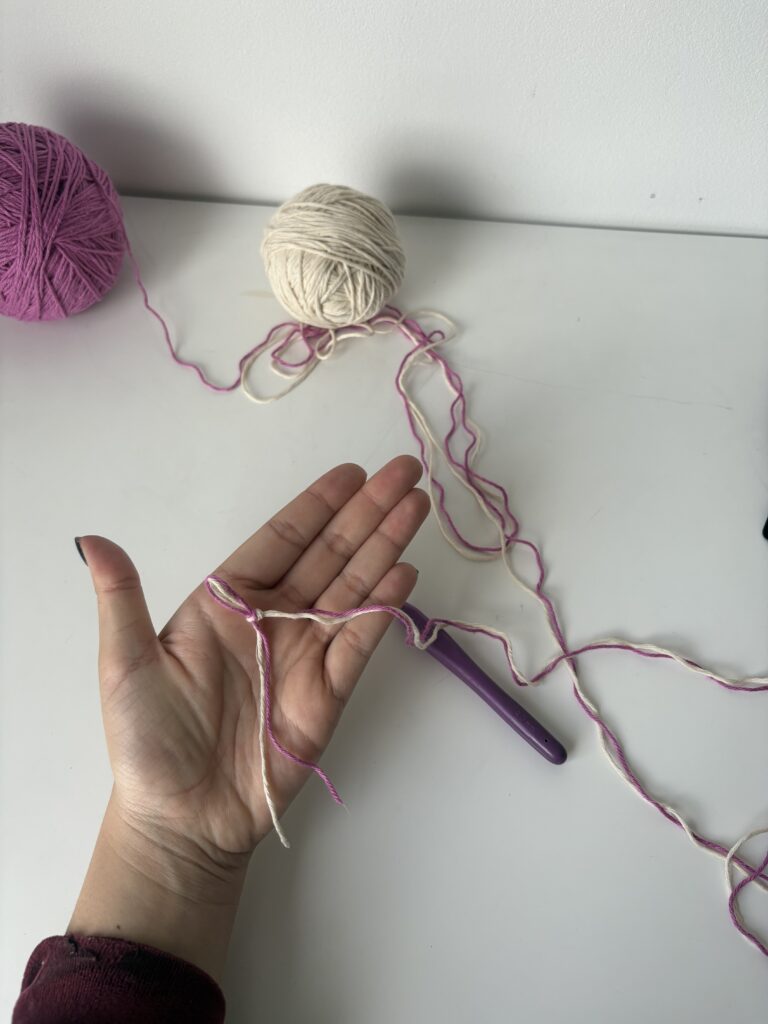
For this project, we will be working with two strands of yarn held together at the same time throughout the entire pattern. This technique not only creates a beautiful, textured multi-color effect but also gives your phone pouch extra strength and durability!
The Foundation:
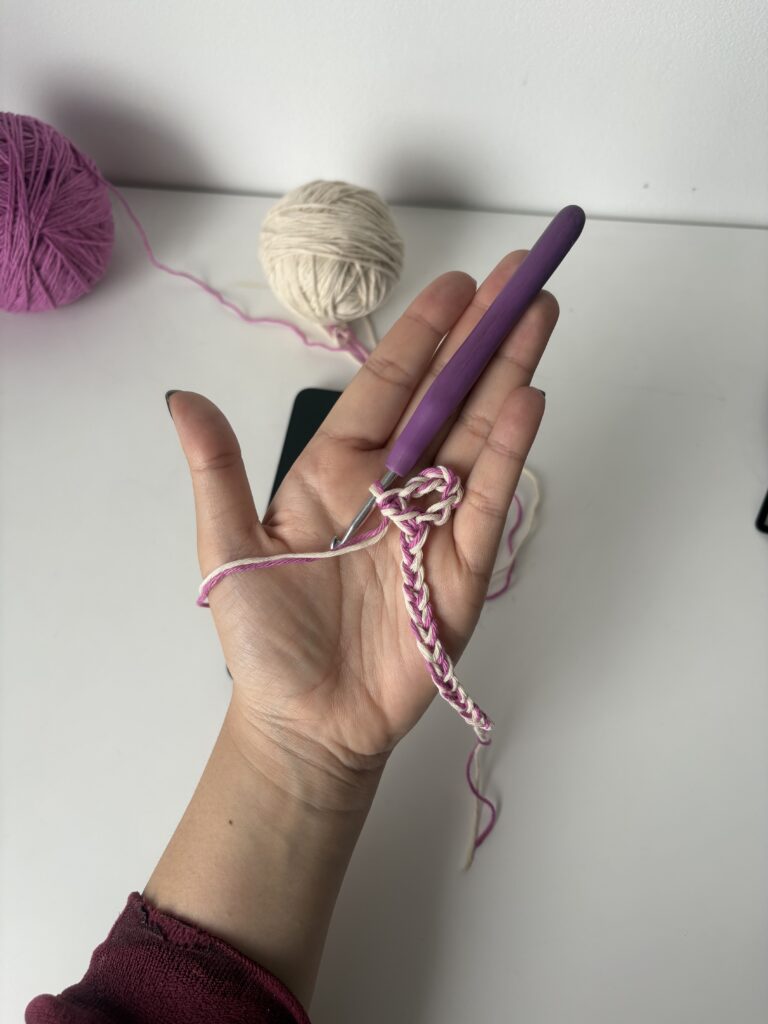
Step 1: Holding both yarn colors together, start with a slip knot.
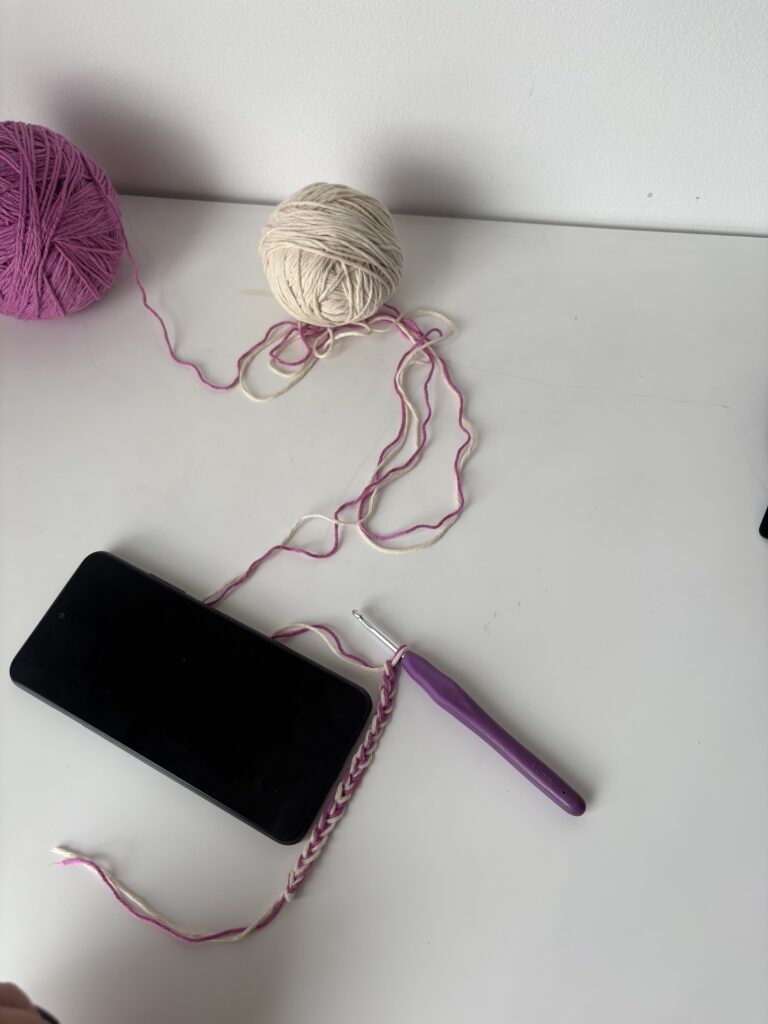
Step 2: Chain until you reach your desired width, mine has 16 ch.
Sizing Tip: Make sure your foundation chain is just a little bit wider than the size of your phone (or whatever items you plan to store inside). This ensures your phone will slide in and out smoothly without being too tight!
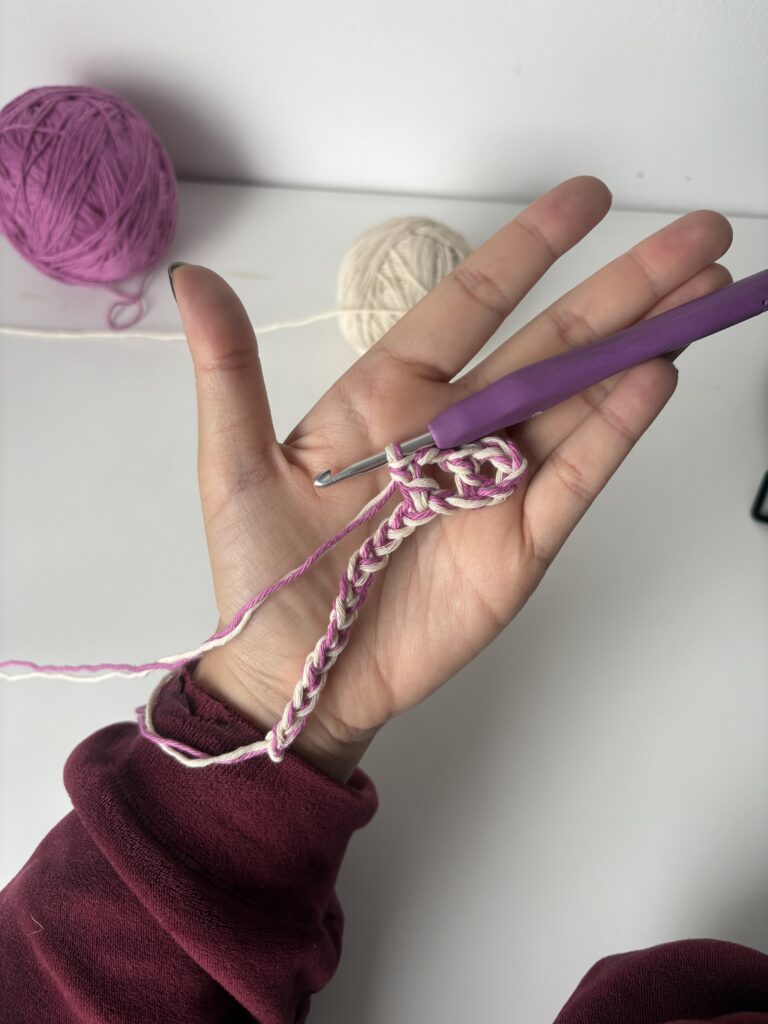
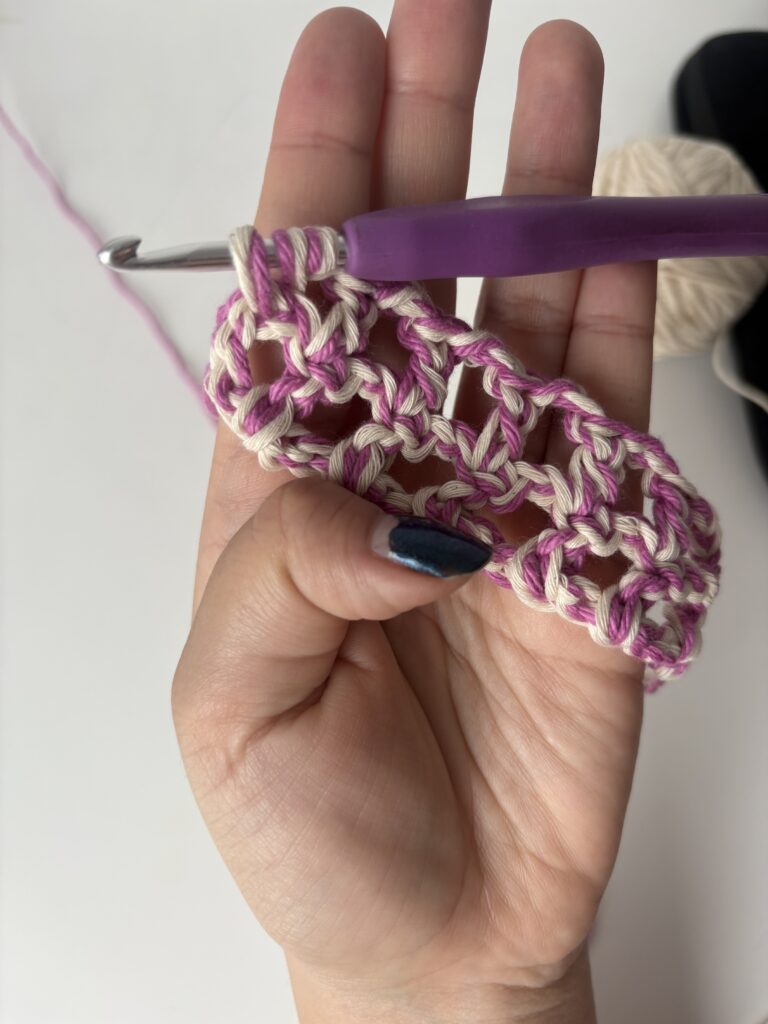
Row 1
Step 1: Ch 3 (this counts as your first hdc + ch-1 space).
Step 2: In the 5th chain from your hook, work 1 hdc.
Step 3:Ch 2, skip the next 2 chains, and work 1 hdc into the 3rd chain.
Step 4 (Finishing the row): When you reach the very end, work your final 1 hdc into the last chain (the corner stitch) to cleanly complete the final mesh square of the row.
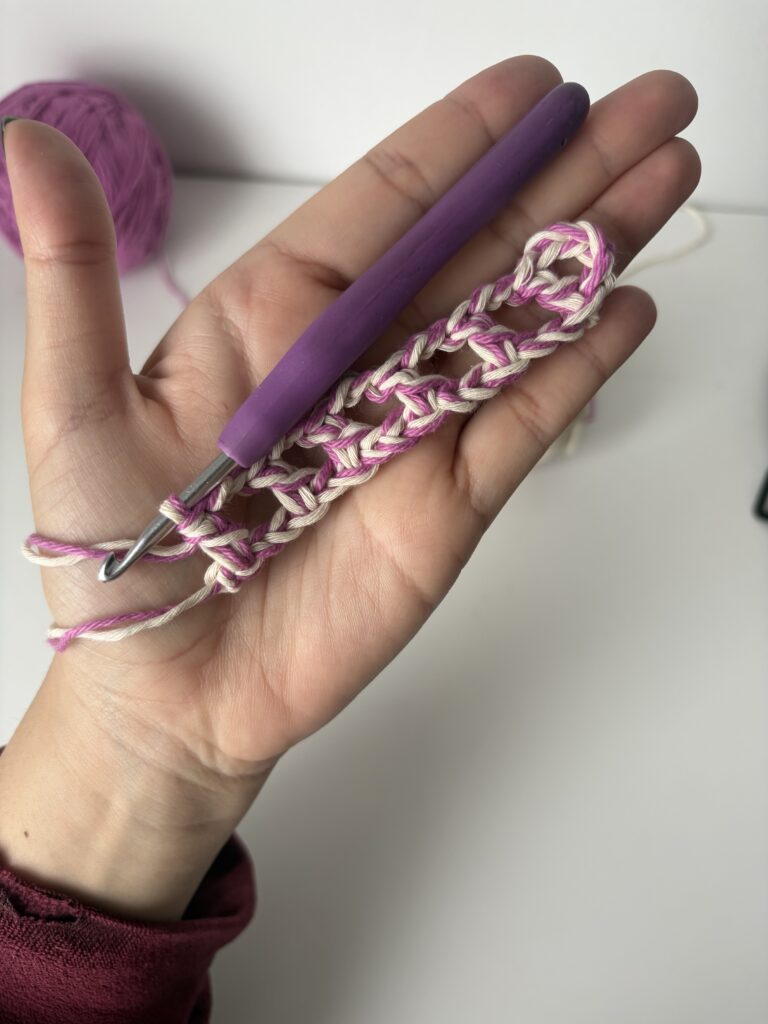
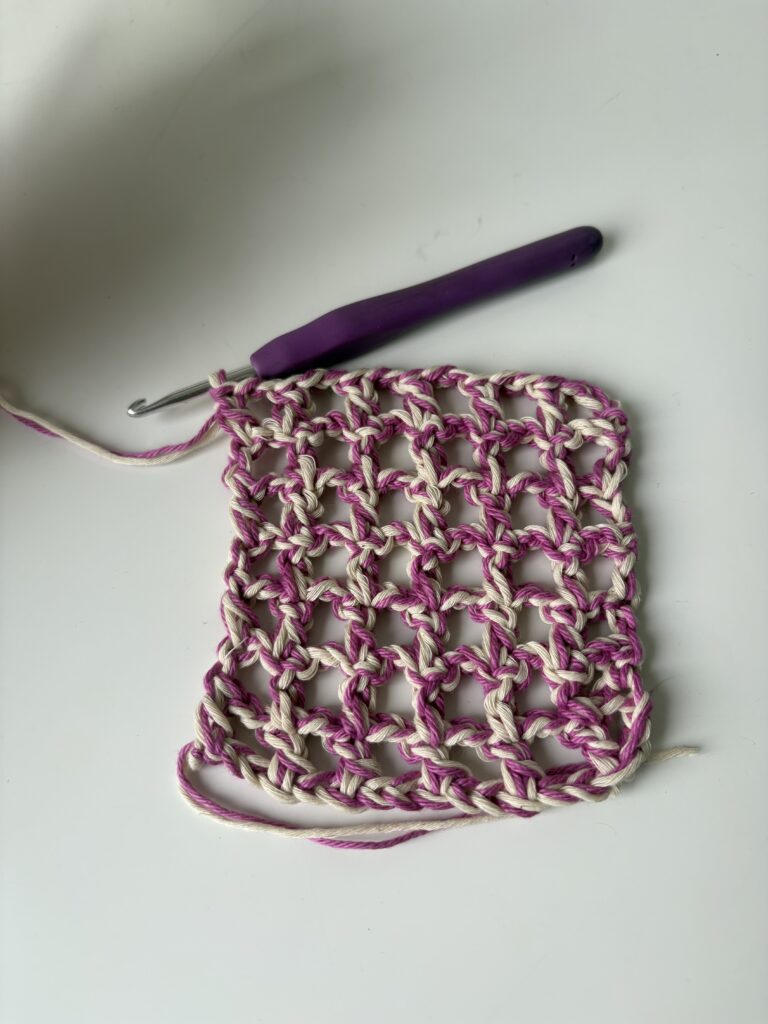
Row 2 – Row 13
Step 1: Ch 3, turn your work.
Step 2: Work 1 hdc directly into the top of the joining stitch from the previous row.
Step 3: Ch 3, work 1 hdc into the next stitch.
Step 4: Ch 2 to continue the mesh pattern.
Step 5 (Finishing the row): When you reach the very end, work your final 1 hdc into the last chain (the corner stitch) to cleanly complete the final mesh square of the row.
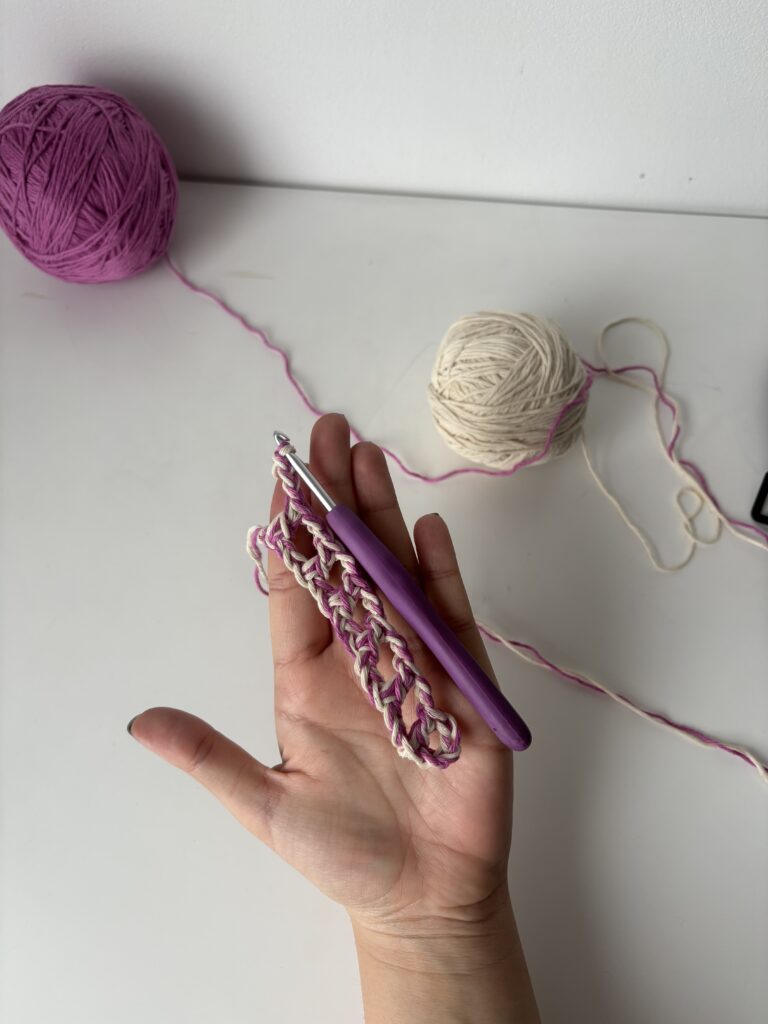
Repeat for the Second Panel! Now that you have finished your first mesh grid, simply repeat the exact same process from the very beginning to create the second panel (the back of your bag). Once you have both matching rectangular panels ready.
How to Make the Straps & Closure
For this pattern, you have two great options for creating the strap. Both choices double as the closure system for the bag, ensuring your belongings stay 100% secure while you travel!
Option 1: The Fast & Simple Chain Strap
If you want a quick project, you can create a beautiful textured strap simply by crocheting a long chain while keeping both yarn colors held together. The two strands will naturally create a lovely, thick, cord-like visual effect.
How to do it: Chain normally until the strap reaches your desired length to wear it comfortably as a crossbody bag.
The Security Extra: Once it reaches your ideal length, add 15 more chains. This extra length is crucial, as it will be woven through the final mesh row of the bag to act as the drawstring closure.
Option 2: The Sturdy Textured Cord (Recommended for Travel)
If you want a more professional, high-end finish that mimics a woven rope and offers zero stretch, this textured cord is the perfect choice.
How to make the cord:
The Double-Tail Slip Knot: Make a slip knot keeping both yarn strands together, but leave two tails: the long working yarn (connected to your yarn) and a shorter tail of about 15 cm (6 inches).
The First Movement: Take the shorter tail and yarn over your hook from front to back.
The Lock: Take the long working yarn, yarn over, and pull it through both loops on your hook. You now have one loop left on your hook.
The Repeat Pattern: Look at the right side of your stitch. You will see a small loop (or bar) on the side. Insert your hook into that right-side loop, yarn over with your working yarn, and pull through both loops on your hook.
Repeat step 4 continuously until your cord reaches your desired crossbody length plus an extra 5 inches (to weave through the top of the mini bag as a drawstring).
🎥 Prefer a Visual Guide? Since this cord technique is very visual, make sure to watch the quick video tutorial below to see the exact hand movements step-by-step!
How to make a crochet strap
Note: You only need to make one long strap, not two! This single strap will be attached to both sides of the pouch, and the remaining length is what weaves through the top to secure your items.
Assembling Your Phone Bag & Adding the Strap
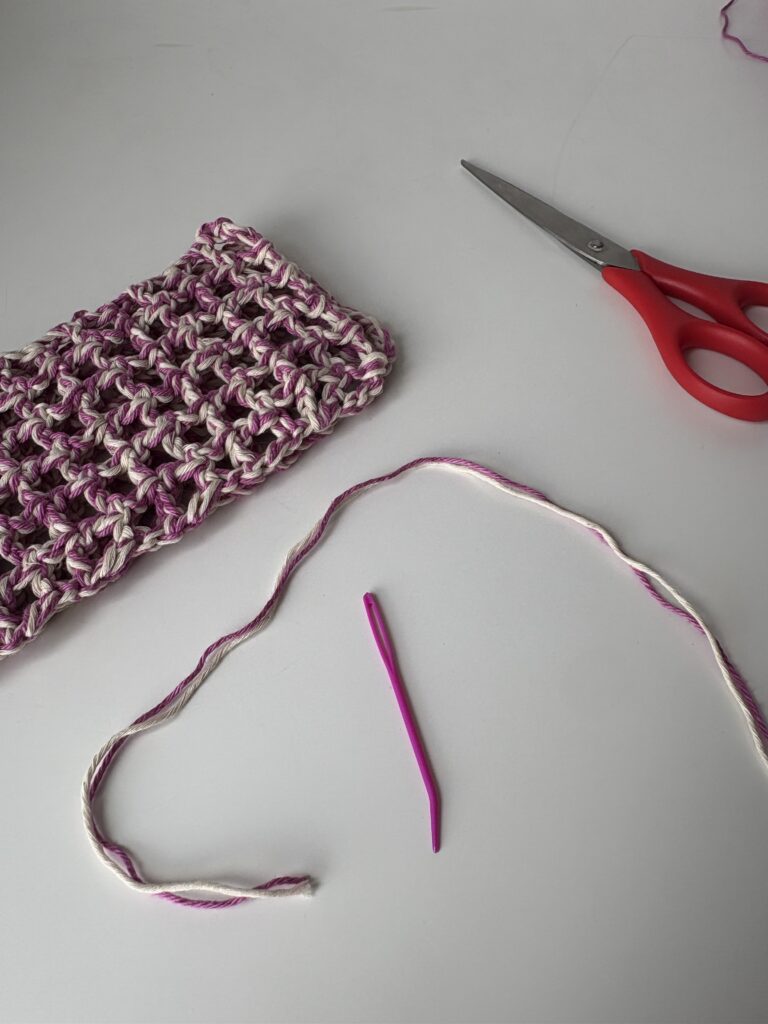
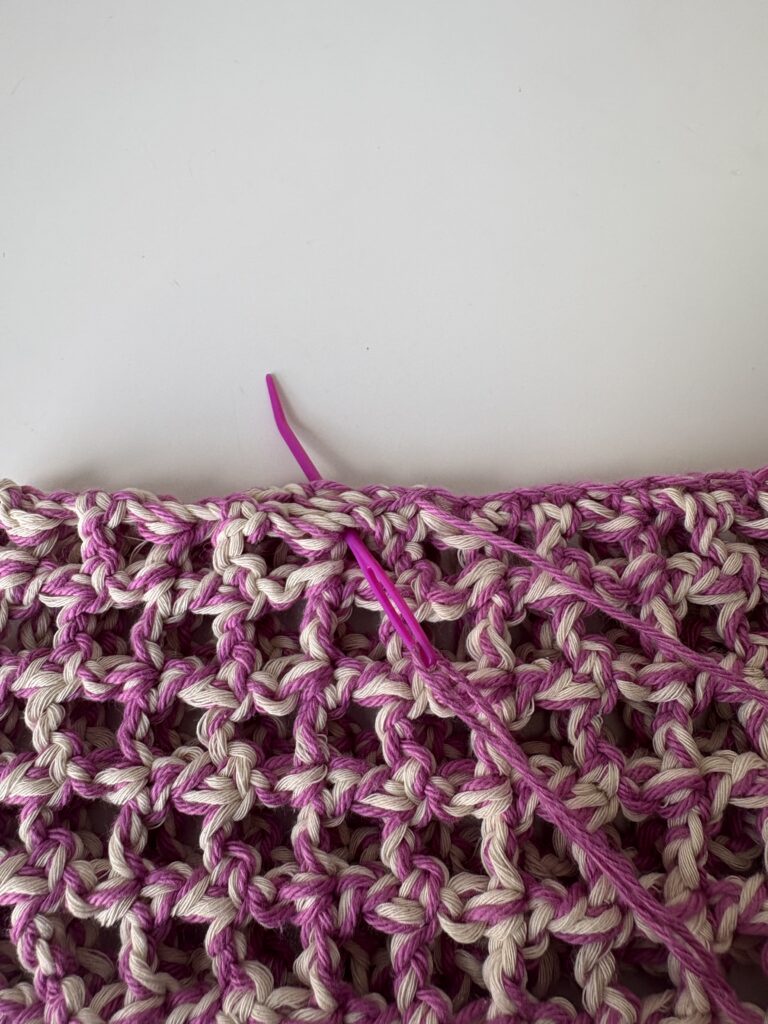
Joining the Panels (The Tapestry Needle Seam)
Using a yarn needle (tapestry needle) and a piece of your yarn, align both panels together. Start sewing at one of the top corners, move all the way down the side, across the bottom base, and back up to the other top corner.
The Professional Finish: Once you have finished sewing the sides and bottom, weave in your ends and turn the bag inside out! Flipping the pouch hides the seamed edges on the inside, leaving you with a perfectly clean, seamless, and professional look on the outside. Plus, this tapestry needle method leaves the absolute maximum amount of space inside the bag, making it much easier to slide your phone in and out smoothly.
Attaching the Cord & Creating the Secure Closure
Instead of making a separate strap and a separate drawstring, we are going to use your cord for both!
Take one end of your cord and securely knot it to the top-left corner of your assembled bag.
Take the other side of the cord, measure your ideal crossbody length, and knot it securely to the top-right corner of the bag.
You will now have a long remaining piece of cord left over on one side. Take this long tail and weave it (over and under) through the spaces of the very last mesh row at the top of the bag.
Pulling this remaining tail will instantly cinch the top shut, creating a secure drawstring closure that keeps your phone completely safe while you travel!
Optional: Adding Beachwear Charms for a Summer Vibe
To give your mini pouch that ultimate beachy, coastal aesthetic, you can easily add some fun hardware or charms to the end of your drawstring cord.
For my sample bag, I used beautiful sea star charms to lean into that carefree beachwear trend.
How to add them: Once your strap is woven through the top row, simply slide your favorite charms or wooden beads onto the remaining end of the cord. Tie a secure double-knot at the very tip so they stay perfectly in place.
Not only do these charms look incredibly cute and trendy, but the extra weight also helps keep the drawstring securely pulled down while you are on the move!
Before you pack your new secure phone purse for your next vacation, why not add one more summer essential to your project bag? Check out my step-by-step Checkered Bikini Top tutorialto complete your handmade beachwear collection. Happy crocheting, and don’t forget to share your finished sets with me.


One thought on “Free Crochet Pattern – Summer Mesh Phone Bag”