Begginer Friendly Guide
Summer is just around the corner, and so many people still underestimate the power a hair accessory has to elevate an entire outfit.
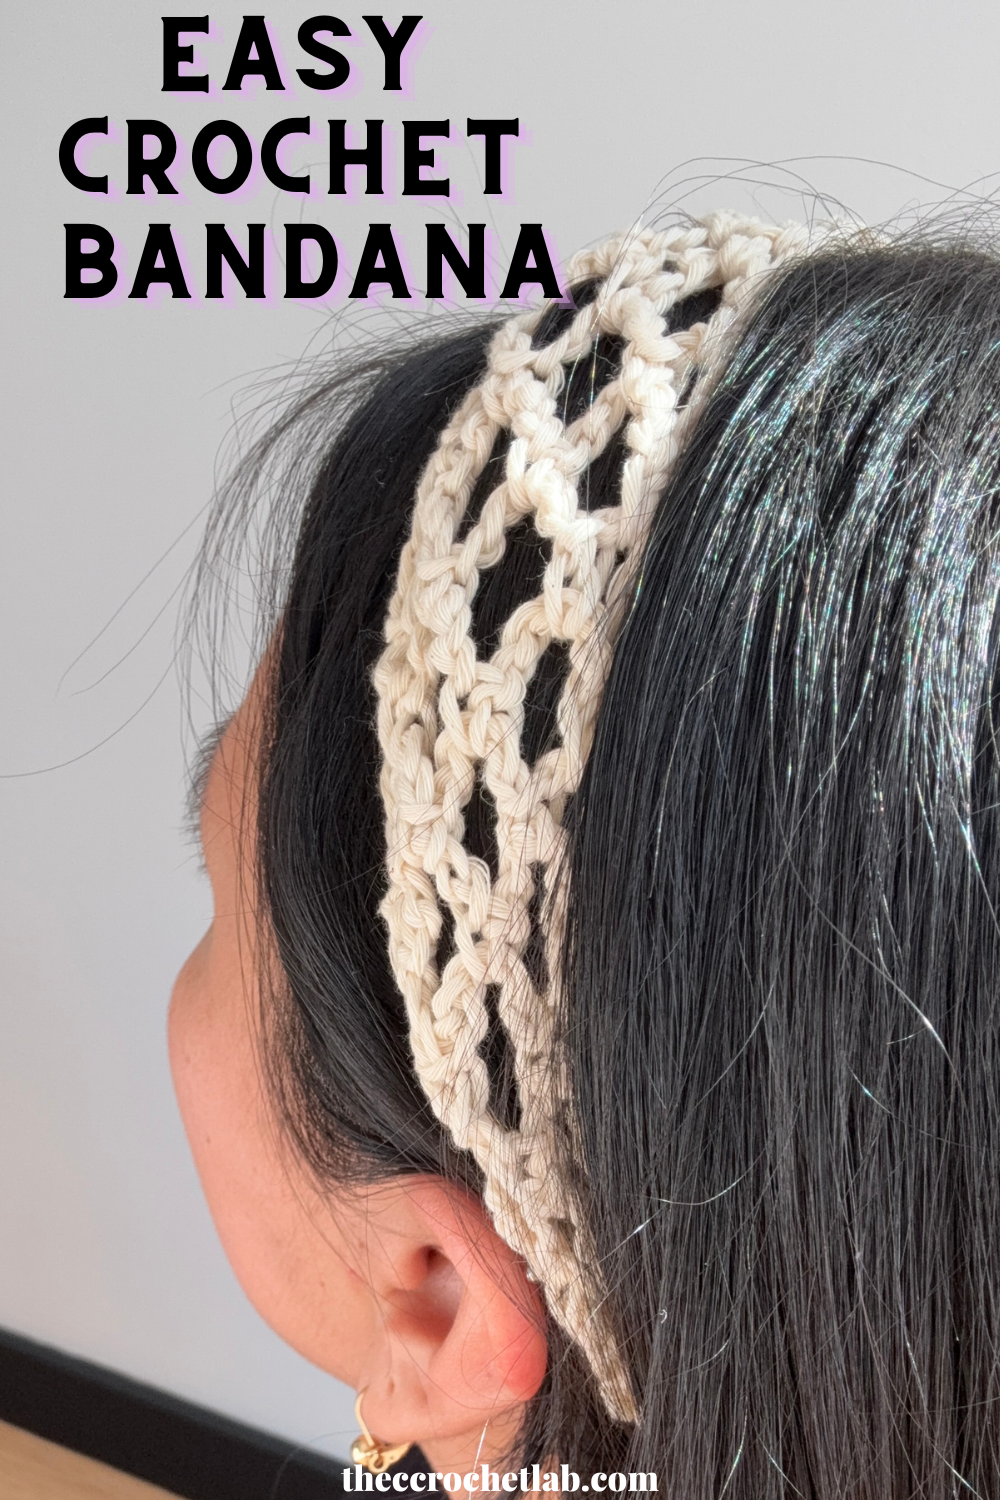
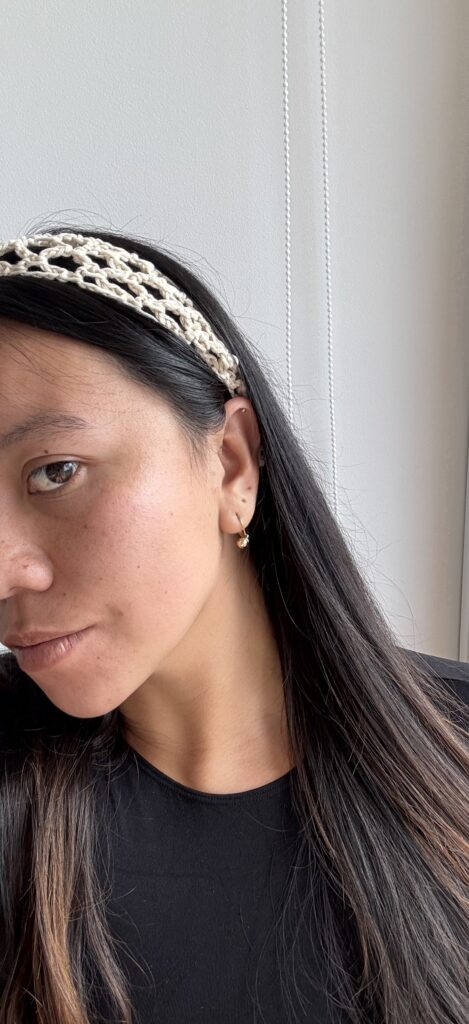
This delicate headband is going to be the perfect finishing touch or the ultimate statement piece for your look. Needless to say, it is absolutely perfect for summer! Plus, it is so incredibly easy to make that you can whip up an endless amount in different colors to match every single one of your outfits.
I completely fell in love with this project because, honestly, not only did I finish several of them in record time, but mastering this specific stitch guarantees I can keep creating so many different summer pieces thanks to its versatility.
How to Style Your Crochet Headband
This tie-back headband is incredibly versatile and the perfect accessory to elevate any casual outfit. Whether you are running errands, heading to the beach, or just having a cozy day at home, here are three easy ways to wear it:
1. The Boho Messy Bun
Throw your hair up into a high, effortless messy bun and tie the headband right behind your ears. Let a few face-framing strands fall loose in the front. It gives off a perfect, laid-back summer vibe!
2. Half-Up, Half-Down Romantic Vibe
Section the top half of your hair and secure it with a clip or scrunchie. Place the headband right at your hairline or slightly back, tying it underneath the top section of hair at the nape of your neck. It looks gorgeous with wavy or curly hair textures!
3. Sleek & Practical (The Ultimate Everyday Look)
If you want to keep your hair completely out of your face, brush it straight back and wear the headband over smooth, open hair. This is perfect for skincare routines, working from home, or windy beach days.
CUSTOMIZING THE PATTERN
This pattern is easy to customize to suit your personal style.
- Color: Feel free to experiment with different colors! I highly recommend using high-contrast colors that pop against your hair.
- Custom Sizing: Headbands stretch over time! To get the perfect fit, make sure the length of your band is about 1 to 2 inches (2.5 to 5 cm) shorter than your actual head circumference. You can easily adjust the size by adding or subtracting rows.
- Yarn choice: Different yarn fibers and weights will affect the final texture and thickness. For best results, choose 100% cotton yarn.
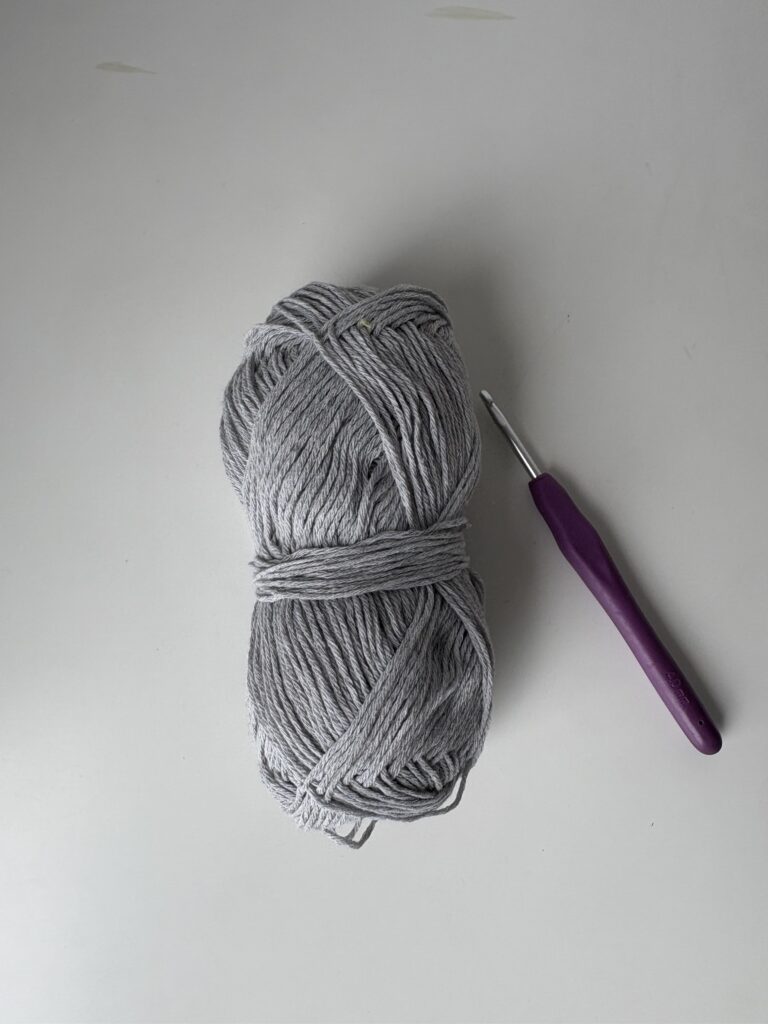
MATERIALS
- Yarn: 20 to 40 grams of cotton yarn. (Perfect for using up your scrap yarn leftovers!)
- Crochet hook: Size recommended for your chosen yarn I used a 4.0 mm
- Notions: Scissors, and a tape measure.
STITCH ABBREVIATIONS (US TERMS)
- sk: Slip Knot
- ch : Chain
- sts: Stitches
- hdc : Single Crochet
- dec: Decrease
PATTERN NOTES
- Stitch Count: Make sure to count your stitches carefully at the end of each row to ensure your headband stays perfectly even.
- Images: Use the reference images provided for guidance
- Tension: Try to keep an even, slightly firm tension. If your stitches are too loose, the headband might slip off your hair.
INSTRUCTIONS
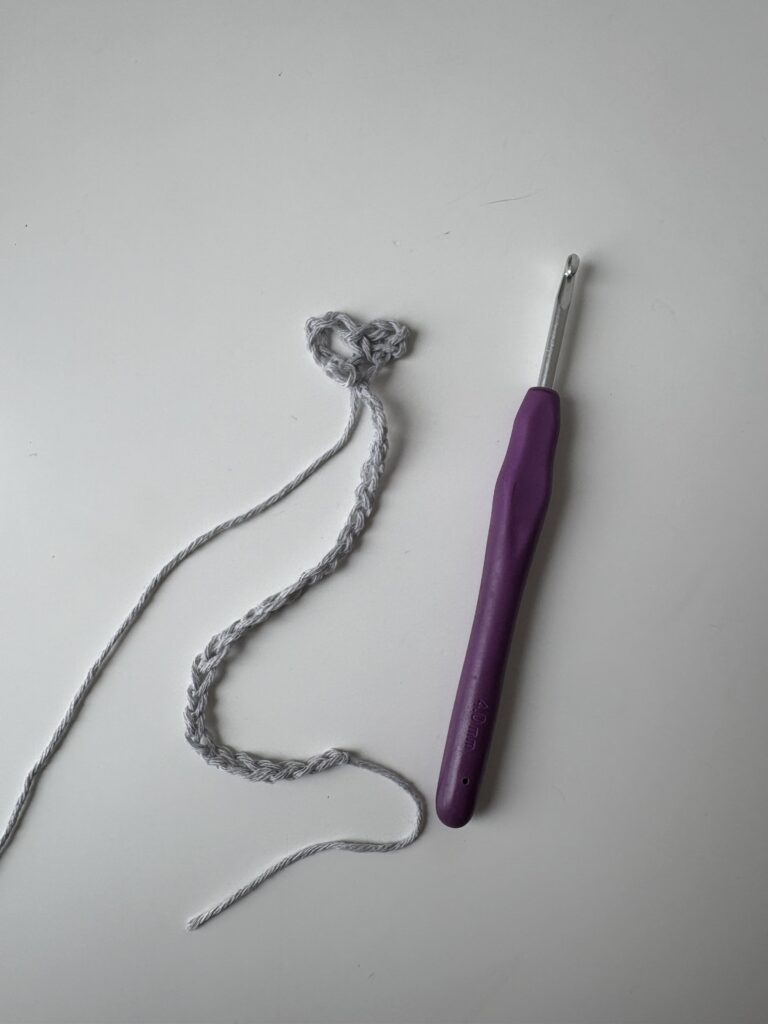
Row 1: Make a slip knot and ch 25. This chain will form the first tie strap used to secure the headband at the nape of your neck.
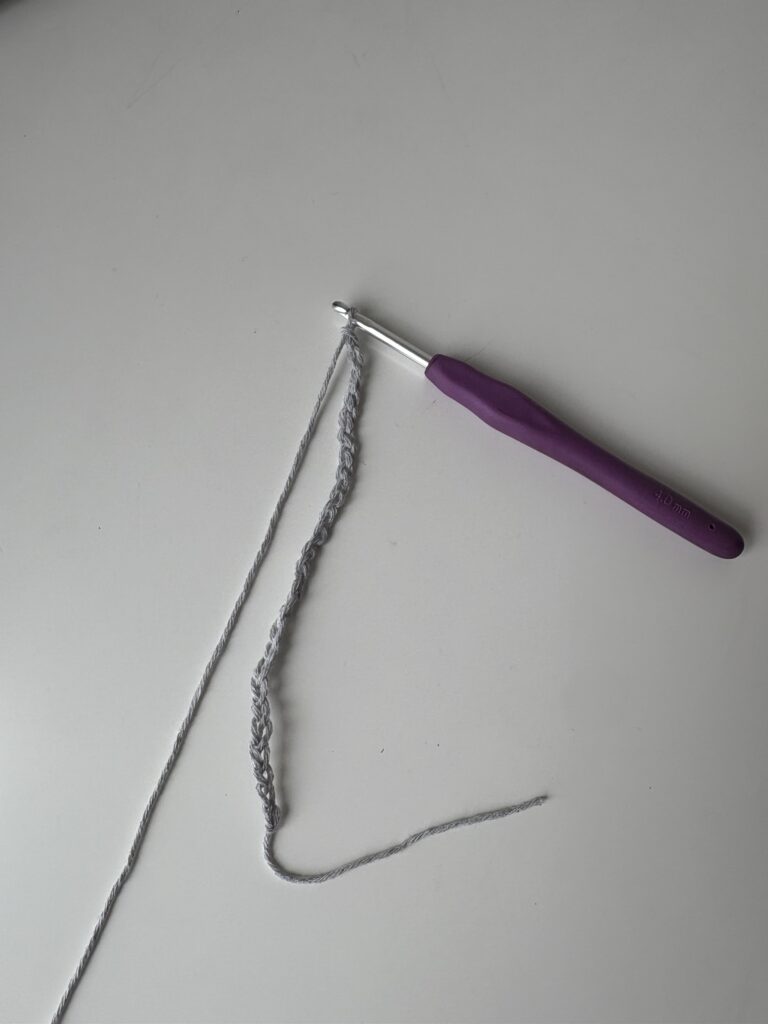
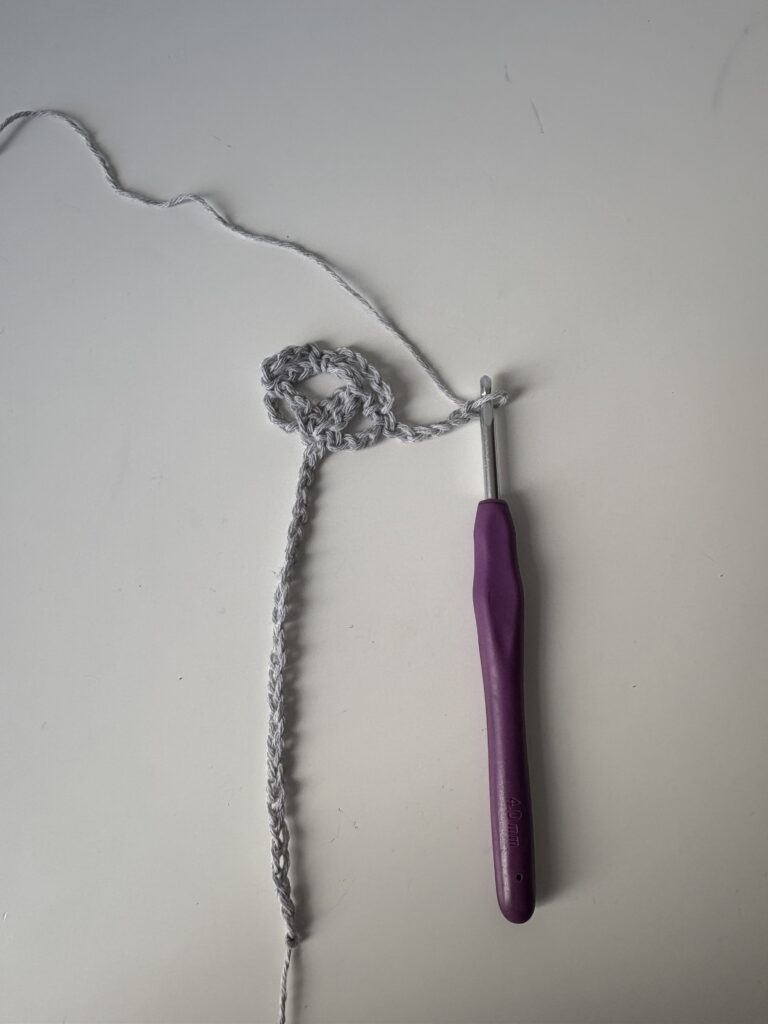
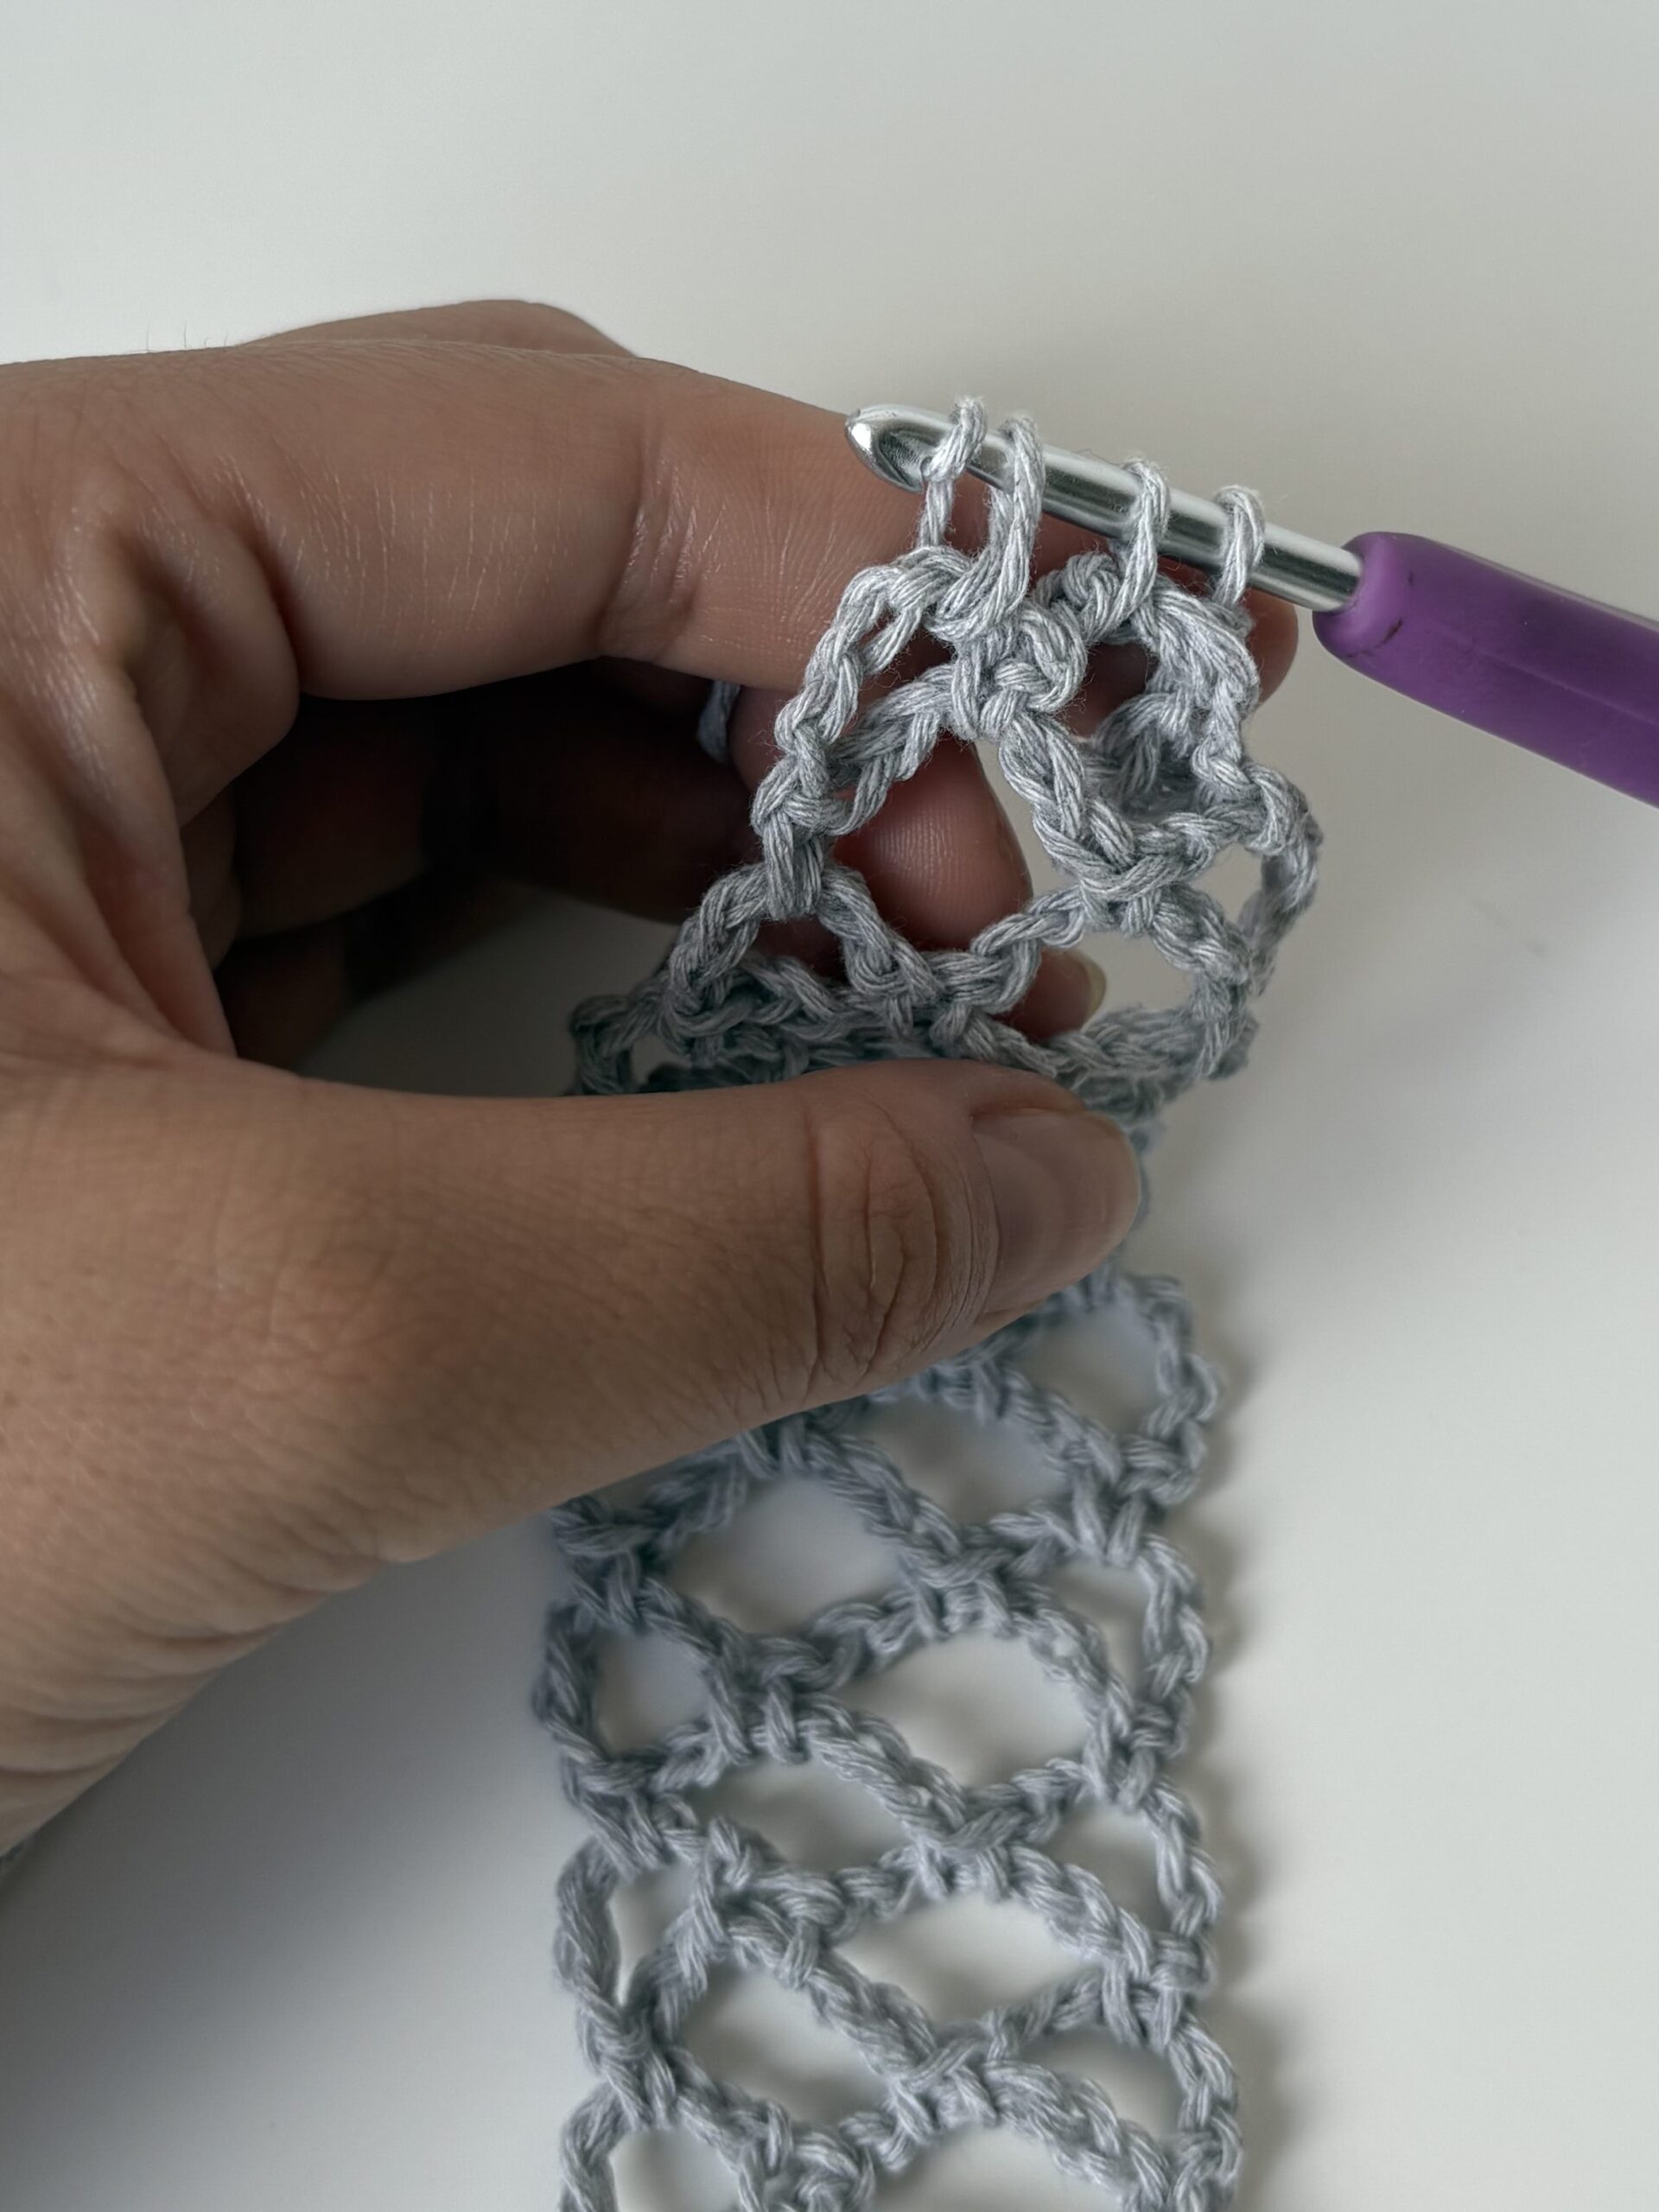
Row 2: Chain 5 and make a single crochet into the 5th chain from the hook. Repeat this step once more into the exact same stitch. You will now have two small chain loops in the same stitch, which will serve as the base for your headband.
Row 3: Chain 5, then make 1 single crochet into the first loop. Next, chain 5 again, and make 1 single crochet into the second loop.
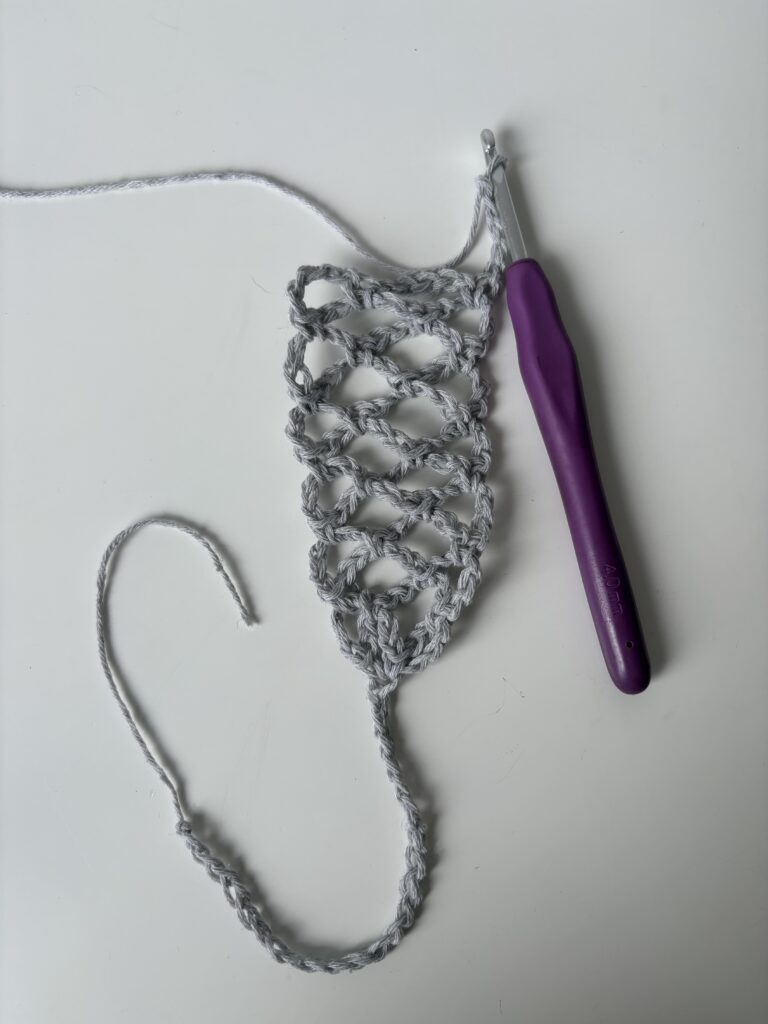
Row 4 – final : Chain 5, then make 1 single crochet into the first loop. Next, chain 5 again, and make 1 single crochet into the second loop.
This is what your work should look like at this point!
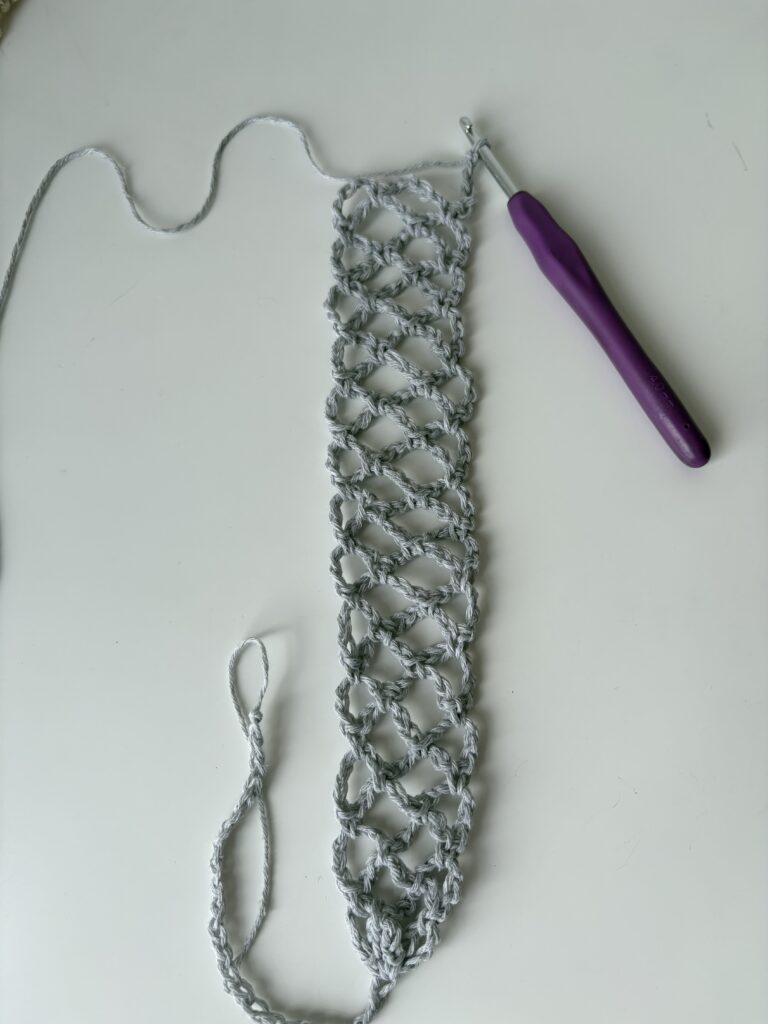
Repeat this process until you reach your desired length. I highly recommend wrapping the headband around your head as you go to check the fit. It might look a bit small at first, but keep in mind that this mesh-like stitch stretches quite a bit!
Final Stitches
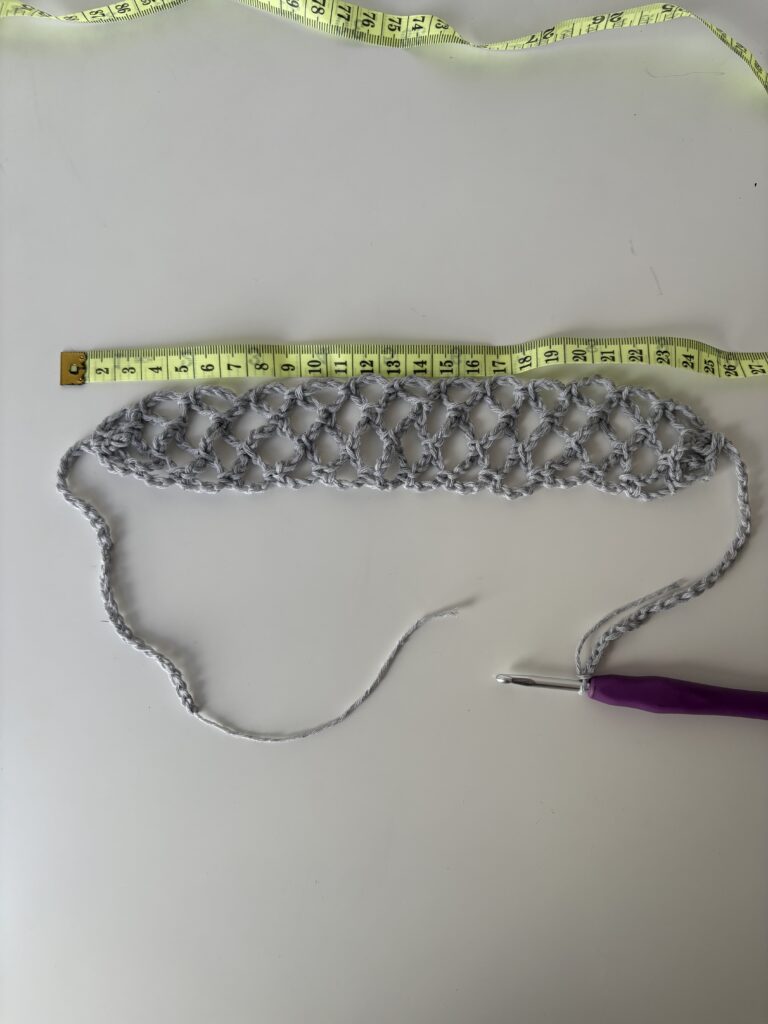
Once you’ve finished stitching and reached the perfect length for your head circumference, your piece should look something like this.
To finish your headband, you are going to make a decrease. First, insert your hook into the loop, yarn over, and pull up a loop (just like an unfinished single crochet). Immediately insert your hook into the next mesh loop, yarn over, and pull up another loop.
You will now have 3 loops on your hook. Yarn over one last time and pull through all 3 loops. This creates your final stitch and perfectly closes the headband shape!
Next, chain 25 to create the other tie strap to secure the headband behind your head.
And that’s it! This is what my finished headband looks like!
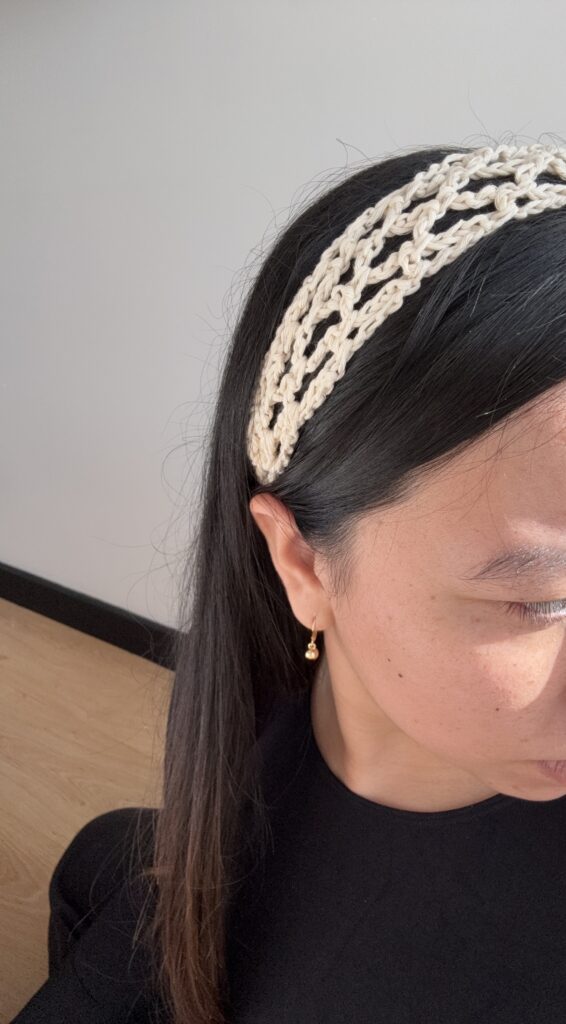
For reference, my headband measures 25 cm (which is about 10 inches). But as I mentioned before, this will depend 100% on your own head circumference!
FAQ!
- Can I use acrylic yarn instead of cotton? You can, but cotton is highly recommended for this specific pattern. Acrylic tends to stretch out permanently over time and doesn’t absorb sweat, while cotton keeps its structural integrity and feels fresh on hot days.
- How long does it take to make this headband? This is a super quick project! Because it uses a simple mesh stitch, it usually takes between 30 to 45 minutes to finish, making it a perfect last-minute gift or market bake product.
- Is this pattern suitable for absolute beginners? Yes! If you know how to chain and make a single crochet, you can absolutely make this. Plus, you can follow along with the step-by-step video tutorial included in this post.
If you loved this pattern, you might also want to check out my Checkered Bandana Crochet Pattern! It’s another perfect, beginner-friendly accessory that is absolutely ideal for summer. Happy crocheting!
2 thoughts on “How to Crochet a Headband Pattern – Summer Crochet Idea”