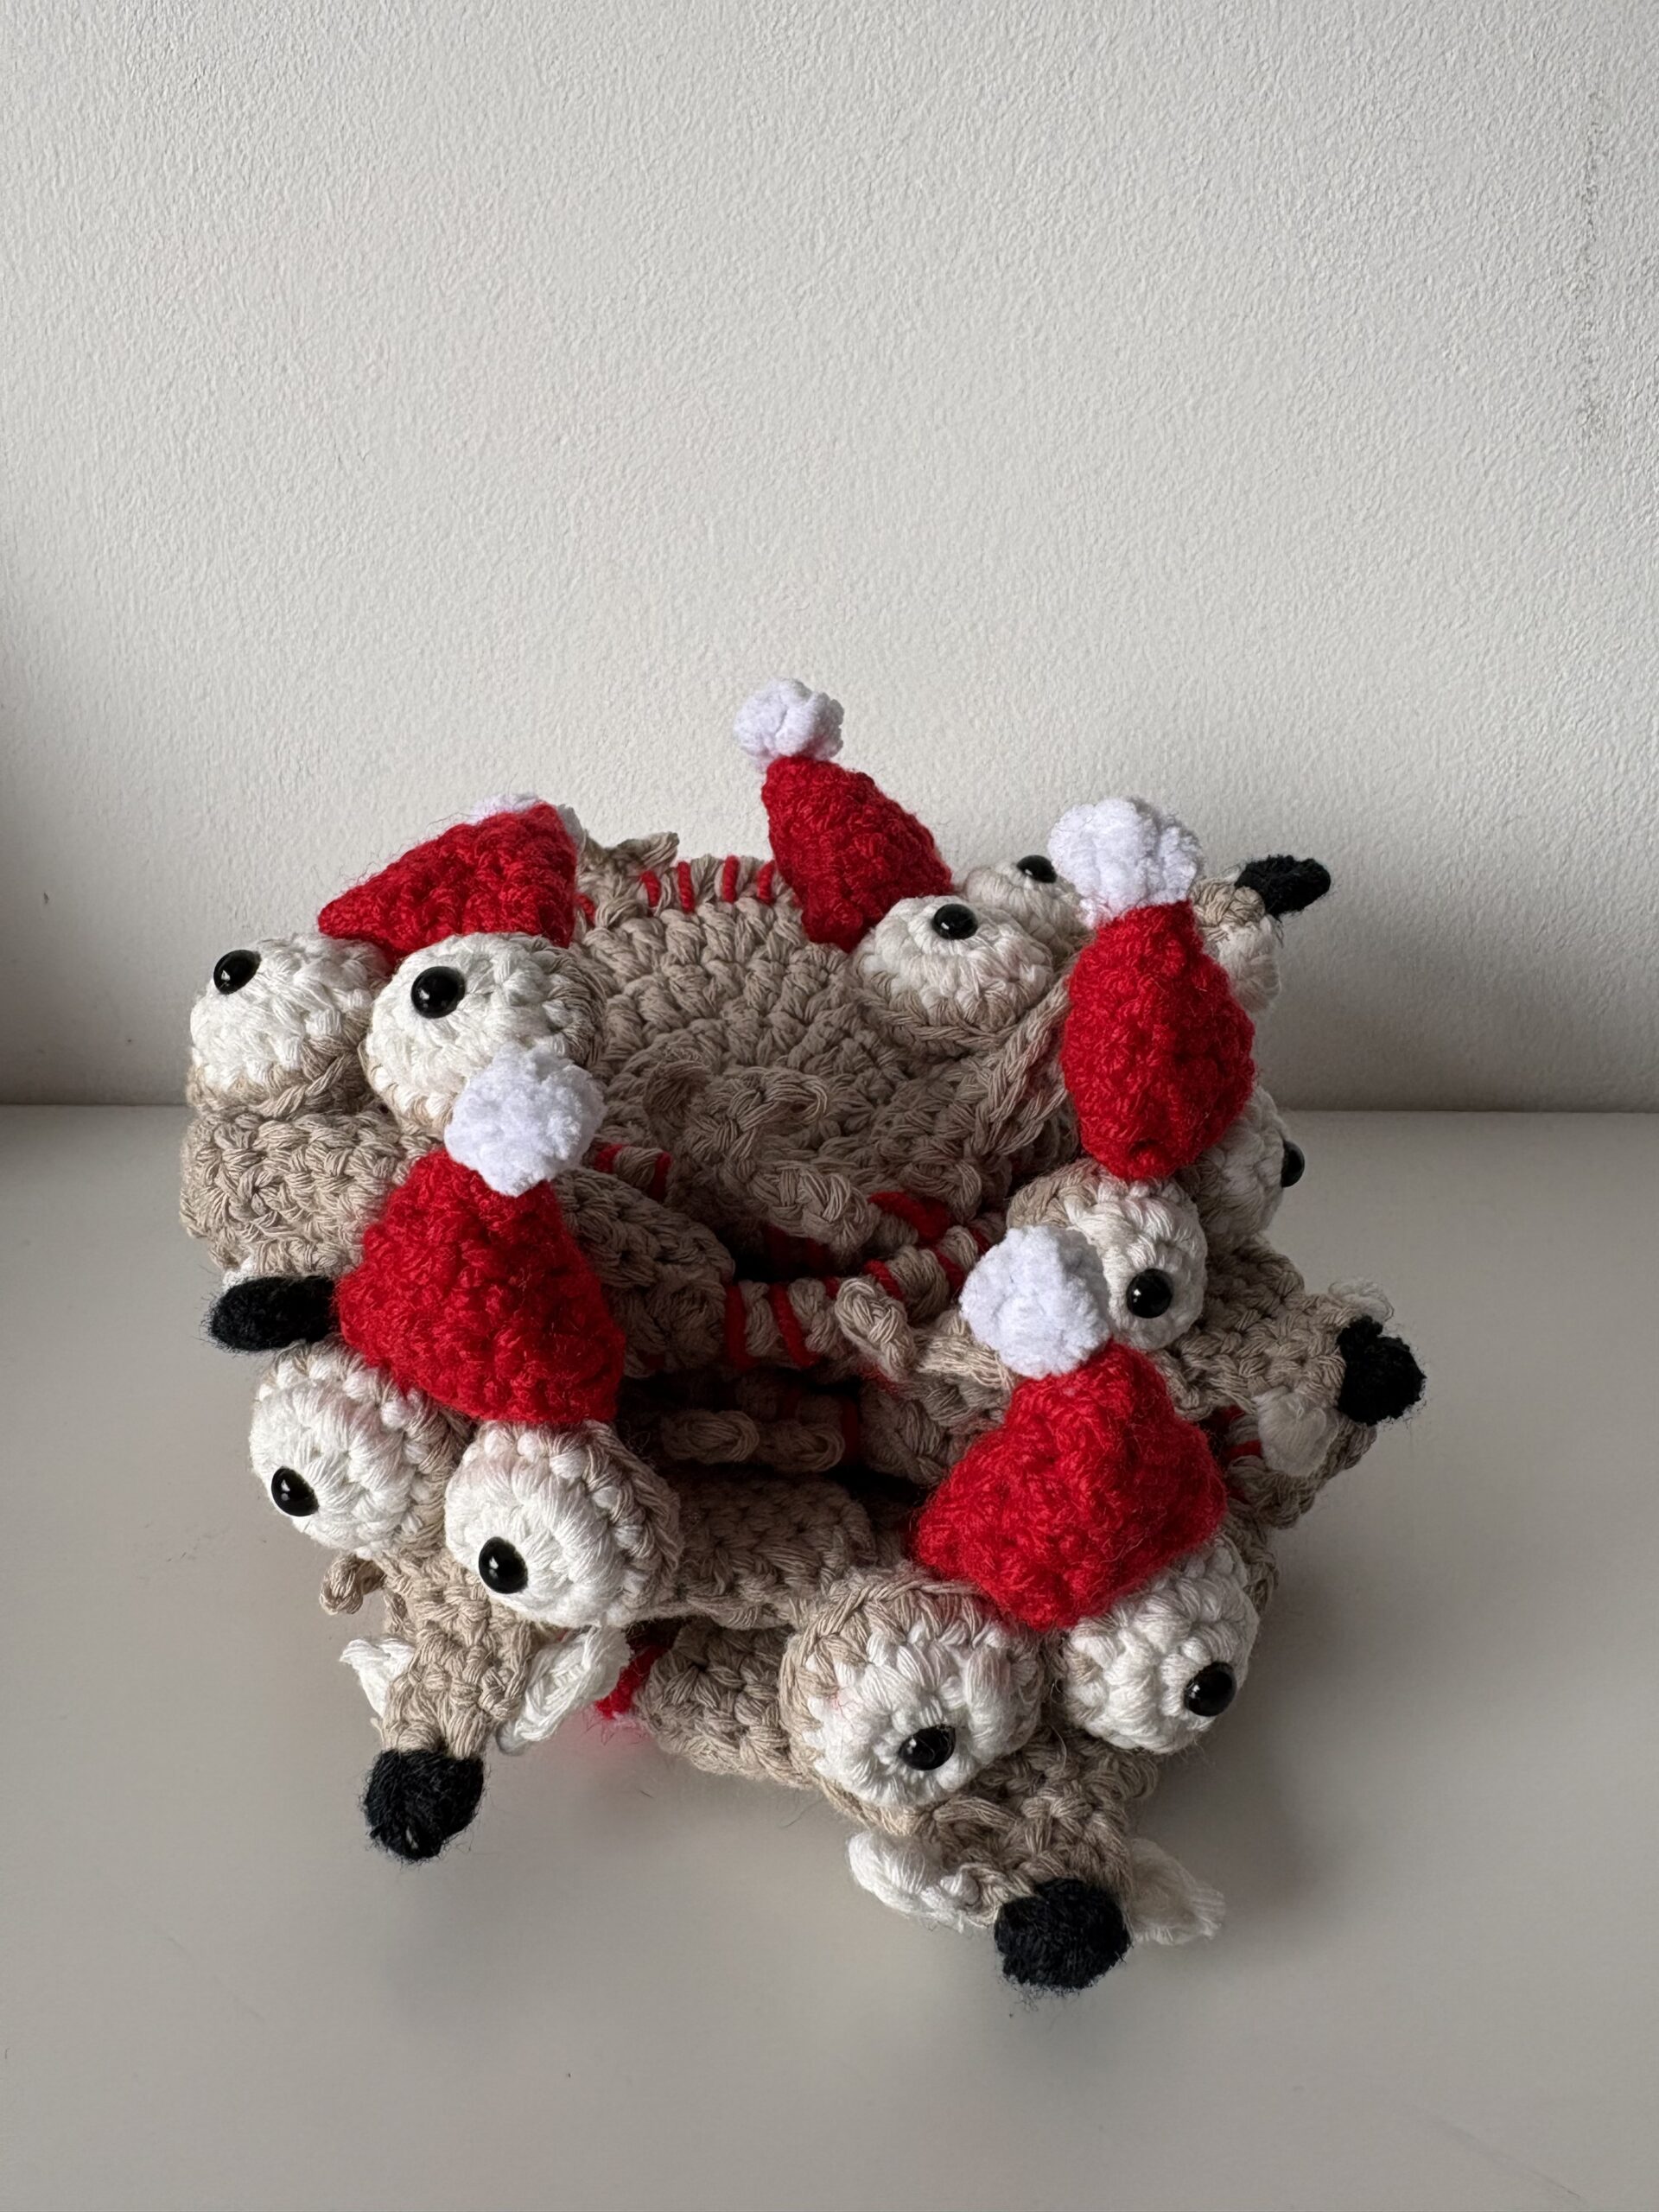
Looking for a free Christmas crochet coaster pattern that is cute, a little weird and perfect for the holidays? This crochet coaster is shaped like an opossum, with four little paws, big pop-up eyes, a pointy black nose, two tiny teeth and a fluffy Santa hat. It makes a great Christmas gift, a fun table decoration, or the kind of thing that gets a laugh when guests set their drink down.
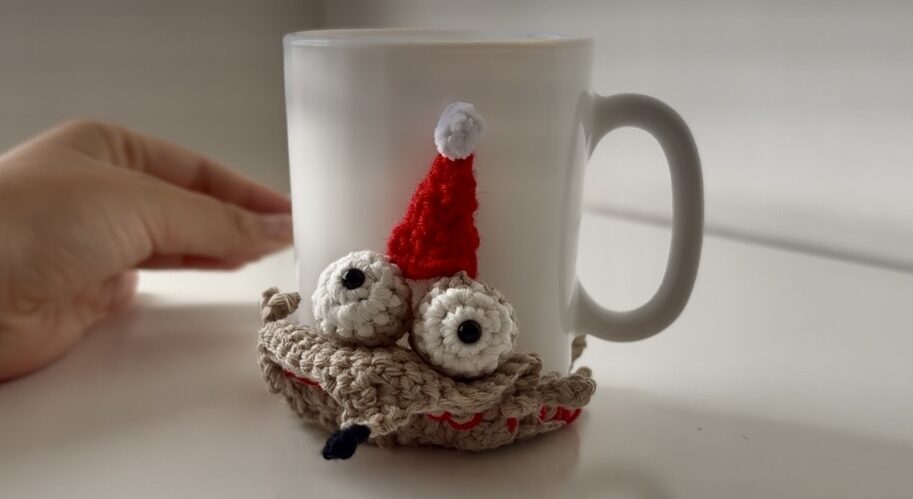
This pattern uses basic stitches (double crochet, single crochet, increases, decreases and a magic ring), so it is a good next step if you are comfortable with amigurumi basics.
If you learn better by watching, here is the full video tutorial on YouTube so you can follow along:
What You Will Need
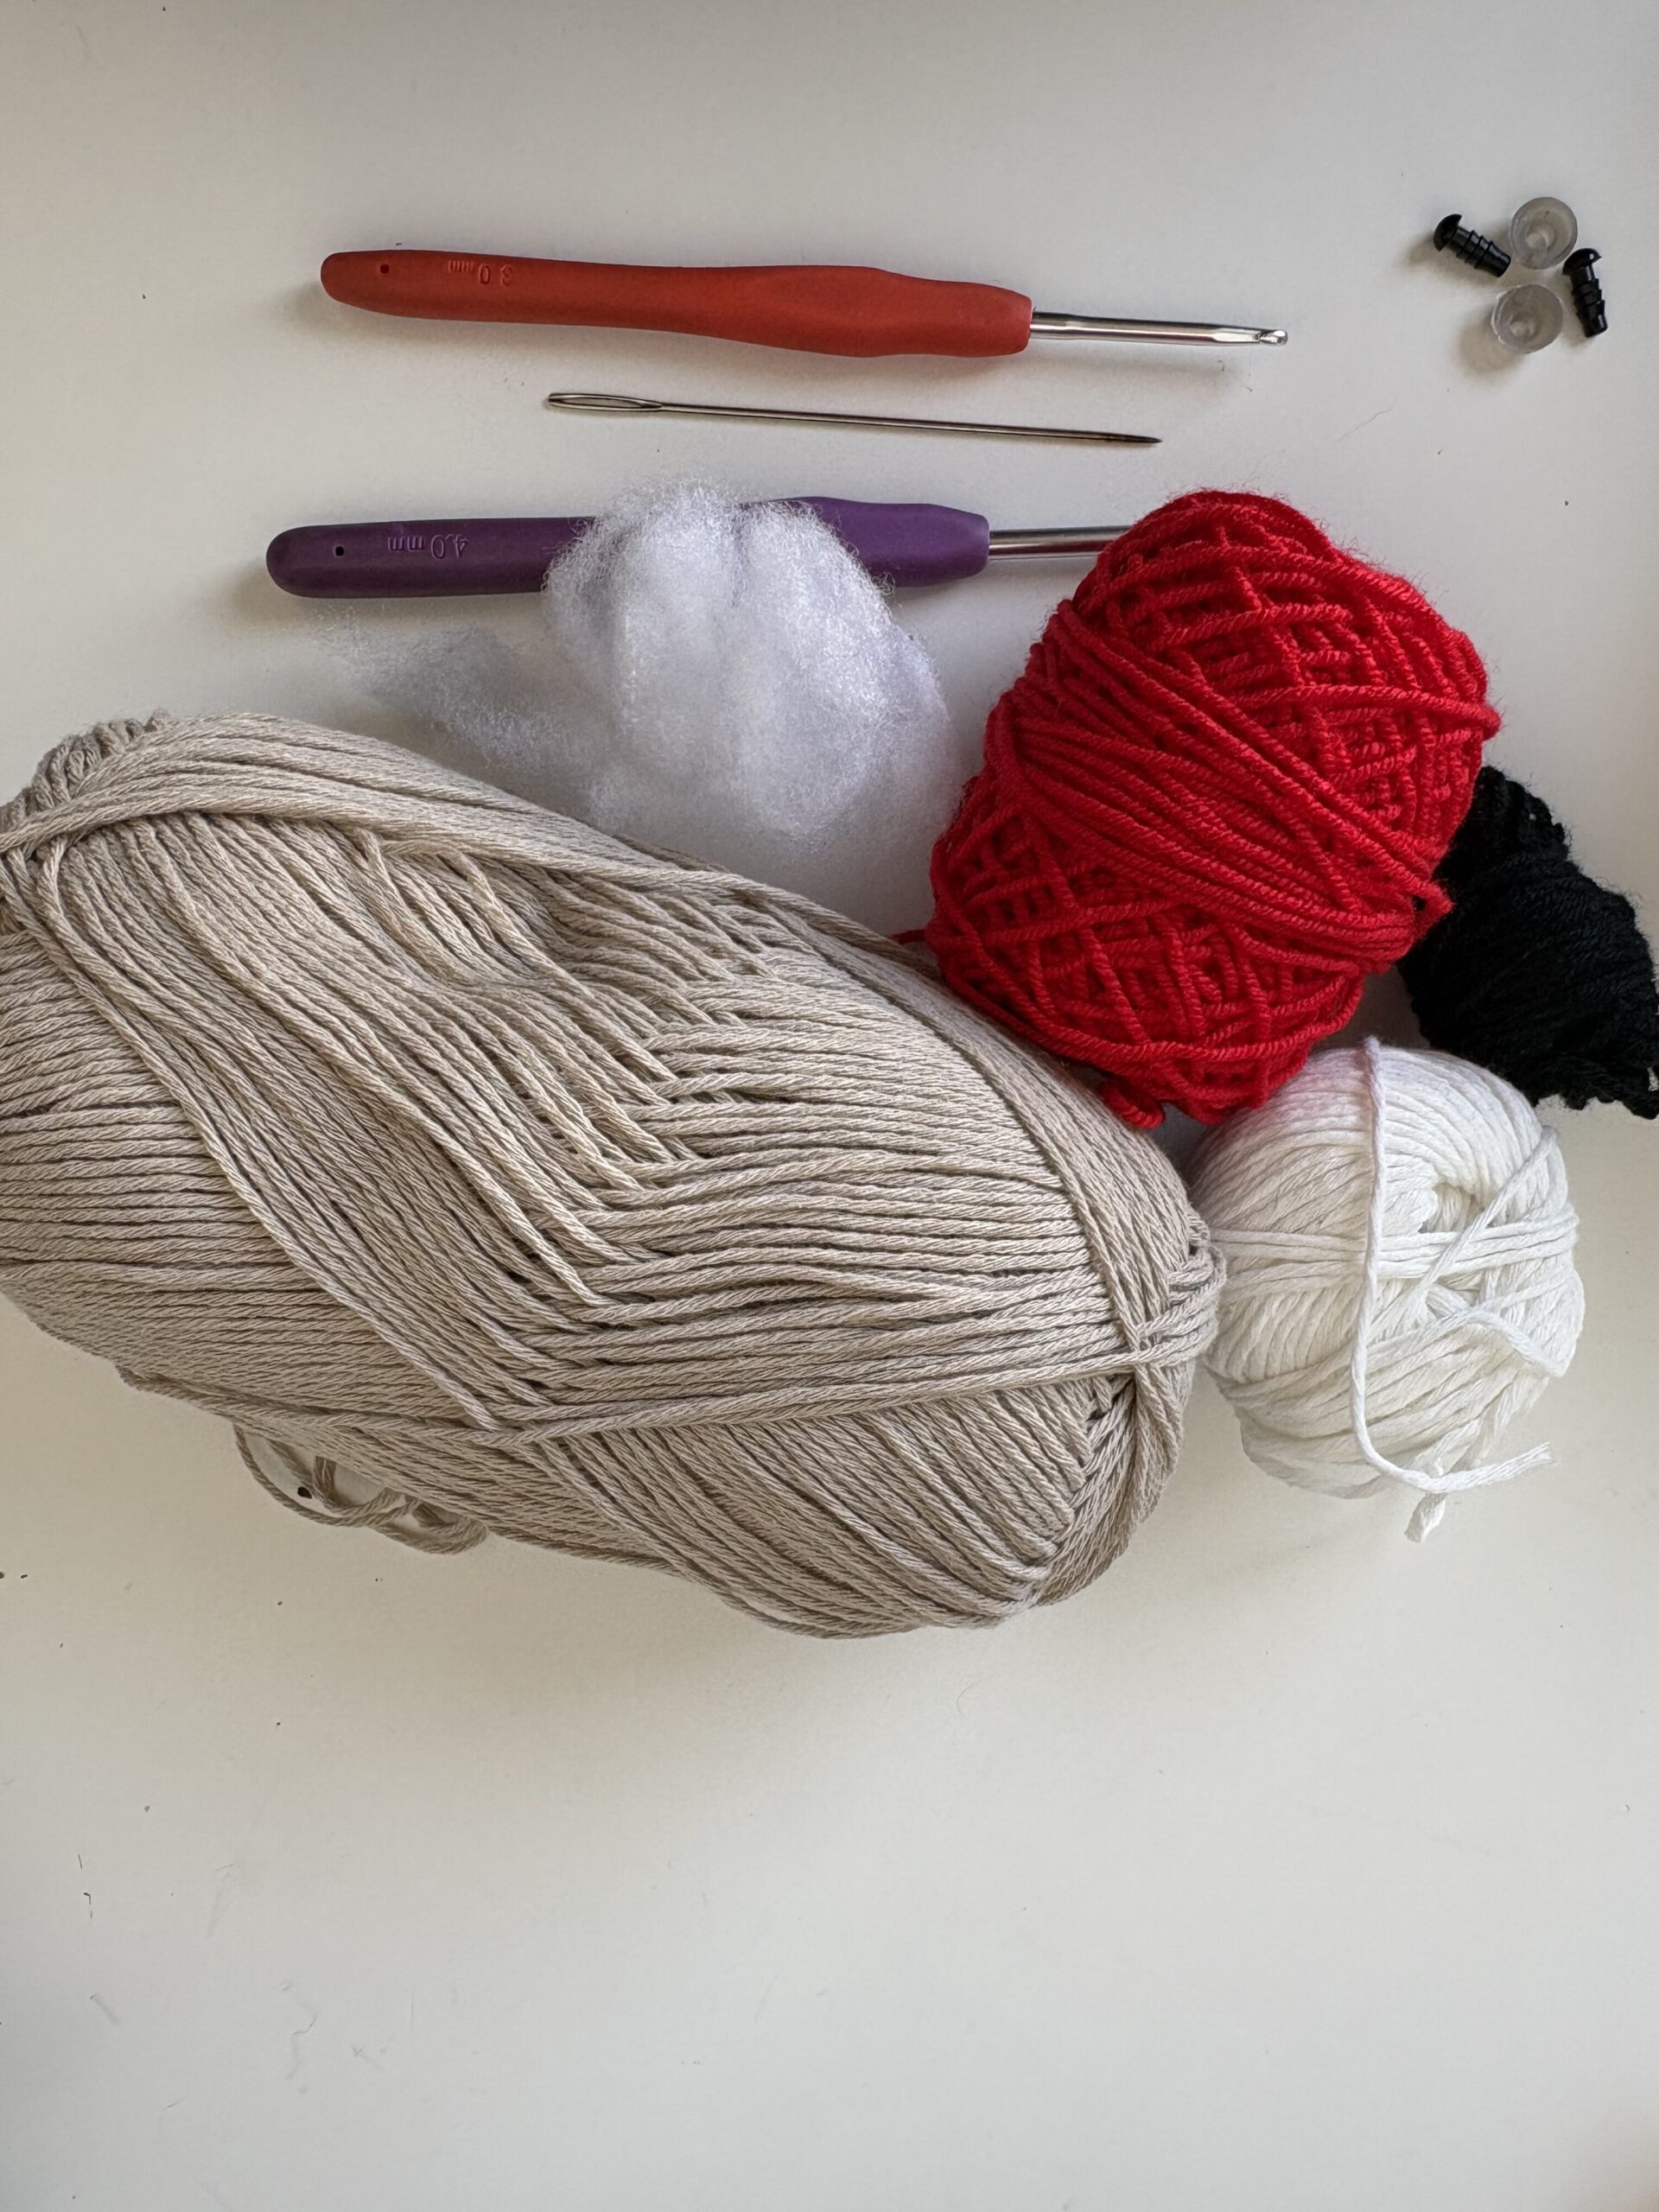
- Yarn in red, black, white and beige (or gray)
- Hook 4.0 mm for the coaster body
- Hook 3.0 mm for the eyes and head
- Hook 2.5 mm for the teeth, hat and assembly (optional but helpful for small spaces)
- Safety eyes, 2
- A little chenille yarn for the hat pom-pom (regular yarn works too, chenille just makes it fluffier)
- Yarn needle
- Scissors
- A small amount of toy stuffing
Abbreviations (US Terms)
- MR: magic ring
- ch: chain
- sl st: slip stitch
- sc: single crochet
- dc: double crochet
- inc: increase (2 stitches in the same stitch)
- dec: decrease (sc2tog)
- BLO: back loop only
Important Tips Before You Start
- Crochet tightly. The coaster is worked with two strands held together, and the tighter your fabric, the better the edges stand up and the more the coaster keeps its shape. A loose fabric gives you a flat coaster, which is exactly what we don’t want. If yours turns out floppy, go down a hook size.
- Two strands, one color. For the body, hold two strands of the same color together. You can use two skeins, or pull the outer and inner strands from the same skein.
- Join every round with a sl st to the first stitch, and ch 2 for height at the start of each dc round.
STEP BY STEP TUTORIAL
Step 1: The Coaster Body (Beige, 4.0 mm, Two Strands)
Round 1: Make a MR and work 10 dc into it. Join with a sl st and pull the ring very tight. (10 dc)
Round 2: Ch 2, then work 2 dc in each stitch around. Join. (20 dc)
Round 3: Ch 2, then 1 dc, inc around. Join. (30 dc)
Round 4: Ch 2, then 2 dc, inc around. Join. (40 dc)
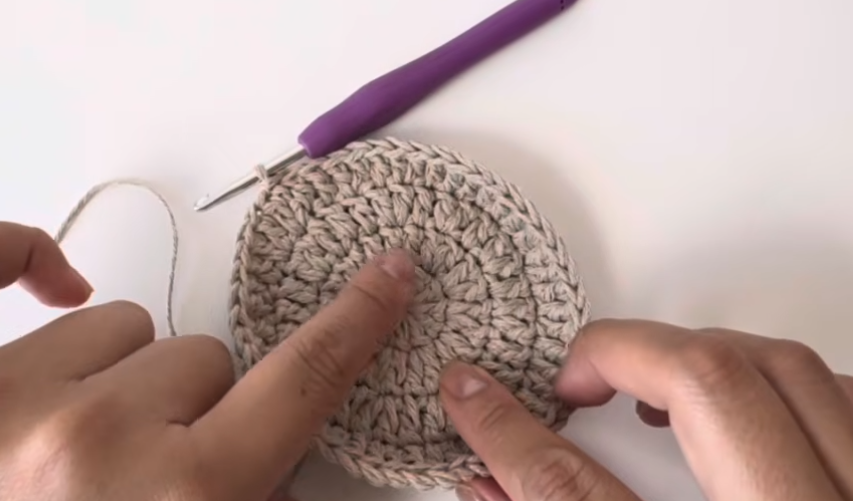
Round 5 (edging): Cut one of the beige strands and join a red one in its place, so the edge is red and beige (or red and gray). Work reverse single crochet (crab stitch) around: work backwards, in the opposite direction from your usual one. Insert the hook, bring the yarn up and finish like a normal sc. This adds tension to the edge, so the coaster stands out and doesn’t look so flat. Join with a sl st, fasten off and weave in the ends.
Step 2: The Legs (Make 4)
Each paw has three little toes.
- Ch 8.
- Work back along the chain with 4 sc to make the first toe.
- Work a second chain and come back along it to the start of the previous chain, to make the next toe chain 4. Repeat once more so the paw has three toes in total.
- Work sc along the rest of the starting chain. This straight part is what you will use to sew the leg to the coaster.
Repeat to make 4 legs.
Step 3: The Eyes (Make 2)
Round 1 (white, 3.0 mm): MR, 6 sc. Join with a sl st. (6 sc)
Round 2: Inc in each stitch around. Join. (12 sc)
Pull the ring tight, but not too tight: you need to leave a small hole for the safety eye.
Add the safety eye now. Before changing color, push the safety eye through the center hole and secure it with its backing. Cut the white, hide the tail well, and tighten so the eye can’t pop out.
Round 3 (body color): Join the beige by wrapping a small piece of yarn as if making a sc, then work 1 sc, inc around. (18 sc) Tuck the white tail inside the new color so the eye stays secure.
Round 4: Sc in the back loops only around, with no increases. This creates a neat ridge between the eye and the lid. (18 sc)
Add a tiny amount of stuffing, just enough to give the eye a round shape. Too much will make it hard to close.
Round 5 onward: Work decreases only, until it gets too tight to continue. Cut the tail, thread it through the remaining stitches, and pull it closed like a magic ring. Weave in the end.
Step 4: The Head (Beige, 3.0 mm)
Join every round with a sl st.
- Round 1: MR, 6 sc. (6)
- Round 2: Inc in each stitch. (12)
- Round 3: 1 sc, inc around. (18)
- Round 4: 2 sc, inc around. (24)
- Round 5: 3 sc, inc around. (30)
- Round 6: 2 sc, inc around. (40)
- Rounds 7 and 8: 1 sc in each stitch. (40)
The head will look very flat. That is normal.
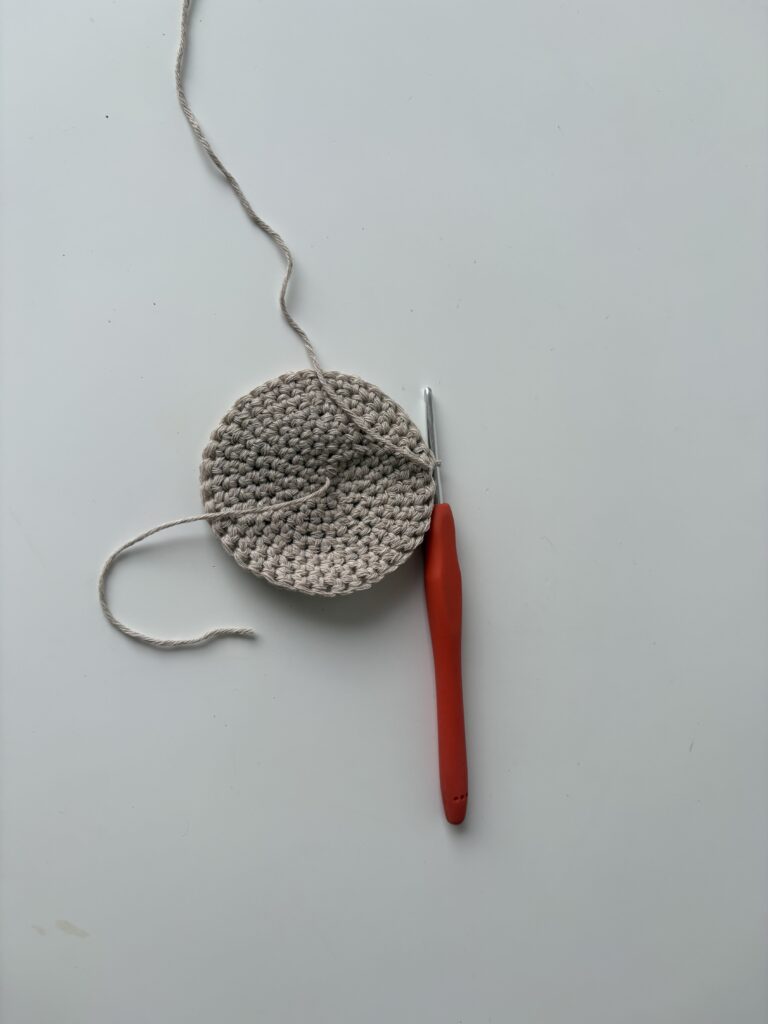
Step 5: Shape the Face and Nose
Fold the flat head in half. Along the open edge:
- Work 2 sc, then count 13 stitches. At stitch 14, insert the hook through the corner (the “ear”) on the opposite side and work 1 sc to secure it.
- Work 5 sc across the front. This forms the opossum’s little mouth.
- Count 13 stitches again and, at stitch 14, join the other ear to the opposite side with 1 sc.
- Work 4 or 5 sc on this last part so it matches the first side.
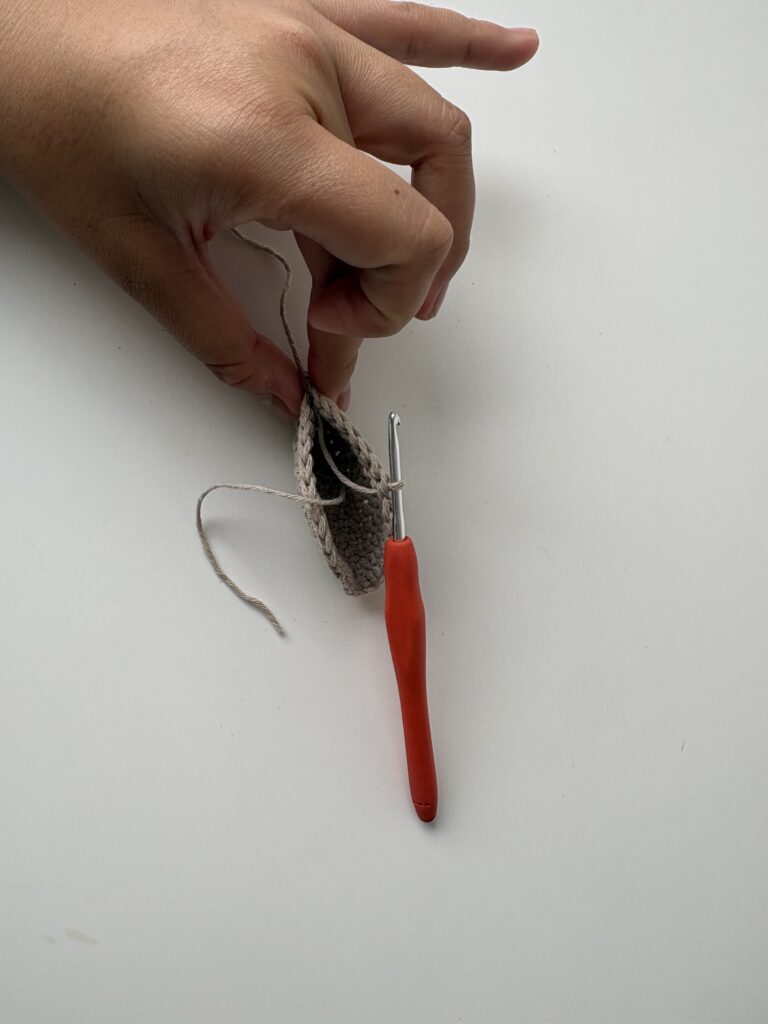
Nose: Start working decreases to form a triangle.
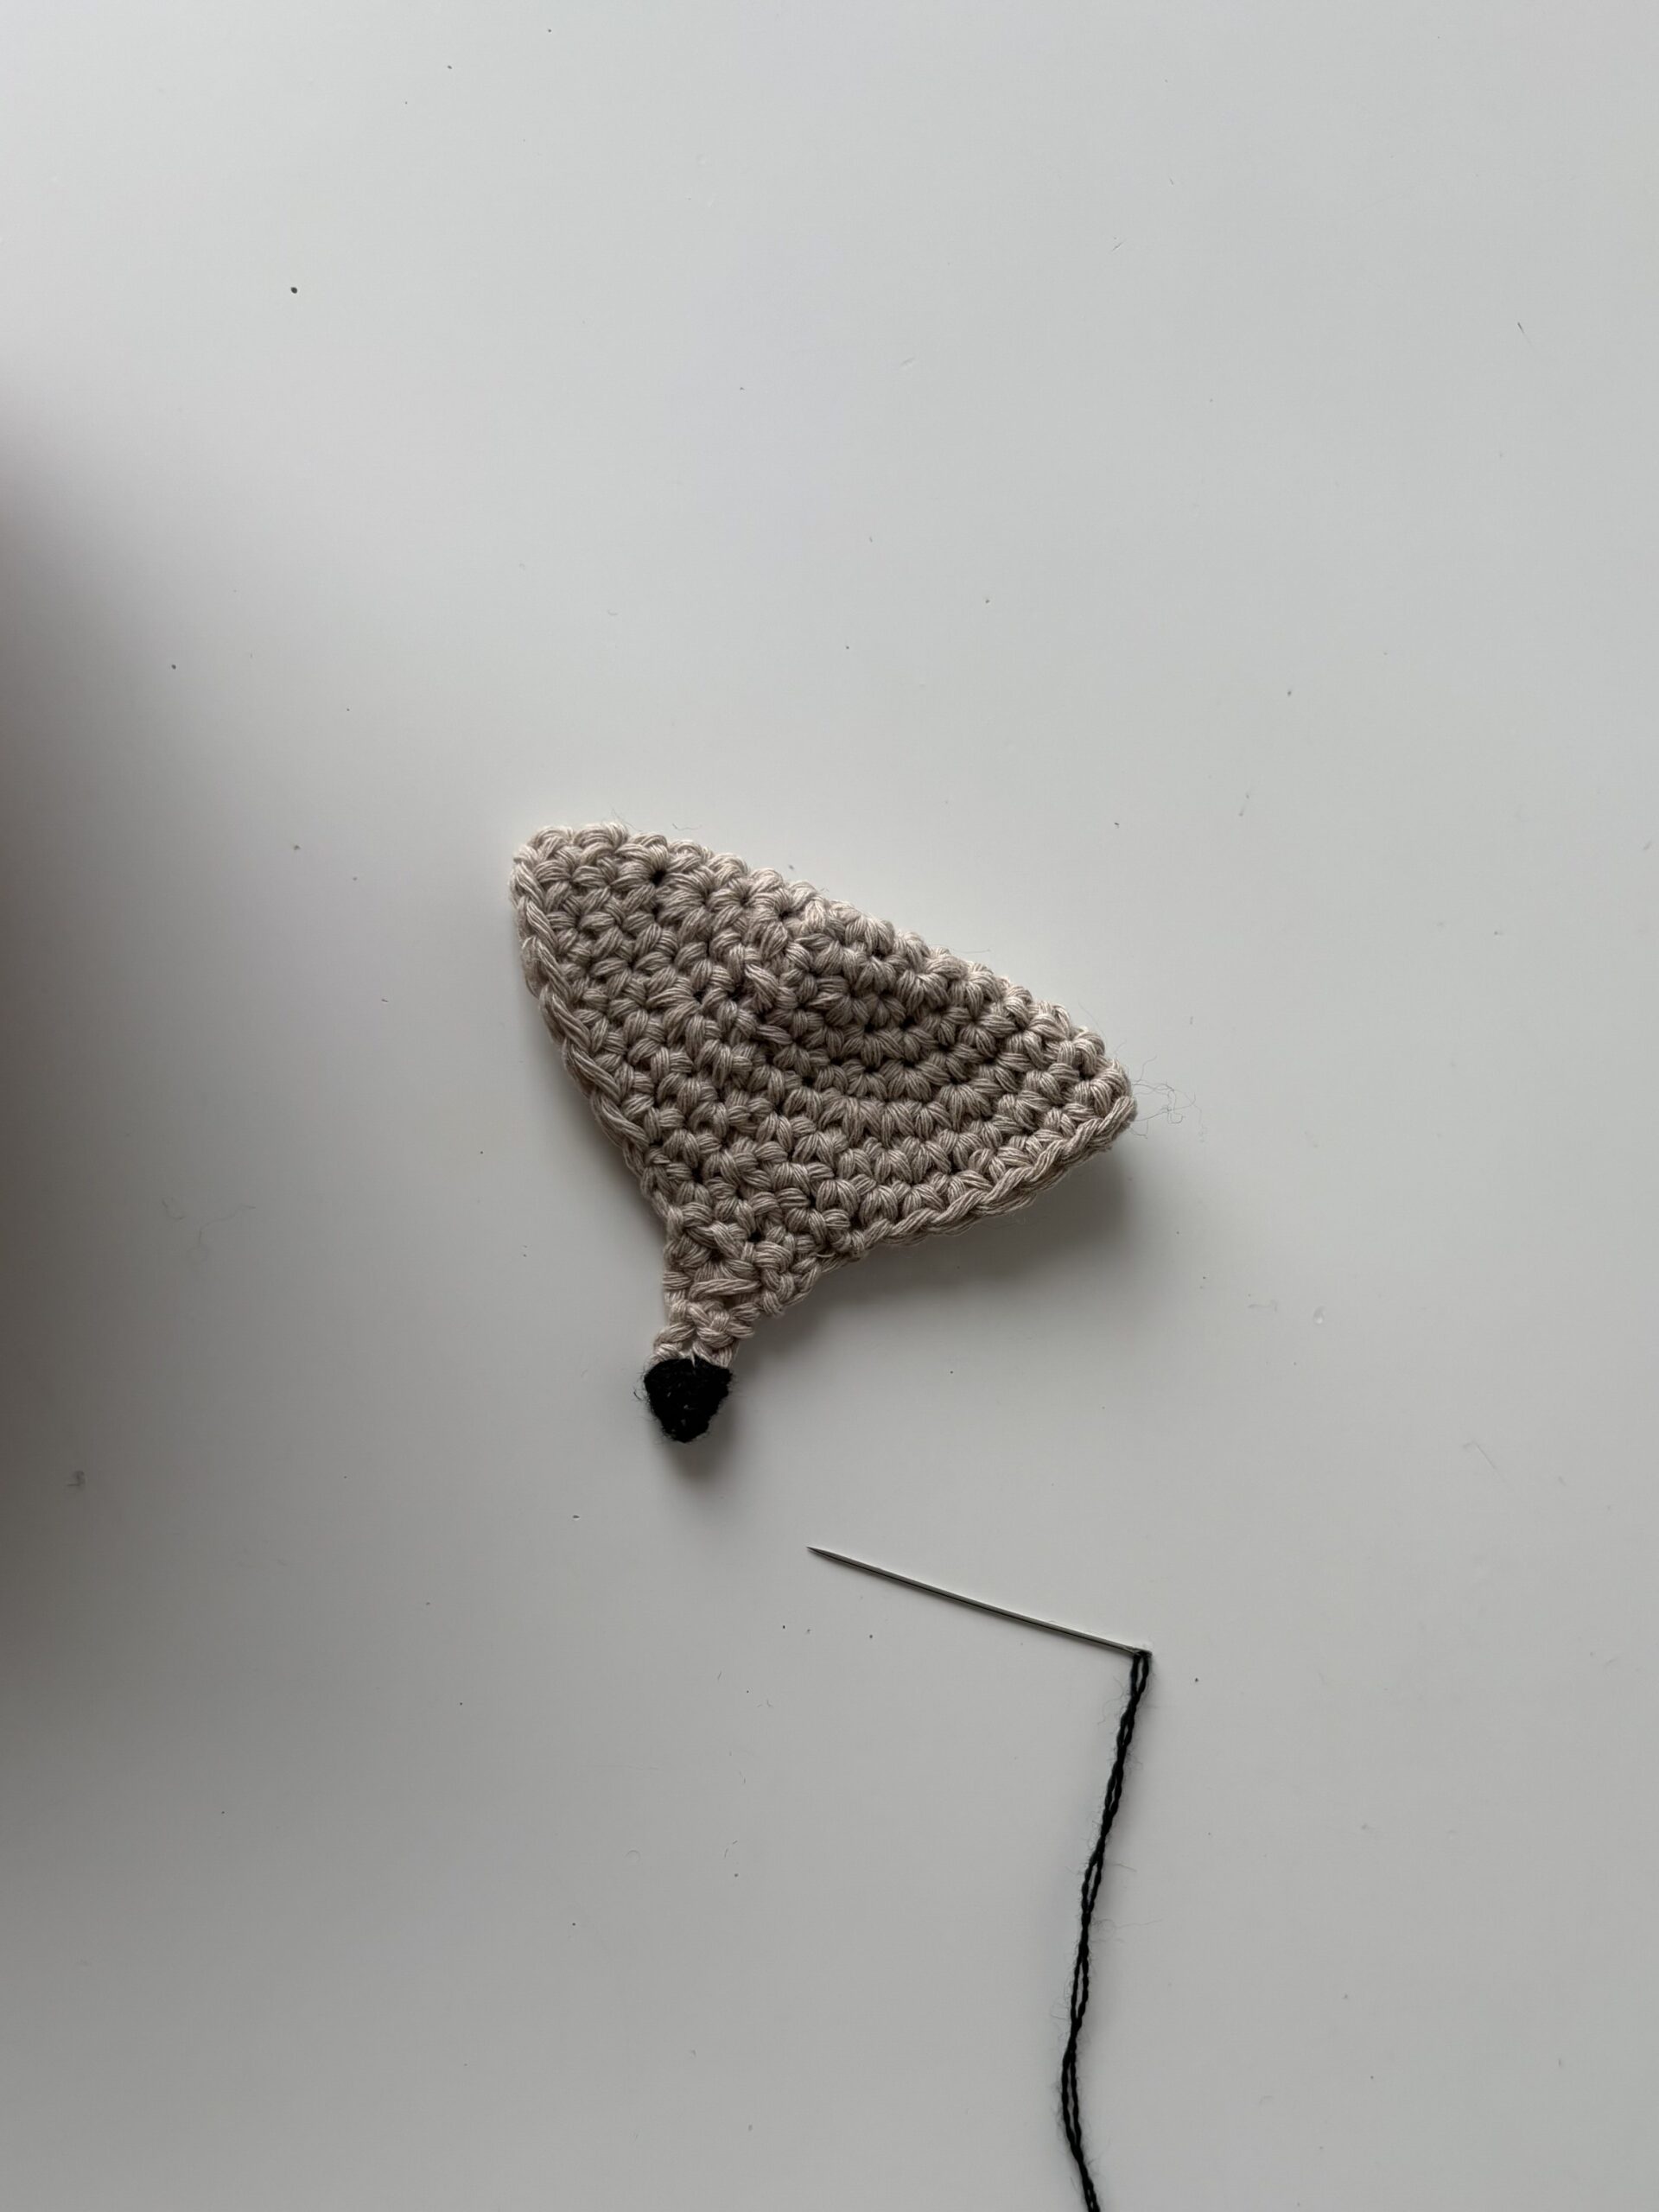
- Make 2 decreases on one side and 1 more decrease on the other, then go up one stitch.
- Next round: 2 sc.
- Next round: 1 dec.
- You will have one stitch left. Close it with the remaining sc, cut the yarn and hide the end.
Step 6: Embroider the Nose
Use black yarn. For better coverage, take a thick black yarn and untwist it slightly so you can use two strands together, as long as they still fit through your needle. Don’t worry about a stitch pattern: just pass the yarn from side to side over the tip of the nose until it is completely black and full. This takes patience, so go over it many times so there are no gaps. A thicker yarn will save you a lot of time.
Step 7: The Teeth
Use white yarn and a 3.0 mm or 2.5 mm hook. Both teeth are made in one piece, which is easier than making them separately.
- Pull the yarn through at the mouth and join.
- Ch 3 and join the first chain to the last to form a small loop, then work 1 sc at the base of the tooth.
- Tighten and cut. Thread the remaining tail down to the underside and join it with the starting tail. Make a small knot at the back to secure it.
- Repeat on the other side for the second tooth.
Step 8: Attach the Eyes
Thread yarn through one stitch on the back of an eye, then pass one end through another stitch, and so on until you have gone through three stitches. This gives the eye a grip on the head. Thread the two strands through the head (a 2.5 mm hook helps with this), pull tight, and tie a small knot. Repeat with the second eye, then hide the knots.
Step 9: The Santa Hat (Make 2 Triangles)
Use red yarn.
- Row 1: Ch 7, then 1 sc in each chain across. (6 sc)
- Row 2: Turn with 1 sc, dec, 2 sc, dec. (4 sc)
- Rows 3 and 4: 4 sc.
- Row 5: Dec, dec. Turn with 1 sc.
- Row 6: Dec. One stitch left: sc and cut.
Make 2 triangles and sew them together with a needle (or join by crocheting) to make the hat.
Pom-pom: With a 2.5 mm hook and chenille yarn (regular yarn works too), make 4 sc and join the first to the last. Then work 4 sc in each stitch to get the round shape of the open edge. Pass the needle through the middle, take the two strands and tuck them inside to help stuff it. Tie a knot for strength, then sew the pom-pom to the tip of the hat.
Step 10: Assemble the Coaster
- Sew the 4 legs to the underside of the coaster, evenly spaced.
- Sew the head to the center of the coaster (the head sits on the top of the coaster).
- Sew the Santa hat to the eyes, on each side.
And that’s it: your Christmas opossum coaster is ready to guard your hot chocolate.
Frequently Asked Questions
Can I use a different color? Yes. Beige works for a classic opossum, but gray is a great alternative. Just keep the red edge for the holiday feel.
Why is my coaster flat? Usually the fabric is too loose. Crochet more tightly or use a smaller hook.
Can I use regular yarn for the pom-pom? Yes. Chenille just makes it fluffier.
Share Your Coaster
If you make this pattern, tag @theccrochetlab on Instagram. And if you liked it, watch the full video tutorial on YouTube and pin this post for later!
Looking for more coaster ideas? check this 10 Easy Crochet Coaster Patterns You Can Make This Weekend