
Quick note: This post contains affiliate links, which means I get a tiny commission if you buy your yarn through them—at zero extra cost to you! It just helps me keep the lights on here at The Crochet Lab so I can keep making free patterns for you. Thank you for your support!
A few years ago, bucket hats became a big trend, and when I realized I could crochet one myself—by hand and just for me—I couldn’t contain my excitement.
There are so many crochet bucket hat designs out there that the possibilities feel almost endless. That’s one of the things I love most about crocheting accessories: every piece can be truly unique.
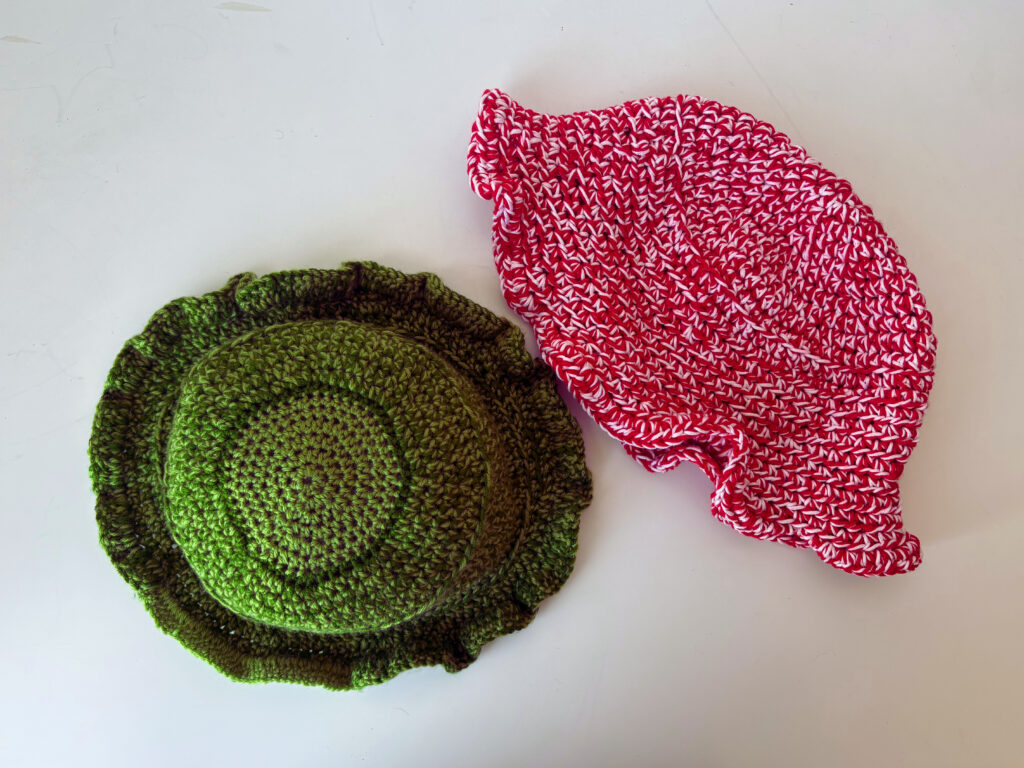
Even though bucket hats are very popular, making your own ensures that no one else will have one exactly like yours. Each stitch, color choice, and detail makes it one of a kind.
Another reason I adore this project is its versatility. While bucket hats are often seen as a summer accessory to protect from the sun, using a thicker yarn can easily turn it into a cozy winter piece that instantly elevates any outfit.
My absolute favorite part is that you only need to know one crochet stitch to create a complete piece, which makes this project perfect for beginners or for those moments when you want something relaxing and fun to make.
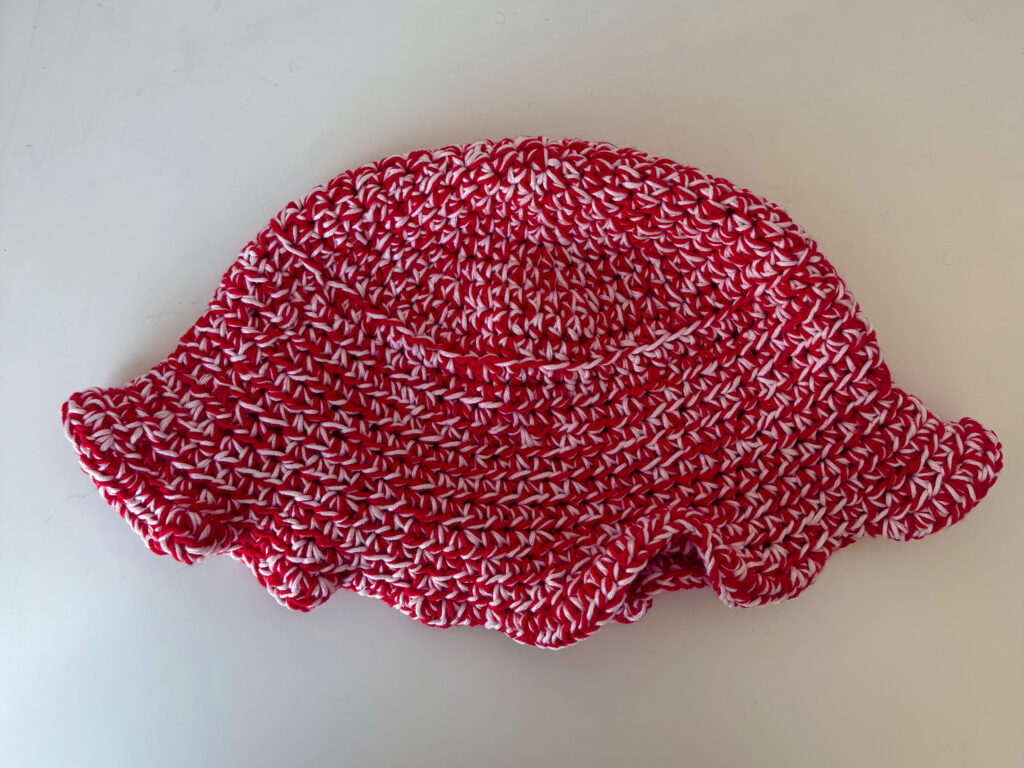
When I made this bucket hat for the first time, I wanted to add a little twist. I was experimenting and had no idea how much I would love the final result. I decided to finish it with a ruffled edge, giving the hat a cozy, soft, and sweet look that quickly became one of my favorite details.
Ready to prep your wardrobe for the cooler months? If you loved making this breezy bucket hat, you are going to obsessed with creating the ultimate cozy staple: a classic crochet beanie. This quick, beginner-friendly pattern will teach you how to achieve the perfect fit and texture to keep you warm when the weather drops.
CUSTOMIZING THE PATTERN
This pattern is easy to customize to suit your personal style.
- Bicolor : Feel free to experiment with different color combinations. Use high-contrast colors for a bold look, or similar tones for a more subtle, cohesive design.
- Size: Adjust the size by adding or removing rounds to make it larger or smaller.
- Yarn choice: Different yarn fibers and weights will affect the final texture and thickness. For best results, choose 100% acrilyc yarn.
MATERIALS
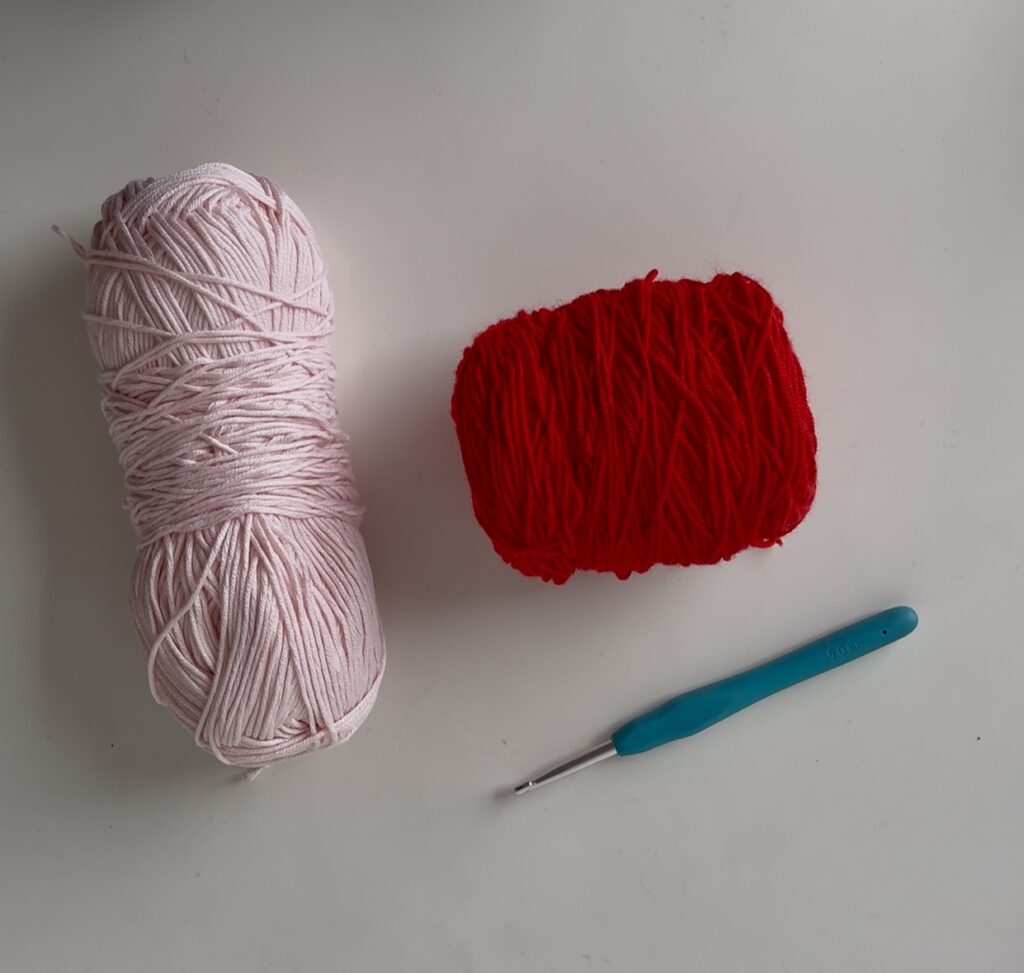
- 2 skeins of cotton yarn in different colors (if you want), I used acrylic yarn, and it worked very well for this project.
- Crochet hook (size recommended for your chosen yarn) I used a 5.0 mm
- Scissors.
STITCH ABBREVIATIONS (US TERMS)
- Magic Ring: MR
- Hald double Crochet: hdc
- Back Loop Only: BLO
- rnd(s) – Round(s)
- rep – Repeat
- Chain: ch
- Increase: inc
- Double Crochet: dc
PATTERN NOTES
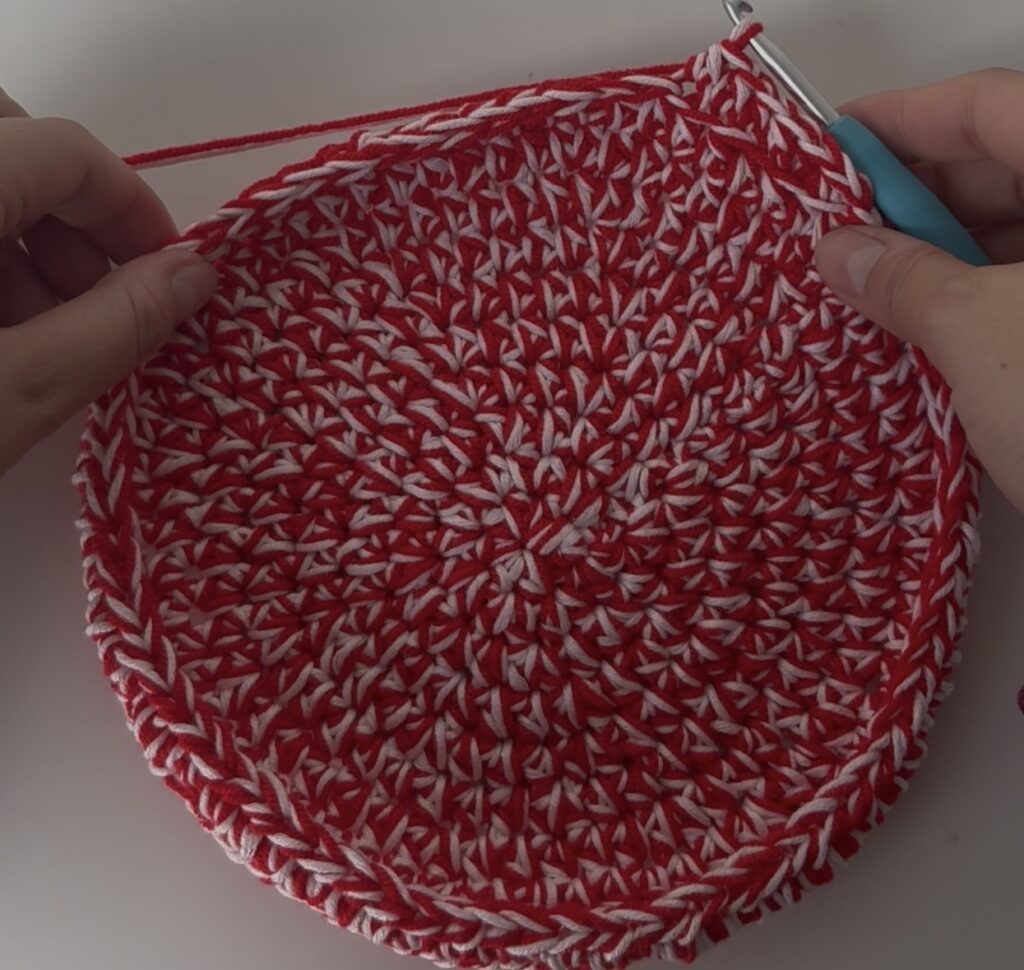
- It’s important to have two skeins of yarn, as this will ensure that the thickness of your fabric matches mine and that the number of rounds needed will be similar. If you prefer to use just one color, that’s totally fine—just remember that you’ll need to work with two strands of yarn at the same time.
- The turning chain 2 does not count as a stitch.
- Use a stitch marker to mark the first stitch of each round.
- Maintain an even tension throughout to ensure the correct fit.
- The finished size may vary slightly depending on yarn, hook size, and tension
- For best results, try the hat on as you go, especially when working the body length.
- At the end of each round, join the last stitch to the first stitch with a slip stitch.
INSTRUCTIONS
Round 1
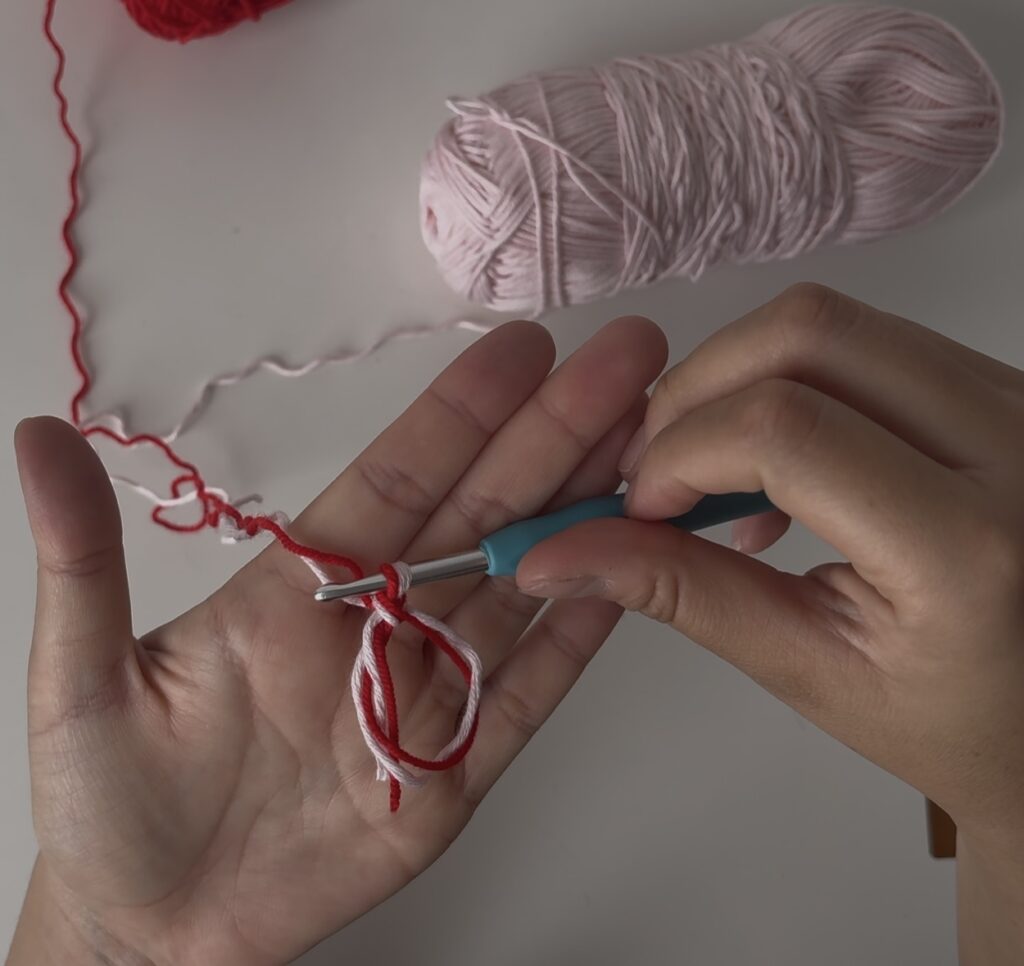
- Create a magic ring.
- Work 8 hdc into the magic ring.
- Pull the ring tight and join with a slip stitch.
- Ch 1 (does not count as a stitch).
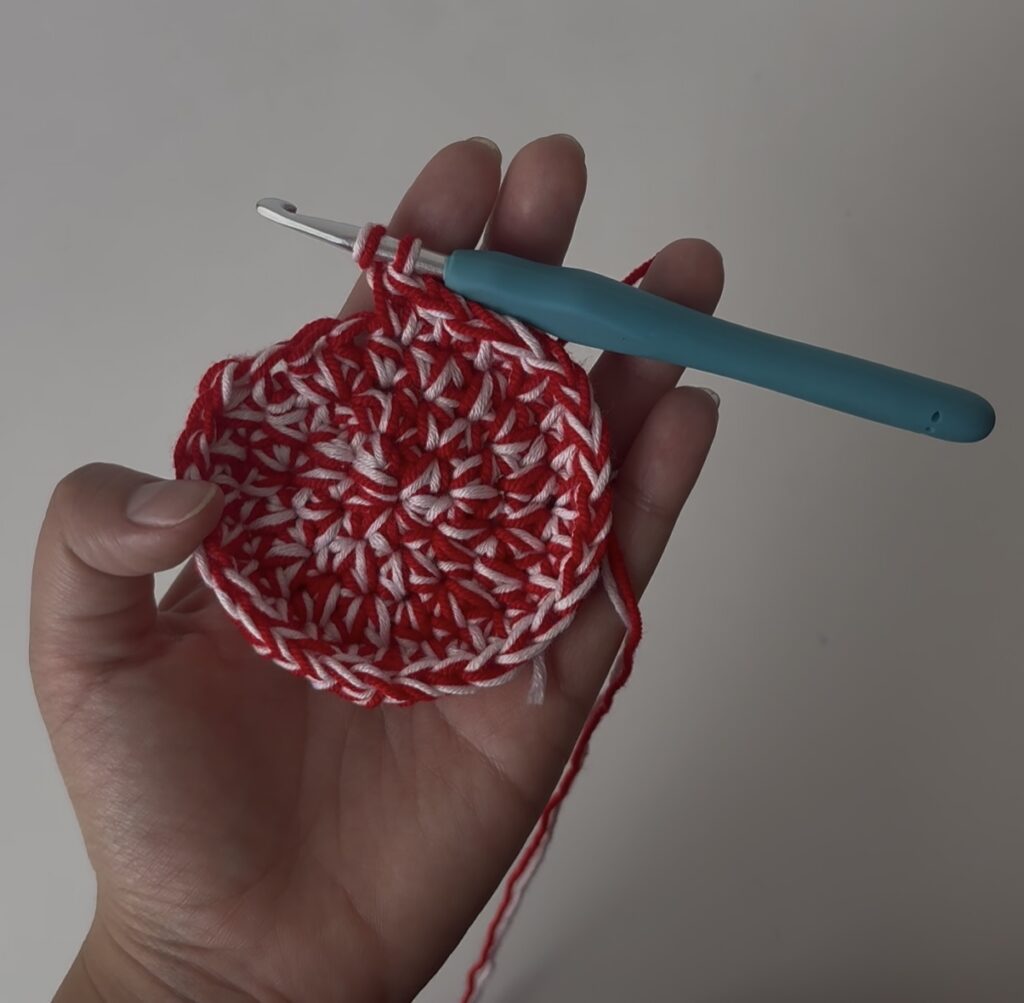
Round 2
- 2 hdc in each hdc (16 total)
- ch 1
Round 3
- 1 hdc, 1 hdc inc (24 total)
- ch 1
Round 4
- 2 hdc, 1 hdc inc (32 total)
- ch 1
Round 5
- 3 hdc, 1 hdc inc (40 total)
- ch 1
Round 6
- 4 hdc, 1 hdc inc (48 total)
- 1ch
Round 7
- 5 hdc, 1 hdc inc (56 total)
- 1ch
Round 8
- 6 hdc, 1 hdc inc (64)
- 1ch
Round 9
- 7 hdc, 1 hdc inc (72)
- 1ch
At this point, measure your head and compare it with the shape of the hat. My head measures 20 cm (8 inches), which is a perfect fit. However, as mentioned earlier, this will depend on your tension and the type of yarn you’re using, so I recommend measuring as you go until you reach your desired size.
If your head is larger, add rounds at this point until you reach your desired size. To add rounds, continue following the previous pattern. For example, if in round 9 you did 7 hdc, 1 hdc increase, then in round 10 you would do 8 hdc, 1 hdc increase, and so on consecutively.
Round 10
Round with no increases: simply work 1 hdc in each stitch around.
Round 11
You can make a round like the previous one, or work it only in the back loop to “mark” a division between the crown of the head and the front brim. This will depend entirely on the style you prefer.
Round 12 – Round 19
Rounds with no increases: simply work 1 hdc in each stitch around.
Round 20
4 hdc, 1 hdc inc
Round 21
Round with no increases: simply work 1 hdc in each stitch around.
Round 22
4 hdc, 1 hdc inc
Round 23
Round with no increases: simply work 1 hdc in each stitch around.
Round 24 FINAL
Work 2 double crochets in each stitch of the previous round. This will create a ruffled effect
Once your ruffled edge is complete, fasten off and weave in any loose ends. Shape the hat gently with your hands if needed :).
2 thoughts on “How to Crochet a Bicolor Ruffled Bucket Hat – Free Pattern”